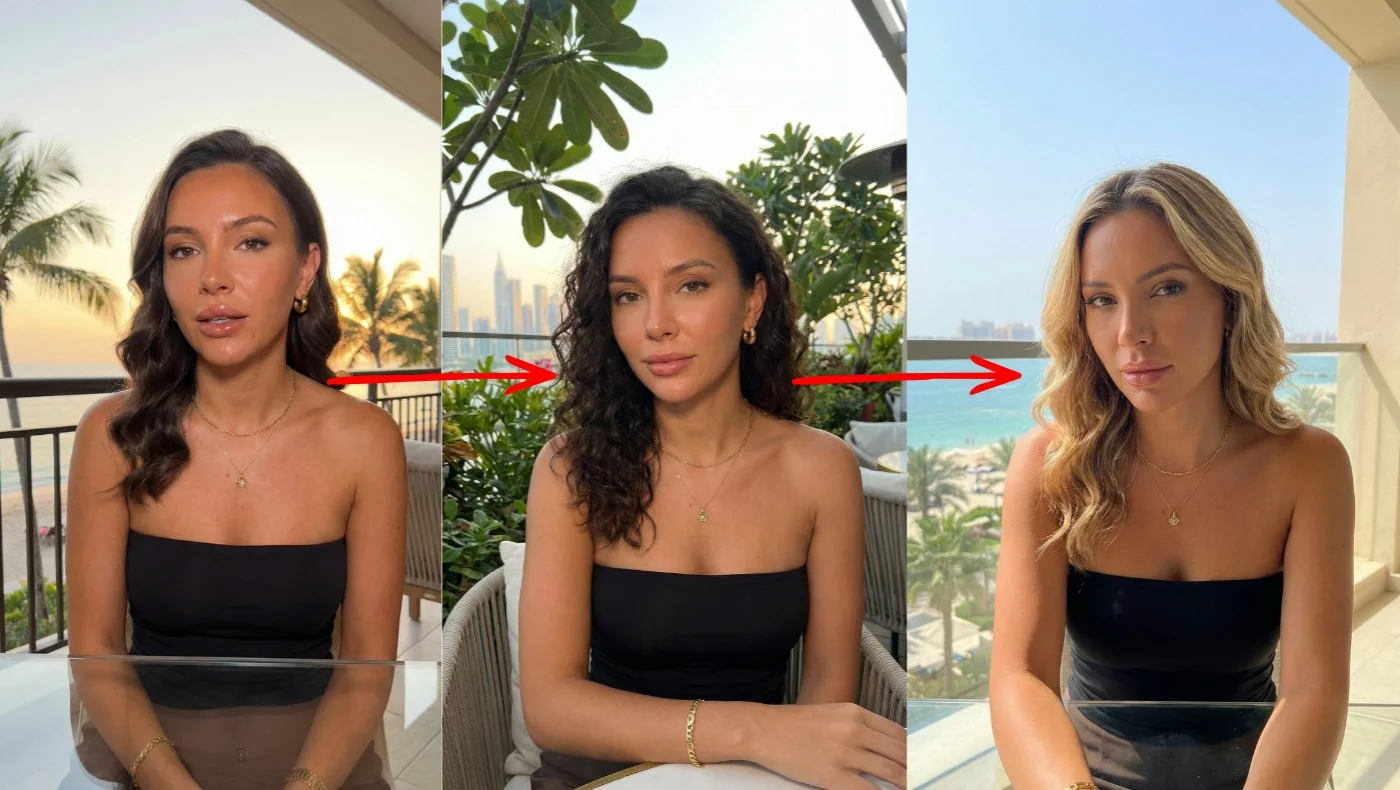
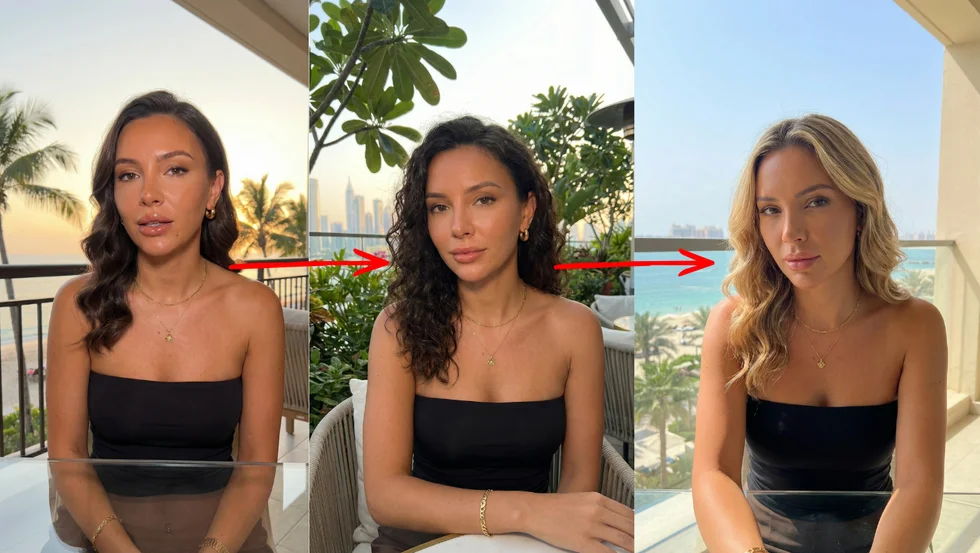
You’ve spent an hour crafting the perfect AI character. Sharp jawline, red leather jacket, a scar above the left eyebrow. She looks incredible.
Then you try to put her in a second scene and she’s a completely different person.
Different face shape. Different skin tone. The jacket is now maroon. The scar moved — or vanished entirely.
This is the single most frustrating problem in AI-generated visual content. And if you’re here, you already know it. Every week in our community, we see members post the same question: How do I keep my character looking the same across multiple images and videos?
I’ve tested every method available right now — from free tools to $66/month subscriptions — and I’m going to walk you through each one, ranked by difficulty and quality. By the end of this guide, you’ll know exactly which approach fits your project, your skill level, and your budget.
TL;DR — The Quick Answer
The easiest method for AI character consistency in 2026 is Nano Banana Pro’s multi-reference upload. Upload 3–5 images of your character from different angles, describe your new scene, and it maintains identity with remarkable accuracy. It’s free through Google AI Studio.
For video consistency, use Kling 3.0’s multi-shot feature — it tracks character identity across scenes automatically.
For image series, Midjourney’s --cref parameter is fast and reliable at $30/month.
No coding. No local GPU. No training. Everything runs in a browser.
Now let’s break down every method in detail.
What Is AI Character Consistency (and Why Is It So Hard)?
AI character consistency means generating the same character — same face, same body, same clothing, same distinguishing features — across multiple images or video scenes. It sounds simple. It’s not.
Here’s why: most AI image generators don’t have memory. Each generation is independent. When you type “a woman with short black hair and green eyes in a coffee shop,” the model isn’t recalling a specific person — it’s inventing one from scratch. Do it again and you get a different woman with short black hair and green eyes.
The tools we’ll cover solve this in different ways:
- Reference image matching — you feed the model an existing image and say “make this person do something else”
- Multi-shot tracking — the tool automatically identifies and maintains characters across a sequence
- Avatar systems — you create a fixed digital person and it’s the same every single time
Each has trade-offs. Let’s get into them.
The Technical Foundations Behind Consistency
Understanding how consistency actually works helps you apply techniques more effectively. Character consistency in 2026 relies on three distinct approaches, each with different trade-offs between speed, fidelity, and flexibility.
Reference-Based Systems are the most accessible approach and the one most creators should start with. You generate an initial character image, then upload it as a reference for all subsequent generations. This is the method used by Nano Banana Pro, Midjourney’s --cref and --oref parameters, and several other platforms. It requires no technical setup and produces immediate results.
Identity Preservation Adapters are dedicated character features that save a character profile the AI remembers across sessions. OpenArt’s Character feature is a notable example, allowing creators to define a character once and generate consistent variations across any scene or art style. Independent testing has shown this approach achieving near-perfect consistency scores across realistic, anime, cartoon, and painterly styles.
Model Fine-Tuning (LoRA) — Low-Rank Adaptation — allows you to train an AI model on a specific character using 15 to 30 reference images. Research published through IEEE on LoRA-based identity preservation demonstrates how face-conditioned LoRA training enhances identity preservation in generative models. The result is a model that inherently knows the character and produces consistent output without requiring reference uploads for each generation. This approach offers the highest fidelity but requires more technical knowledge and setup time. It is best suited for long-term projects like game development, animation, or ongoing content series where the investment in training pays off over hundreds of generations. Additional research on meta-learning approaches to LoRA for domain-aware personalization shows the technique continuing to advance rapidly.
Method 1: The Character Sheet (Foundation for Everything Else)
Before you touch any tool, you need a character sheet. This is the single habit that separates people who get consistent results from people who don’t.
A character sheet is a set of 3–8 reference images of your character from multiple angles and in different lighting. Think of it like a casting headshot package — front view, side profile, three-quarter angle, full body, close-up of distinguishing features.
How to Create a Character Sheet
Step 1: Generate your hero image. Use whatever tool you prefer — Midjourney, Flux, even Nano Banana. Create one image of your character that you love. This is your anchor.
Step 2: Generate angle variations. Using that first image as a reference, generate the same character from different perspectives. You want at minimum:
- Front-facing headshot
- Three-quarter view (slightly turned)
- Side profile
- Full body shot
- Close-up of any unique features (tattoos, scars, accessories)
Step 3: Lock the details in a text description. Write down everything about this character. Be specific:
“Maya, early 30s, East Asian, shoulder-length black hair with copper highlights, angular jawline, brown eyes, small nose stud (left nostril), wears a weathered olive-green military jacket over a white tank top, slim build, 5’6”.”
This text description becomes your prompt backbone. Every time you generate this character, you paste this description. The reference images handle the visual matching; the text description handles the details that reference matching sometimes drops.
Step 4: Save everything in one folder. Name it something obvious. maya-character-sheet. You’ll be uploading these images repeatedly.
This might feel like overkill. It’s not. Members in our community who skip the character sheet spend three times as long fighting inconsistency later. Do the setup once and every method below works better.
Method 2: Nano Banana Pro — The Easiest Way to Keep Characters Consistent
This is the method I recommend to almost everyone right now, and it’s the one our community has gone wild over in the past few months.
Nano Banana Pro is built on Google’s Gemini model. The key feature: you can upload up to five reference images alongside your text prompt. The model analyzes those images and maintains the character’s identity when generating new scenes.
It’s free through Google AI Studio. That alone makes it the obvious starting point.
Why Nano Banana Pro Works So Well
Most character reference tools let you upload one image. That gives the model a single viewpoint to work with — so when you ask for a different angle, it has to guess. And it guesses wrong.
Nano Banana Pro’s multi-reference approach means you upload your character from multiple angles. The model builds a much more complete understanding of what your character looks like. Front, side, three-quarter, full body — the more you give it, the better it preserves identity.
Step-by-Step: Nano Banana Pro Character Consistency
Step 1: Go to Google AI Studio and open Nano Banana Pro.
Step 2: Upload 3–5 images from your character sheet. Pick images that show different angles and lighting. Don’t upload five front-facing headshots — that defeats the purpose. Variety is key.
Step 3: Write your scene prompt. Be specific about the setting but let the model handle the character details. Example:
“Generate an image of the character shown in the reference photos. She is sitting in a dimly lit jazz bar, leaning forward on a small round table, a half-empty glass of whiskey in front of her. Warm amber lighting. Film noir aesthetic.”
Step 4: Generate. Review the result. If something drifted (hair color slightly off, jacket missing), add a correction note to your prompt:
“Make sure she has copper highlights in her black hair and is wearing her olive-green military jacket.”
Step 5: Iterate. Nano Banana Pro is forgiving — most of the time, three reference images plus a detailed prompt nails it on the first try.
Tips From Our Community
- Three images is the sweet spot. Five is the max, but three well-chosen angles (front, three-quarter, full body) usually outperform five similar ones.
- Include one close-up of the face. The face is where consistency matters most and where drift is most noticeable.
- Don’t fight the model on style. If your reference images are photorealistic, don’t ask for anime output. Nano Banana Pro works best when input and output styles align.
- Use your text description as a safety net. Even with five reference images, including key details in text (“nose stud on left nostril”) catches things the model might overlook.
Nano Banana Pro isn’t perfect. Complex outfits with lots of small details can drift. Characters in extreme poses sometimes lose facial accuracy. But for the vast majority of use cases — especially if you’re building a visual story, social media series, or concept art — this is the fastest path to consistent characters with zero cost.
Method 3: Midjourney —cref (Character Reference)
Midjourney’s --cref parameter has been the workhorse of AI character consistency since it launched. It’s not free, but if you’re already paying for Midjourney, it’s incredibly powerful.
How —cref Works
You paste an image URL at the end of your prompt with the --cref flag. Midjourney analyzes that image and attempts to match the character’s appearance in your new generation.
/imagine a woman walking through a rainy Tokyo street at night, neon reflections on wet pavement --cref https://your-image-url.jpgThat’s it. One parameter. Midjourney does the rest.
Step-by-Step: Using —cref for Consistent Characters
Step 1: Generate or upload your anchor image. If you’re starting from scratch, create your character in Midjourney first. Upscale the version you like best.
Step 2: Get the image URL. In Discord, click on your upscaled image, then right-click and “Copy Image Address.” If you’re using the Midjourney web app, you can copy the URL directly from your gallery.
Step 3: Write your new scene prompt and add --cref followed by the URL:
/imagine the same woman sitting at a café in Paris, morning sunlight, croissant and espresso on the table --cref https://www.midjourney.com/home/your-image-id.pngStep 4: Adjust the character weight if needed. By default, --cref applies at full strength. You can dial it down with --cw:
--cref https://your-url.png --cw 50A --cw value of 100 (default) matches the face, hair, and clothing closely. Lower values like 50 match the face but allow more variation in outfit and style. Use lower values when you want the same person but in completely different clothing.
Pairing —cref with —sref for Full Consistency
Here’s a trick that took our community’s results up several notches: combine --cref (character reference) with --sref (style reference).
--cref keeps the character consistent. --sref keeps the visual style consistent — lighting, color palette, rendering approach, artistic feel.
/imagine the woman exploring an ancient temple, dramatic lighting --cref https://character-url.png --sref https://style-url.pngUse an image from your existing series as the --sref source. This locks both the character AND the visual style, so your series looks like it belongs together.
—cref Limitations
- Only accepts one reference image (unlike Nano Banana Pro’s five)
- Faces are usually accurate; bodies and clothing are less reliable
- Doesn’t work well when switching between very different art styles
- URL must be a direct image link — Discord CDN links work best
Despite these limits, --cref is fast, reliable, and most of our members already have Midjourney subscriptions. It’s the go-to for image series.
Method 4: Kling 3.0 Multi-Shot for Video Consistency
Images are one thing. Video is harder. When your character is moving, talking, turning — that’s where consistency really gets tested.
Kling 3.0’s multi-shot feature is the best browser-based solution for maintaining character identity across video scenes right now. No question.
How Multi-Shot Works
Kling 3.0 lets you define characters and track them across multiple video generations. You upload your character reference, generate Scene 1, and when you generate Scene 2, the system automatically maintains that character’s identity. It’s tracking the character across your project, not treating each generation as independent.
This is fundamentally different from image-to-video (I2V) tools that just animate a single photo. Multi-shot understands that Scene 1 and Scene 5 have the same character, even if the camera angle, lighting, and background are completely different.
Step-by-Step: Kling 3.0 Multi-Shot
Step 1: Create a new project in Kling and upload your character reference images.
Step 2: Define your character. Give them a name, upload 2–3 reference images, and write a brief description. Kling builds a character profile from this.
Step 3: Generate your first scene. Write a scene description and select your defined character. Example:
“Maya walks into a crowded subway station, looking down at her phone. Overhead fluorescent lighting. Commuters passing by.”
Step 4: Generate your next scene. Select the same character profile. Write a new scene description:
“Maya sits on the subway, staring out the window. Her reflection visible in the dark glass. Gentle rocking motion.”
Kling maintains Maya’s face, hair, and outfit across both scenes because it’s referencing the same character profile.
Step 5: Continue building scenes. The more scenes you generate with the same character profile, the better Kling understands what to preserve.
When to Use Kling vs. Other Tools
Kling 3.0 is the right choice when:
- You’re making a multi-scene video project (short film, ad, music video)
- Your character needs to move and emote naturally
- You need consistency across 3+ video clips
It’s probably overkill if you just need a few static images of the same character. Use Nano Banana Pro or Midjourney for that.
The Pro plan at $66/month isn’t cheap. But if you’re producing video content seriously, the time it saves versus manually trying to match characters across individual I2V generations is enormous.
Method 5: HeyGen — Instant Consistency for Talking Heads
Sometimes you don’t need artistic flexibility. You just need the same person talking to camera, every time, without fail.
That’s HeyGen.
HeyGen takes a completely different approach to character consistency: it creates a digital avatar of a real person (or a stock avatar) and uses that exact same model for every video. There’s no drift, no variation, no “kind of looks like them.” It’s the same digital person every single time.
When HeyGen Is the Right Choice
- Talking head videos — tutorials, explainers, course content, social media
- Spokesperson content — you need a consistent brand face
- Multilingual content — same avatar, different languages, lip-synced
- Speed — you need videos fast and can’t spend time on consistency fixes
When HeyGen Is the Wrong Choice
- You want cinematic, artistic, or narrative content
- You need your character in varied poses, environments, and activities
- You want creative control over camera angles and lighting
- You want a fully fictional character (HeyGen avatars look like real people or their stock options)
HeyGen solves a very specific problem perfectly. At $48/month for the Creator plan, it’s a focused investment for a focused use case.
Method 6: Other Tools Worth Knowing
Flux Kontext Pro
Flux Kontext Pro uses context-aware editing to maintain character identity. You provide a source image, describe the change you want (“put her in a winter setting, wearing a heavy coat”), and Flux modifies the scene while preserving the character. It’s particularly good at outfit changes — keeping the face locked while changing everything around it.
Best for: single-character scene variations where you want tight control over what changes and what doesn’t.
Runway Gen-4
Runway’s latest generation includes character tools designed for video consistency. You can define character attributes and Runway works to maintain them across generations. It’s solid, but in our testing, Kling 3.0’s multi-shot feature produces more reliable results for multi-scene projects.
Best for: members already in the Runway ecosystem who want consistency without switching platforms.
Veo 3.1
Google’s Veo 3.1 is strong at image-to-video conversion that respects the source image’s character. Feed it a well-crafted character image and it does a good job maintaining identity in the resulting video. It won’t track characters across separate generations like Kling, but for single-scene I2V, the fidelity is impressive.
Best for: converting your Nano Banana Pro stills into individual video scenes.
Comparison Table: Every Method Ranked
| Method | Tool | Difficulty (1-5) | Quality (1-5) | Monthly Cost |
|---|---|---|---|---|
| Multi-reference upload | Nano Banana Pro | 1 | 4 | Free |
| Character reference (—cref) | Midjourney | 2 | 4 | $30 |
| Style + character ref (—cref + —sref) | Midjourney | 3 | 5 | $30 |
| Multi-shot video | Kling 3.0 | 3 | 5 | $66 |
| Context-aware editing | Flux Kontext Pro | 2 | 4 | Varies |
| Avatar system | HeyGen | 1 | 4 | $48 |
| Image-to-video | Veo 3.1 | 2 | 4 | Free (AI Studio) |
| Character tools | Runway Gen-4 | 3 | 3 | $76 |
Our pick for most people: Start with Nano Banana Pro (free, easy). Move to Midjourney --cref for image series. Graduate to Kling 3.0 when you’re ready for video.
Walkthrough: Make a 5-Scene Short Film With Consistent Characters
Let’s put it all together. We’ll create a 5-scene short film about Maya — the character we described earlier — using Nano Banana Pro for character images and Kling 3.0 for video.
Pre-Production (10 minutes)
Create Maya’s character sheet. Open Nano Banana Pro in Google AI Studio. Generate your anchor image:
“Photorealistic portrait of a woman in her early 30s, East Asian, shoulder-length black hair with copper highlights, angular jawline, brown eyes, small nose stud on left nostril, weathered olive-green military jacket over white tank top. Neutral background, soft studio lighting.”
Generate variations: front, three-quarter, side profile, full body. Save your best 4 images.
Write your text description and save it in a text file alongside the images.
Scene 1: The Phone Call (2 minutes)
In Nano Banana Pro, upload your 4 reference images. Prompt:
“The character from the reference photos stands on a city rooftop at dusk. She’s holding a phone to her ear, looking out over the skyline. Wind blowing her hair slightly. Golden hour lighting. Cinematic composition.”
Save the output image.
Scene 2: The Decision (2 minutes)
Same reference images uploaded. New prompt:
“The character from the reference photos sits alone at a kitchen table in a small apartment. A single overhead light. She’s staring at a map spread out on the table. Determined expression. Warm but dim interior lighting.”
Scene 3: The Journey (2 minutes)
“The character from the reference photos walks along a dusty desert highway, backpack over one shoulder. Late afternoon sun. Wide shot showing the vast empty road stretching ahead. Cinematic, slightly desaturated color grade.”
Scene 4: The Arrival (2 minutes)
“The character from the reference photos stands at the entrance of an abandoned warehouse. She’s looking up at the building. Overcast sky. Slightly ominous atmosphere. Medium shot from behind, showing her and the building.”
Scene 5: The Reveal (2 minutes)
“Close-up of the character from the reference photos. She’s inside a dark space, illuminated by a single shaft of light from above. A slight smile forming on her face. Dust particles visible in the light. Dramatic chiaroscuro lighting.”
Bringing It to Video (15 minutes)
Now take your five Nano Banana Pro images into Kling 3.0.
-
Create a new project
-
Upload Maya’s reference images as a character profile
-
Use each scene image as a starting frame for image-to-video generation
-
Write motion descriptions for each scene:
- Scene 1: “She lowers the phone slowly, wind continues in her hair, she takes a deep breath”
- Scene 2: “She traces a route on the map with her finger, then sits back in the chair”
- Scene 3: “Walking steadily forward, the camera follows from behind, dust kicked up by her boots”
- Scene 4: “She takes a step forward, tilts her head, reaches for the warehouse door”
- Scene 5: “The smile grows, she lets out a small laugh, the light shifts slightly”
-
Generate each video clip
-
Download all five and edit them together in CapCut, DaVinci Resolve, or any editor you like
Total time: about 30–45 minutes for a 5-scene short film with a consistent character. A year ago this would have taken days of prompt wrestling and still looked inconsistent.
Character Consistency in Video: Why Faces Break During Motion (and How to Fix It)
Everything above? That’s mostly about images. Static frames. A character standing still, looking cool.
Video is a different beast entirely.
Here’s the ugly truth that most tutorials skip: your character can look perfect in a reference image, and the moment you feed that image into a video generator, the face starts drifting by frame 20. By frame 48, it’s a different person. Same hair, same jacket, but the jawline shifted, the eyes changed shape, the nose is wider. It’s maddening.
Why does this happen? Because video generation is essentially creating 24–48 separate images per second of footage. Each frame is a new generation. The model tries to maintain continuity, but motion introduces noise — head turns, expression changes, lighting shifts as the character moves. Every one of these is an opportunity for the model to “reinterpret” the face. And it does. Constantly.
This is the exact frustration you see in threads like “Highest Character Consistency You’ve Seen? (WAN 2.2)” on r/StableDiffusion. People feed a flawless character image into image-to-video models and watch the identity dissolve the instant motion starts. It’s not a skill issue. It’s a fundamental limitation of current I2V technology.
So what actually works right now?
Kling 3.0 multi-shot (covered above) is your best bet for multi-scene video. It’s not doing frame-by-frame generation blindly — it’s tracking character identity across your project. That’s a fundamentally different architecture than basic I2V.
Start/end frame anchoring is another approach gaining traction. Veo 3 lets you define both the first and last frame of a generation. This pins the character’s appearance at both ends, and the model interpolates between them. Less room to drift when both endpoints are locked.
Shorter clips stitched together beats one long generation every time. Generate 2–3 second clips instead of 10-second ones. Less time for drift to accumulate. Cut them together in your editor. It’s more work, but the results are dramatically more consistent.
HeyGen solves this completely for one specific use case: talking heads. Because HeyGen uses a fixed avatar model, the face literally cannot drift. It’s the same digital person in frame 1 and frame 1,000. If your project is someone speaking to camera — tutorials, explainers, course content — skip the I2V headache entirely and use an avatar system.
The honest take: video character consistency is still the hardest unsolved problem in this space. We’re getting better tools every month, but if someone tells you they’ve got “100% consistency” in AI video with complex motion, ask to see the full uncut clip. Not a cherry-picked 2-second excerpt.
Multiple Characters in the Same Scene: The Hardest Consistency Problem
One consistent character is hard. Two consistent characters in the same frame? That’s exponentially harder.
The reason is straightforward: the model has to maintain two separate identities simultaneously. It needs to remember that Character A has a round face and blonde hair while Character B has a sharp jawline and black hair — and keep those distinct while both characters interact in the same scene. Models love to blend features between characters. You’ll get Character A’s nose on Character B’s face. Hair colors averaging out. Clothing swapping between them.
There’s a reason the YouTube video “How to Create AI Animated Dialogue Scenes with Multiple Consistent Characters” pulled 116K views. People are desperate for a solution. And honestly? There’s no clean one yet.
Here’s what’s working right now, roughly ordered from easiest to most reliable:
Midjourney multiple —cref URLs. You can pass more than one character reference in a single prompt. The results are… mixed. Sometimes it nails both characters. Sometimes it creates a third person who’s a mashup of both references. Worth trying, but don’t count on it for production work.
OpenArt’s multi-character feature. It exists. It’s marketed heavily. Reddit’s honest take: “not all that consistent.” Some members in our community have gotten decent results, but it takes a lot of regeneration and cherry-picking. Not the reliable workflow you want for a 20-page comic.
The composite workflow is the most reliable approach we’ve found. Here’s how it works:
- Generate each character separately using Nano Banana Pro with their individual reference sheets
- Pose each character for the scene you need — same camera angle, similar lighting
- Composite them together in Photoshop, Canva, or even a free tool like Photopea
- Use that composite as your I2V input for video
It’s more manual work. But you’re maintaining full control over each character’s identity because they’re never competing for the model’s attention in the same generation.
For video specifically, the easiest path is generating separate character clips and editing them together. Shot-reverse-shot. Cut between characters. This is how most AI short films handle multi-character scenes right now — not because it’s the ideal workflow, but because single-shot multi-character video generation is still unreliable.
I’ll be straight with you: no tool nails multi-character consistency perfectly yet. This is the frontier. If you need two characters interacting closely in the same frame — hugging, fighting, sitting side by side — expect to spend time on manual compositing and retouching. The tools will get there. They’re not there today.
Flux Kontext Pro and Midjourney —oref: The New Consistency Tools
The tool landscape in AI character consistency moves fast. Two tools have emerged since early 2025 that deserve serious attention, and our article wouldn’t be complete without covering them.
Flux Kontext Pro is an instruction-based editing model from Black Forest Labs. 12 billion parameters. What makes it different: it creates what’s essentially a “persistent visual memory” of your character. You give it an image and a text instruction — “put her in a winter scene” or “change the background to a neon-lit alley” — and it edits the scene while keeping the character locked.
The numbers are impressive. In testing, Flux Kontext maintains consistency across 50+ scene variations with less than 5% visual drift. That’s not marketing fluff — the architecture is designed specifically for this. It builds an internal reference map of your character and treats edits as modifications to the scene, not regenerations of the person.
Best use case: you already have a great character image and you want to place them in 10, 20, 50 different scenes without the face drifting. Flux Kontext is surgical. You tell it exactly what to change and it leaves everything else alone. That precision is what sets it apart.
Midjourney —oref (Omni Reference) landed with V7 and it’s a significant upgrade over the —cref parameter we covered earlier. Where —cref could only reference characters, —oref can reference characters, objects, AND scenes. The weight parameter jumped from —cw’s 0–100 scale to —ow’s 0–1000 scale. That’s ten times the granularity for controlling how closely the output matches your reference.
For character consistency specifically, —oref at high —ow values (800–1000) locks the face and body tighter than —cref ever did. At lower values (200–400), you get more creative variation while keeping the core identity. The 97K-view Woollyfern tutorial on YouTube walks through the full parameter range — worth watching if you’re a Midjourney user.
How do these compare to what we already covered?
Flux Kontext Pro is best for surgical scene edits. You have an image, you want to change the setting but keep the person identical. It’s not a from-scratch generation tool — it’s an editing tool. Different job.
Midjourney —oref is the evolution of —cref for Midjourney users. Better control, broader reference types, finer weight adjustments. If you were already using —cref, —oref is a direct upgrade.
Neither replaces Nano Banana Pro’s multi-reference approach for generating new images from scratch. They’re complementary. A solid workflow might look like: generate your character in Nano Banana Pro, refine scene variations in Flux Kontext, create your image series in Midjourney with —oref.
One thing worth flagging: this space changes fast. Tools that are cutting-edge today get surpassed in months. We update our guides regularly — check back on our blog for the latest recommendations.
Advanced Techniques for Maximum Consistency
Create a Character Attribute Hierarchy
Not all visual elements are equally important for recognition. Research into visual perception suggests that organising character attributes by importance significantly improves perceived consistency. Primary identifiers include face shape, distinctive features, and hair style and colour. Secondary identifiers include clothing style, colour palette, and accessories. Tertiary elements include background, lighting variation, and minor details.
Focus your prompting effort on maintaining primary and secondary identifiers. Allow more flexibility with tertiary elements. This hierarchy mirrors how humans actually recognise faces: we notice core facial structure first, then clothing and style, then environmental context.
Control Expression and Pose Separately From Identity
When generating variations, change one variable at a time. If you want your character smiling in a coffee shop, do not simultaneously change their outfit, lighting, and camera angle. Changing too many variables in a single prompt increases the chance of identity drift. Build up complexity gradually: first establish the character in the new setting, then adjust expression, then modify outfit if needed.
Audit and Correct Drift Early
Character drift — where the character’s appearance gradually shifts across many generations — is a subtle but serious problem. It happens so slowly that individual images look acceptable, but comparing image number 1 to image number 50 reveals significant differences. Regularly compare your newest outputs to your original reference image. If drift is occurring, re-anchor by generating several images with minimal prompt changes using only the original reference.
Common Mistakes (and How to Fix Them)
Mistake 1: Using Only One Reference Image
One image gives the AI one viewpoint. It will guess — badly — what your character looks like from other angles.
Fix: Always use at least 3 reference images showing different angles. This is non-negotiable for good results.
Mistake 2: Inconsistent Lighting in Reference Images
If your reference images have wildly different lighting (one harsh midday, one soft golden hour, one fluorescent), the AI gets confused about skin tone, hair color, and overall appearance.
Fix: Keep lighting relatively consistent across your reference images, or at minimum include one that’s in neutral lighting.
Mistake 3: Describing the Character Differently Each Time
Your first prompt says “copper highlights.” Your third prompt says “auburn streaks.” The AI reads these as different things.
Fix: Copy-paste your exact character description every time. Save it in a text file. Don’t paraphrase, don’t get creative, don’t vary the wording.
Mistake 4: Changing Too Many Variables at Once
You change the scene, the lighting, the outfit, the pose, and the camera angle all at once. The AI has to make too many decisions and drops character details.
Fix: Change one or two things between generations. Same outfit, new scene. Same scene, new pose. Build up gradually.
Mistake 5: Ignoring Small Drift Early
Scene 1 is perfect. Scene 2 has a slightly different jawline. You shrug it off. By Scene 5, your character is unrecognizable.
Fix: If you notice drift in any generation, regenerate immediately. Don’t carry flawed images forward — they compound the problem.
Mistake 6: Choosing the Wrong Tool for the Job
Using HeyGen when you need cinematic variety. Using Midjourney --cref when you need video. Using Kling for a single static image.
Fix: Refer to the comparison table above. Match the tool to your actual need, not just the tool you’re most familiar with.
Mistake 7: Skipping the Character Sheet
“I’ll just describe them really well in text.” No. Text-only prompts produce a different face every time. Every. Single. Time.
Fix: Create the character sheet. It takes 10 minutes. It saves hours.
Frequently Asked Questions
Can I Keep AI Characters Consistent Without Any Paid Tools?
Yes. Nano Banana Pro through Google AI Studio is completely free and is currently the easiest method for AI character consistency. Upload 3–5 reference images, write your scene prompt, and generate. For video, Veo 3.1 is also accessible through Google AI Studio at no cost. You can create a full visual story without spending a dollar.
How Many Reference Images Do I Need for Good Character Consistency?
Three is the minimum we recommend. Five is the maximum most tools accept. The ideal set includes: one front-facing headshot, one three-quarter view, one full body shot. If you have room for more, add a side profile and a close-up of any distinctive features (tattoos, scars, unique accessories). Quality and variety of angles matters more than quantity.
What’s the Difference Between —cref and —sref in Midjourney?
--cref (character reference) tells Midjourney to match a specific character’s appearance — their face, hair, body, and clothing. --sref (style reference) tells Midjourney to match the visual style of an image — the lighting, color palette, artistic technique, and overall aesthetic. Used together, they keep both the character AND the visual style consistent across your image series. Think of --cref as “same person” and --sref as “same look and feel.”
Can I Use a Real Person’s Photo as a Character Reference?
Technically, yes — most tools accept any image as a reference. But there are important ethical and legal considerations. Using someone’s likeness without consent can violate privacy laws and platform terms of service. Our recommendation: use AI-generated characters, or use photos of yourself. If you’re creating content for a client, get written consent and check the platform’s specific policies on likeness rights.
Why Does My Character’s Face Change When I Change the Scene?
The most common cause is insufficient reference material. If you’re only providing one image, the AI has to guess what your character looks like from angles it hasn’t seen. Other causes: inconsistent prompt descriptions between scenes, dramatic lighting changes that alter how features appear, and requesting art styles that are very different from your reference images. Fix it by using 3+ reference images, copy-pasting your character description exactly, and keeping stylistic shifts gradual.
Is Kling 3.0 Worth $66/Month Just for Character Consistency?
If you’re producing multi-scene video content regularly — short films, ads, narrative content, music videos — yes. Kling 3.0’s multi-shot feature saves hours of work per project compared to manually trying to maintain character consistency across individual video generations. If you only need video occasionally, you might be better off using Nano Banana Pro (free) for your character images and then using a pay-per-use video tool. The value depends entirely on your volume.
Can I Mix Different Tools in the Same Project?
Absolutely, and we encourage it. The 5-scene walkthrough above uses exactly this approach: Nano Banana Pro for generating consistent character images, then Kling 3.0 for turning those images into video. You might use Midjourney for initial character design, Nano Banana Pro for scene variations, and Kling for final video production. The character sheet is what ties everything together — as long as you’re feeding the same reference images into each tool, the character stays recognizable across platforms.
What’s Next
AI character consistency used to require custom model training, hours of trial and error, and a fair amount of luck. That era is over.
Right now, in February 2026, you can maintain a consistent character across dozens of scenes using nothing but free browser tools. The barrier isn’t technical anymore — it’s just knowing which tool to use and how to set up your references properly.
Here’s your action plan:
- Create a character sheet today. Pick a character, generate 4–5 reference images from different angles, write a detailed text description.
- Try Nano Banana Pro. It’s free. Upload your references, generate three different scenes. See how well it holds.
- If you need video, try Kling 3.0. The multi-shot feature is the real deal for multi-scene consistency.
- Share your results in our community. We have 16,500+ members doing this every day. Post your character sheet and scenes — you’ll get feedback, tips, and probably some applause.
The tools are here. The methods work. Now go make something with a character people will remember.