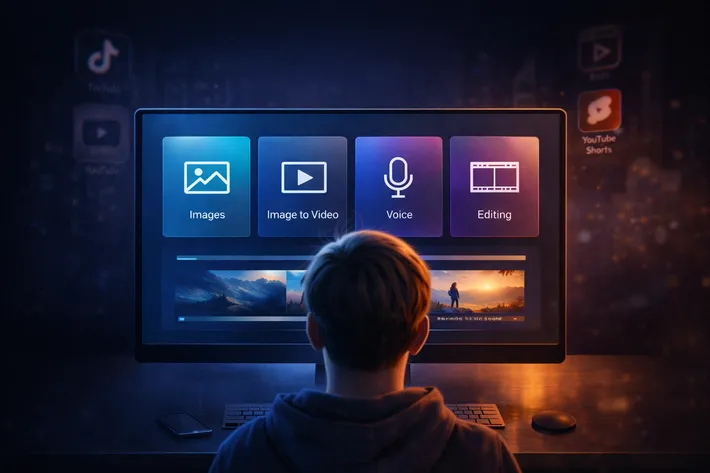
Foundations & Tools

Best AI Video Tools for Beginners in 2026

80 min read
Beginner using AI video tool dashboard with images, voice, and editing panels
TL;DR: Build a 4-layer AI video stack for TikTok, Reels & Shorts: Midjourney for images, Kling AI for animation, ElevenLabs for voice, CapCut for editing. Start free, upgrade one layer at a time. Focus on cinematic stills, subtle motion, and 3-layer audio for realistic content that hooks viewers fast.

Best AI Video Tools for Beginners in 2026

If you’re starting with AI video creation in 2026, you’re facing an overwhelming landscape of options. Text-to-video platforms, image animators, voice synthesizers, and editing apps all compete for your attention and budget. The truth is simpler than the marketing suggests: you don’t need a dozen subscriptions to create professional-looking AI video content. You need a strategic four-layer stack that handles image generation, image-to-video animation, voice and sound design, and final editing.

This guide cuts through the noise with an opinionated, beginner-focused recommendation system. Rather than reviewing every tool on the market, we’ll show you exactly which platforms belong in your 2026 starter stack and how they work together to produce realistic, engaging short-form video content optimized for TikTok, Instagram Reels, and YouTube Shorts. The goal is fewer tools, better workflow, and faster results.

Why You Only Need a Simple Beginner Stack

The AI video tool market has matured significantly by 2026. According to industry analysis, AI video generation has transitioned from experimental technology to production-ready tools used by millions of creators worldwide. The key developments include higher resolution outputs with most platforms now supporting 4K video generation, longer video durations extending from seconds to minutes, improved motion coherence through better temporal consistency and physics simulation, and seamless multi-modal capabilities integrating text, image, and video inputs.

Despite this explosion in capabilities, beginners actually benefit from simplicity over breadth. The best AI video tools for newcomers in 2026 share several critical characteristics that distinguish them from professional-grade platforms: ease of use with intuitive interfaces that don’t require technical training, realistic output quality that passes the “uncanny valley” test, flexible export options without restrictive watermarks or format limitations, accessible pricing with meaningful free tiers or affordable monthly subscriptions, manageable learning curves that let you produce your first usable video within hours rather than weeks, active community support with tutorials and prompt libraries, and modest device requirements that work on standard consumer hardware rather than demanding high-end workstations.

The four-layer approach simplifies decision-making. Instead of trying to find one platform that does everything (which inevitably means compromises), you select specialized tools that excel at specific tasks and then integrate them into a cohesive workflow. This modular strategy offers several advantages: you can upgrade individual layers without rebuilding your entire process, you avoid vendor lock-in to expensive all-in-one platforms, you gain flexibility to adapt as new tools emerge, and most importantly, you achieve better output quality because each tool focuses on what it does best.

For beginners in 2026, the criteria for “best” means tools that balance quality with accessibility. You want platforms that help you learn AI video creation principles without overwhelming you with advanced features you won’t use in your first hundred videos.

The Four-Layer AI Video Workflow for 2026

The beginner stack breaks AI video production into four sequential layers, each with a clear purpose and recommended tool category.

Layer 1: Image Generation

Everything starts with a strong foundation image. Better input images produce better video outcomes because the quality of motion, lighting consistency, and character realism is largely decided at the image stage. Your image generation tool should excel at creating cinematic still frames with proper lighting direction, locked lens characteristics (35mm, 50mm, or other focal lengths specified in your prompt), realistic skin textures and environmental details, appropriate depth of field, and clear compositional structure that already looks like a film still before animation begins.

The top beginner-friendly picks for this layer are Midjourney and Nanobanana PRO. Midjourney has cemented its position as a crucial tool in creative industries by 2026, with version 7 introducing natural imperfection modeling that replicates subtle textures, softened edges, and authentic details that give visuals warmth and authenticity. Its strength lies in capturing complex artistic styles and building atmospheric, conceptually rich images. Nanobanana PRO offers similar capabilities with streamlined Discord-based workflows ideal for beginners.

Layer 2: Image-to-Video Animation

Once you have your cinematic still frame, the image-to-video layer adds motion while preserving the lighting, character consistency, and composition established in layer one. The key principle here is subtlety over complexity. Small, controlled movements feel real while dramatic camera swings and excessive motion amplify any flaws in the original image and often feel synthetic.

Your image-to-video tool should handle slow camera pans and tilts naturally, maintain lighting consistency from the source image, preserve character features without drift or morphing, simulate realistic physics for object and fabric movement, and offer motion control parameters that let you specify subtle rather than dramatic effects.

The recommended beginner picks are Kling AI and Seedance 2.0. Kling AI is renowned for its ability to create strikingly realistic, professional-grade videos with hyper-realistic output quality. It excels in managing complex character and camera movement, particularly skilled at generating dynamic scenes with extended shots and seamless transitions that enhance cinematic storytelling through fluid motion. Seedance 2.0 offers similar capabilities with particularly strong performance in maintaining character consistency across shots.

Layer 3: Voice and Sound Design

Audio is the hidden realism multiplier in AI video content. Default AI voices fail because they exhibit flat rhythm with equal weight on every word, lack emotional contour and natural syllable stress, and sound unnaturally uniform without breath spacing or micro-pauses. Humans detect these patterns instantly and disengage.

Your audio layer needs three components: a realistic AI voice that captures rhythm and accent-based melodic flow, ambient room tone because no real environment is absolutely silent, and micro sound effects including fabric movement, light footsteps, background air, and room echo. These layers create what experts call “trust through texture,” the subtle imperfections that make content feel authentic rather than produced.

The top beginner picks are ElevenLabs for voice generation and Pixabay for free sound effects and music. ElevenLabs has surpassed $330 million in annual recurring revenue by 2026, with its voice AI technology being adopted by Fortune 500 companies and startups alike. The platform now handles more than 50,000 calls per month across deployed enterprise environments, demonstrating its reliability and realism. ElevenLabs voices use advanced neural synthesis to achieve near-human realism, emotional nuance, and clarity unmatched by most competitors.

Layer 4: Editing and Polish

The final layer is where story and pacing happen. Even with AI-generated visual assets and professional voice work, editing determines whether your video hooks viewers in the first two seconds and maintains watch time through to completion. Your editing tool should offer timeline simplicity without overwhelming features, automatic subtitle generation for accessibility and engagement, platform-specific templates optimized for TikTok, Reels, and Shorts formats, easy audio syncing for voice and sound effect layers, and both mobile and desktop versions for flexible workflows.

The standout beginner pick for 2026 is CapCut. CapCut has amassed over 318 million monthly active users by 2024, making it the number one video editing app by active user engagement, significantly outperforming competitors like Canva (100 million users), InShot (60 million users), and Adobe Express (1-2 million users). The app has reached 1.5 billion cumulative downloads by 2024, demonstrating its global appeal and market dominance. CapCut’s revenue growth from $0.4 million in Q1 2022 to $59 million in Q1 2024 reflects its sustained demand and rapid trajectory. And some rummors says that CapCut in late 2025 had over 800 million MAU (Monthly Active Users), which is a clear sign why we should start using it if we are not.

Criteria for Beginner-Friendly AI Video Tools

When evaluating AI video tools specifically for beginners in 2026, several evaluation factors determine whether a platform will accelerate or frustrate your learning process.

Realism and output quality matter first because viewers on TikTok, Reels, and Shorts scroll past obviously synthetic content within milliseconds. Your tools need to produce video that passes casual inspection, meaning natural motion that follows real-world physics, lighting consistency across frames, character persistence without facial morphing or outfit changes, and texture detail including skin imperfections and environmental depth.

Temporal consistency refers to how well motion flows from frame to frame without jarring glitches or unnatural transitions. Advanced AI video models in 2026 possess what researchers call “physical world logic,” understanding that reflections in puddles must match objects above them and handling complex spatial relationships with surgical accuracy. Beginners should prioritize tools with strong temporal consistency because it reduces the need for corrective editing and creates more professional-looking results from the start.

Character persistence has remained a major challenge in AI video generation, with creators reporting significant headaches trying to keep characters stable even in 3-5 minute AI productions. The issue stems from the fact that diffusion models generate frame by frame without true memory of who the character is, leading to drift where hair color shifts, eye shapes change, and outfits spontaneously mutate. Beginner-friendly tools in 2026 address this through reference image systems (like MidJourney Omni Reference), seed locking mechanisms that maintain consistency across generations, and style-lock prompts that reinforce specific visual characteristics.

Pricing structure significantly impacts beginners who need to test and learn without committing to expensive annual contracts. Look for tools offering meaningful free tiers with reasonable usage limits rather than token demos, transparent credit systems where you understand exactly what each generation costs, monthly subscription options rather than annual lock-ins, commercial licensing clarity so you know whether you can monetize your output, and upgrade paths that let you scale without switching platforms entirely.

Trial and free tier policies vary dramatically across platforms. Some tools offer generous free access with watermarks that you can remove once you’re ready to pay, while others provide extremely limited trials designed primarily for evaluation rather than actual production work. Beginners should prioritize platforms with enough free access to complete 5-10 test videos before making purchase decisions.

Watermark policies and export formats affect your ability to distribute and monetize content. Some free tiers include small, unobtrusive watermarks while others overlay large branding that makes content unusable for professional purposes. Similarly, export format options matter because platform algorithms favor specific resolutions and aspect ratios. Your tools should export clean 1080p video at minimum, support vertical (9:16) formats for Shorts, Reels, and TikTok, offer horizontal (16:9) for YouTube main feed, and provide clean files without forced compression or quality degradation.

Template support and preset options dramatically reduce the learning curve for beginners. Rather than starting from blank canvases, templates provide structural frameworks you can customize, teaching you effective prompt patterns, composition principles, and pacing strategies through reverse engineering. The best beginner tools include community-shared templates, platform-curated starting points organized by use case, and easily modifiable presets that demonstrate best practices.

Speed to first usable video is the ultimate beginner test. How quickly can someone with zero AI video experience go from sign-up to publishable output? The best tools in 2026 allow complete beginners to produce their first usable 10-15 second video within 2-3 hours of starting, including time for tool familiarization, basic prompt experimentation, and simple editing. If a platform requires days of tutorials before you can produce anything usable, it’s not beginner-friendly regardless of its advanced capabilities.

Best AI Video Generators for Absolute Beginners

With the four-layer framework established, let’s examine specific tools that someone with zero editing background can start using immediately. These generators emphasize low-friction user interfaces, abundant templates, and workflows optimized for short-form content creation.

The Easiest AI Video Tools for Your First 10 Clips

Your first 10 AI video clips serve a specific purpose: building familiarity with generative AI behavior, learning what prompts produce desired results, understanding motion control parameters, and gaining confidence in the technical workflow. The tools that excel at this introductory phase share certain characteristics that accelerate learning without overwhelming beginners.

For social media shorts and quick b-roll, the combination of Nanobanana PRO or Midjourney for image generation paired with Kling AI for animation provides an optimal learning environment. This workflow teaches the fundamental principle that strong AI video starts with strong images. You generate your cinematic still frame first, controlling lighting, composition, and character details through text prompts. Then you animate that locked frame using subtle motion parameters. This separation helps beginners understand the layer-based approach that professional creators use.

Kling AI’s particular strength for beginners lies in its extended video length capability, supporting shots up to 2 minutes long at 1080p resolution and 30fps, significantly longer than most AI video generators which typically max out at 10-60 seconds. This longer generation capacity gives beginners more material to work with and reduces the need for complex multi-clip stitching in early projects. Additionally, Kling’s 3D spatiotemporal joint attention mechanism simulates real-world physics, creating content that follows actual motion rules and physical laws without requiring beginners to manually specify complex physics parameters.

For talking head style videos where you need a consistent AI character delivering scripted content, the workflow shifts slightly. Start with your character image from Midjourney or Nanobanana PRO, using seed locking and detailed descriptive prompts to establish the look you want to maintain across multiple videos. Generate this character in a neutral pose with good lighting and clear facial features. Then create slight variations using the same seed number, changing only the expression or subtle head angle.

Once you have 3-5 character variations, animate subtle expressions using Kling AI with minimal motion parameters. The key is requesting gentle head turns and subtle facial expressions rather than dramatic movements. For consistency, use duration settings of 3-5 seconds for optimal stability, as shorter clips minimize the risk of character drift that longer generations might introduce. Combine these animated expression clips with your ElevenLabs voiceover in CapCut, where you can sync the voice to the visual expressions and add your three-layer audio stack.

For simple narrative b-roll supporting a voice-over story, your workflow can be more experimental because you’re not trying to maintain a single character across shots. Generate diverse cinematic stills in Midjourney focusing on environmental and atmospheric content rather than characters. Animate these with slow pans, subtle tilts, or slight zoom effects in Kling AI or Seedance 2.0. These motion-enhanced environmental shots become your visual backdrop while ElevenLabs delivers your narrative and CapCut handles the pacing and transitions.

The critical insight for beginners is that these three use cases (social shorts, talking heads, narrative b-roll) cover the vast majority of AI video content types on platforms like TikTok, Reels, and YouTube Shorts. Mastering the basic workflows for these three scenarios gives you the foundation to produce consistent content while you refine your prompting skills and develop your unique style.

Free vs Paid Options for Beginners

Understanding the free-versus-paid trade-offs helps beginners make strategic decisions about where to invest limited budgets and when free tiers provide sufficient value for learning and testing.

Truly free resources with no usage limits are rare but valuable for beginners. Pixabay stands out as a completely free platform offering high-quality sound effects and royalty-free music with no watermarks, no subscription requirements, and full commercial usage rights. This makes Pixabay an essential component of every beginner stack regardless of budget. You can build your three-layer audio design (voice, ambient room tone, micro sound effects) using ElevenLabs for voice on a free or paid tier and Pixabay for all environmental audio without any additional cost.

Generous free tiers with limitations characterize most AI video generation platforms in 2026. These typically offer limited daily credits or generation counts, watermarked outputs that display platform branding, resolution caps limiting exports to 720p rather than 1080p or 4K, and shorter maximum video lengths than paid subscriptions allow. The trade-off math is straightforward: if you’re learning and testing, watermarked 720p output with 3-5 free generations per day gives you enough material to complete 10-15 test videos over your first week without spending anything.

Free trial periods for premium platforms let you evaluate advanced capabilities before committing to subscriptions. When using trials strategically, plan your testing period to maximize learning. Spend the first day understanding the interface and basic controls. Use days two through five generating diverse test content across different use cases. Reserve the final trial days for creating 2-3 complete projects from start to finish. This structured approach ensures you make informed subscription decisions based on actual production experience rather than feature marketing.

The watermark consideration varies by platform and use case. Some platforms include small, corner-positioned branding that’s relatively unobtrusive for organic social media content. Others overlay large centered watermarks that make content unusable for professional purposes or brand accounts. For beginners, watermarks matter less during the learning phase. Your first 20-30 videos are primarily about skill development and workflow refinement. Once you’re consistently producing content you want to distribute widely or monetize, upgrading to paid tiers for watermark-free exports becomes justified.

Export limits and resolution restrictions affect content quality and distribution options. Free tiers often restrict exports to 720p resolution, which is technically acceptable for mobile viewing on social platforms but noticeably lower quality than 1080p or 4K content from competitors. If your content strategy focuses primarily on TikTok and Instagram Reels where most viewing happens on mobile devices, 720p from free tiers may be sufficient. YouTube Shorts and desktop viewing benefit significantly from 1080p minimum resolution, justifying paid subscriptions if those platforms are priorities.

Usage caps and credit systems require understanding how generation costs accumulate. Some platforms charge per generation attempt regardless of output quality, meaning failed generations consume credits just like successful ones. Others charge based on video length, resolution, or advanced features used. Beginners should prioritize platforms with generation-based pricing during the learning phase because it’s more predictable. You know that your monthly subscription includes X generations, allowing you to budget experiments and iterations accordingly. Length-based or resolution-based pricing becomes more economical once you’re experienced enough to achieve usable results consistently without multiple iterations.

The optimal beginner budget strategy for 2026 balances free resources with strategic paid subscriptions. Start with free tiers across all four layers: Midjourney’s limited free trial or Nanobanana PRO’s free tier for image generation, Kling AI or Seedance’s free daily generations for animation, ElevenLabs’ free tier for voice, and CapCut which is entirely free with all features unlocked. This gets you producing complete videos immediately without any financial commitment.

After producing 10-15 complete test videos using entirely free resources, evaluate which single layer creates the biggest bottleneck in your workflow. For most beginners, this will be either image generation (if you’re running out of Midjourney credits) or image-to-video animation (if you need more daily generations in Kling or Seedance). Upgrade only that one bottleneck layer to a paid subscription, keeping the other three layers on free tiers. This focused investment typically costs $10-30 monthly and dramatically increases your production capacity while you continue learning.

Once you’re producing 3-5 videos weekly consistently and you’ve identified a distribution platform where you’re gaining traction, evaluate whether upgrading a second layer provides meaningful return on investment. For creators focused on voice-driven content, upgrading ElevenLabs for additional voice customization and higher-quality output often makes sense. For visually focused creators, adding a paid Midjourney subscription for unlimited image generation unlocks rapid experimentation and iteration.

Image Generation: The Foundation of Realistic AI Video

The most critical insight for beginners in 2026 is that AI video quality is determined before animation ever begins. Everything starts with the foundation image, and better input images produce dramatically better video outcomes. This principle separates creators who produce professional-looking content from those whose videos immediately read as synthetic and unconvincing.

The quality decision happens at the image stage because animation amplifies whatever is present in the source frame. If your starting image has inconsistent lighting, vague environmental context, or flat compositional depth, the image-to-video engine will faithfully animate those weaknesses, making them more obvious through motion. Conversely, when your foundation image already looks like a cinematic film still with proper lighting direction, realistic textures, and clear spatial relationships, the animation layer enhances those strengths rather than exposing flaws.

Understanding what makes an image “cinematic” requires knowing what professionals look for in film stills. Cinematic images exhibit several key characteristics that beginners should consciously build into their prompts and generation workflow. First, lighting direction must be consistent and motivated, meaning light appears to come from specific sources (window, lamp, sun) rather than the flat, ambient illumination typical of amateur photography. Second, lens characteristics should be specified and locked, with clear focal length choices like 35mm for environmental context, 50mm for natural perspective, or 85mm for portrait compression and flattering facial features.

Third, depth of field separates professional from amateur visual storytelling. Shallow depth of field with the subject in sharp focus and background softly blurred creates visual hierarchy and directs viewer attention exactly where you want it. Deep depth of field keeps the entire frame sharp, useful for establishing shots where environmental context matters as much as the primary subject. AI models in 2026 can simulate these aperture effects when prompted correctly, with specifications like “f/1.4” producing strong background blur and “f/8” maintaining sharpness throughout the frame.

Fourth, skin texture and environmental detail signal realism to viewers. Controlled imperfections like light grain, micro shadows, subtle skin texture, natural camera shake, and slight asymmetry make images feel authentic rather than artificially perfect. Human perception immediately flags perfect uniformity as synthetic, so deliberately introducing realistic texture variation improves believability dramatically.

Fifth, environmental context grounds characters and objects in believable spaces. Rather than generating subjects against vague backgrounds, specify concrete locations with architectural details, weather conditions, time of day, and atmospheric effects. A character standing in “a modern office with floor-to-ceiling windows, afternoon sunlight, visible city skyline” gives the AI far more semantic information to work with than “office interior,” resulting in more coherent and filmable scenes.

The choice of image generation tool significantly impacts your workflow and output quality. Midjourney has cemented its position as a crucial tool across creative industries by 2026, particularly with version 7’s introduction of natural imperfection modeling that replicates subtle textures, softened edges, and authentic details giving visuals warmth and authenticity. Midjourney’s particular strength lies in capturing complex artistic styles and building atmospheric, conceptually rich images ideal for narrative and mood-driven content.

Nanobanana PRO offers similar high-quality image generation with streamlined Discord-based workflows that many beginners find more intuitive than Midjourney’s command structure. Both tools excel at producing the cinematic foundation images that translate well into motion, making them the top tier choices for beginners building their 2026 stack.

How to Create Cinematic Still Frames for AI Video

Creating cinematic foundation images requires a systematic approach that builds professional visual characteristics into your prompts from the start rather than hoping for lucky results through trial and error.

Start with consistent light direction specifications. Your prompt should explicitly describe where light originates and how it interacts with subjects and environments. Instead of generic “well-lit” descriptions, specify exact lighting scenarios: “golden hour sunlight from camera left, creating rim light on hair and warm highlights on skin,” or “overhead fluorescent lighting with cool color temperature, casting subtle shadows under features.” This precision gives AI models the semantic structure needed to maintain lighting consistency when the image transitions to video.

Light direction becomes even more critical in image-to-video animation because motion reveals lighting inconsistencies that static images can hide. If your foundation image shows light coming from one direction but shadows suggesting another, even subtle camera movement will make that contradiction obvious to viewers. Establishing clear, consistent lighting in the image stage prevents these immersion-breaking moments in the animated result.

Lock your lens type and focal length in prompts. Professional cinematographers choose specific lenses for specific narrative purposes, and your prompts should do the same. A 35mm lens provides wide environmental context while maintaining natural perspective, useful for establishing shots and scenes where location matters. A 50mm lens approximates natural human vision perspective, creating balanced framing for medium shots and general-purpose content. An 85mm lens provides portrait flattery through subtle compression and is ideal for close-ups where character emotion drives the scene.

Specifying lens choice in your prompt helps the AI model understand spatial relationships and perspective rendering. “Shot on 35mm lens” signals wide environmental framing, while “shot on 85mm lens” tells the model to compress depth and emphasize the subject. This consistency carries through to animation, where camera movement needs to respect the established perspective and spatial logic.

Control depth of field to direct attention. Depth of field functions as visual storytelling, guiding viewer focus to specific elements while de-emphasizing others. In AI prompting, specify aperture values to control this effect. “Shot at f/1.4” requests maximum background blur, creating strong subject isolation and cinematic bokeh. “Shot at f/2.8” maintains some background softness while keeping more context recognizable. “Shot at f/8” keeps the entire frame sharp, appropriate for landscape and architectural content where environmental detail matters throughout the composition.

Advanced AI models in 2026 understand depth of field semantics through neural radiance field representations, accurately segmenting scene depth to apply realistic blur gradients. This means your aperture specifications will produce believable optical effects that hold up under motion, with blur characteristics remaining consistent as animated cameras pan or tilt.

Build realistic environmental context into every prompt. Vague location descriptions produce vague, unconvincing backgrounds that undermine the realism of otherwise strong subjects. Instead of “indoor scene,” specify exact environments with architectural and atmospheric detail: “modern minimalist apartment, polished concrete floors, floor-to-ceiling windows revealing city skyline at dusk, warm interior lighting contrasting cool blue hour exterior.” This level of environmental specificity helps the AI model generate coherent spatial relationships and consistent details that remain stable during animation.

Environmental detail serves double duty by establishing mood and atmosphere beyond just physical location. Weather conditions, time of day, season, and lighting quality all contribute to emotional tone. “Overcast afternoon, diffused natural light through thin clouds, muted color palette” creates entirely different atmosphere than “bright midday sun, harsh shadows, high contrast, saturated colors,” even describing the same physical location.

Emphasize skin texture and realistic imperfections in character prompts. Default AI image generation often produces unnaturally smooth, poreless skin that immediately signals synthetic content. Counter this by explicitly requesting texture detail: “realistic skin texture with visible pores, subtle imperfections, natural skin variation, authentic detail.” This prompting pattern tells the model to avoid the overly processed aesthetic that plagued earlier AI generations.

Realistic texture extends beyond skin to clothing, materials, and surfaces throughout your images. Fabric should show weave structure, slight wrinkles, and natural drape. Hard surfaces should display subtle wear, realistic reflection characteristics, and appropriate material response to lighting. These micro-details accumulate to create the “trust through texture” that makes AI content feel authentic rather than produced.

Test motion compatibility before committing to animation. Not all beautiful AI images translate well to video. Static composition that works perfectly in a still frame might contain elements that confuse motion models or create artifacts during animation. Before investing time in animating a complex scene, evaluate whether your image exhibits motion-friendly characteristics: clearly defined subject boundaries without ambiguous edges, consistent lighting that can be maintained through camera movement, environmental elements with logical spatial relationships, and compositional balance that supports pan or tilt operations.

Some common image characteristics create problems in animation: extremely complex backgrounds with fine detail that models struggle to maintain consistently, multiple light sources with contradictory shadows that become obvious during motion, faces or characters at extreme angles where slight movement causes distortion, and compositional elements at frame edges where camera motion might require the model to hallucinate unseen content.

Best Image Generation Tools for Beginners in 2026

Choosing between the top image generation platforms requires understanding how their interfaces, pricing models, and output characteristics align with beginner needs and the broader four-layer workflow.

Midjourney remains the gold standard for cinematic image generation in 2026. Midjourney version 7’s introduction of natural imperfection modeling represents a significant evolution in AI-generated realism, replicating subtle textures, softened edges, and authentic details that give visuals warmth and authenticity rather than the overly clean, synthetic appearance of earlier models. This development specifically addresses the “uncanny valley” problem that plagued AI imagery, making Midjourney outputs increasingly difficult to distinguish from professional photography and digital art.

Midjourney’s strength lies in its exceptional understanding of artistic styles, compositional principles, and atmospheric rendering. When you request “cinematic still frame, film noir lighting, 1940s aesthetic, Blade Runner color grading, shot on 50mm,” Midjourney interprets the layered cultural and technical references to produce coherent results that capture the intended mood and visual language. This semantic sophistication makes it particularly valuable for creators working on narrative content where consistent aesthetic and emotional tone matters across multiple scenes.

The platform operates through Discord bot commands, which presents a slight learning curve for complete beginners but offers substantial advantages once mastered. The Discord interface provides immediate community feedback, shared prompt libraries, and visible experimentation from other creators, turning the platform into both tool and learning environment. You can study effective prompting strategies by examining successful images and their associated prompts, accelerating your skill development through reverse engineering proven approaches.

Midjourney’s pricing structure as of 2026 includes a basic plan at approximately $10 monthly for limited fast generations and relaxed mode for unlimited slower generations, a standard plan at $30 monthly for extended fast generation hours, and a pro plan at $60 monthly for maximum fast generation capacity and stealth mode where your images aren’t publicly visible. For beginners, the basic plan provides sufficient generation capacity for learning and testing while keeping costs minimal during the skill-building phase.

Nanobanana PRO offers an alternative with similar quality output and slightly different workflow optimization. Nanobanana PRO focuses on streamlined prompt structures and faster generation iterations, making it attractive for creators who prioritize production speed over artistic experimentation. The platform’s interface simplifies common cinematic prompting patterns through preset modifiers and style templates, reducing the prompt engineering knowledge required to achieve professional results.

Nanobanana PRO’s particular advantage for beginners lies in its optimization for image-to-video workflows. The platform understands that many generated images will be animated rather than used as static content, so default outputs emphasize characteristics that translate well to motion: consistent lighting, clear subject-background separation, and compositional stability. This motion-aware generation philosophy helps beginners avoid creating beautiful static images that nonetheless produce problematic results when animated.

The pricing model includes a free tier with reasonable daily generation limits, watermarked outputs, and access to core features. This makes Nanobanana PRO an excellent starting point for complete beginners who want to experiment with the full four-layer workflow before committing to paid subscriptions. The paid tier at approximately $15-25 monthly removes watermarks, increases generation capacity, and unlocks advanced features like seed locking for character consistency.

Choosing between Midjourney and Nanobanana PRO depends primarily on your creative priorities and budget constraints. If your focus is artistic expression, complex scene composition, and capturing specific aesthetic references, Midjourney’s sophisticated understanding of visual culture and style makes it worth the investment and learning curve. If you’re prioritizing production efficiency, rapid iteration, and straightforward workflows optimized for animated output, Nanobanana PRO’s streamlined approach may better serve your needs.

Many successful creators in 2026 use both platforms strategically. They employ Midjourney for hero shots, key character establishment images, and content requiring maximum artistic control, while using Nanobanana PRO for high-volume b-roll generation, background elements, and supplementary content where speed matters more than absolute creative precision. This hybrid approach balances quality and efficiency across different content requirements.

Image-to-Video Engines: From Stills to Motion

The image-to-video layer transforms your cinematic foundation images into animated content while preserving the lighting, composition, and character consistency established in layer one. Understanding how these engines work and what motion control parameters to specify separates smooth, professional-looking animations from jarring, synthetic-feeling results.

The fundamental principle is subtlety over complexity. Small, controlled movements feel real because they match how actual cameras move and how real-world physics govern object motion. Dramatic camera swings, excessive zoom effects, and unrealistic motion speeds amplify any flaws in your foundation image and often feel synthetic regardless of visual quality. Professional image-to-video work in 2026 emphasizes gentle pans, subtle tilts, slight zoom operations, and natural physics simulation over attention-grabbing but unconvincing motion effects.

This constraint exists because of how temporal consistency works in AI video generation. Models must maintain visual coherence frame-by-frame, preserving lighting characteristics, object boundaries, and spatial relationships throughout motion sequences. Subtle motion gives the model less distance to travel between frames, reducing opportunities for drift, artifacts, and consistency breaks. Aggressive motion forces the model to hallucinate more unseen content and maintain coherence across larger transformations, increasing failure probability.

When moving from image-to-video, your prompts should reinforce the lighting and compositional decisions made in the foundation image. Specify motion that respects established light sources rather than requesting camera movement that would reveal lighting inconsistencies. For example, if your image shows light coming from camera left, a slow pan right will maintain that lighting relationship naturally. A pan left would force the model to imagine how that same scene looks from an angle where lighting should appear different, often producing inconsistent results.

Motion control parameters that produce professional results include slow pan operations where the camera moves horizontally across the scene at natural, measured speed. This works particularly well for environmental establishing shots and reveals, where gradual movement lets viewers absorb visual information while maintaining smoothness. Slow tilt operations move the camera vertically, useful for revealing vertical spaces like building interiors, tall structures, or transitions from ground to sky.

Subtle zoom effects, either slow zoom in for emphasis and focus or slow zoom out for context and revelation, add dimensionality without the aggressive movement that breaks immersion. These should be specified as gradual operations: “subtle slow zoom in” rather than “dramatic zoom” to ensure the model interprets your intent as gentle rather than aggressive.

Parallax motion, where foreground and background elements move at slightly different speeds to create depth perception, adds sophisticated visual interest when handled subtly. This effect occurs naturally when cameras move laterally past scenes with clear foreground, mid-ground, and background layers, so choosing foundation images with good depth separation enables more convincing parallax during animation.

Minimal motion with emphasis on atmospheric effects represents another professional approach, where camera remains largely static but environmental elements like fabric, hair, smoke, or particles provide subtle animation. This technique works exceptionally well for portrait-style content where character position remains stable but natural micro-movements create life and authenticity.

Text-to-Video vs Image-to-Video in 2026

The distinction between text-to-video and image-to-video approaches represents one of the most important workflow decisions beginners make, fundamentally affecting creative control, output quality, and production reliability.

Text-to-video generation creates video content directly from text prompts without intermediate image stages. You describe the desired scene, characters, action, and camera movement in natural language, and the model generates video attempting to match your description. This approach offers maximum convenience and simplicity, requiring only prompt engineering skill without image generation knowledge or tools.

However, text-to-video introduces significant control limitations that affect output quality and consistency. The model must simultaneously hallucinate visual content, temporal motion, physics simulation, and maintain consistency across all these dimensions from a single text description. This cognitive load on the model often results in compromises: inconsistent character appearance across frames, lighting that shifts unnaturally, physics that doesn’t quite match reality, and composition that varies unpredictably.

Text-to-video works best for experimental ideation, quick concept visualization, and scenarios where exact visual control matters less than rapid iteration. If you’re testing story concepts, exploring motion ideas, or generating rough drafts for later refinement, text-to-video’s speed and simplicity provide value. For finished content requiring character consistency, specific aesthetic control, or professional polish, the approach’s limitations become problematic.

Image-to-video generation starts with your locked foundation image and adds motion while preserving visual characteristics. This two-stage process separates visual creation from motion animation, reducing the model’s cognitive load and allowing focused optimization at each stage. You have complete control over the starting frame, including character appearance, lighting, composition, and environmental detail, then specify how that locked frame should animate.

This separation delivers several critical advantages for beginners. First, visual consistency improves dramatically because the model starts from a concrete reference rather than hallucinating appearance frame-by-frame. Your character looks identical in frame one and frame thirty because both are generated from the same source image with specified motion paths rather than independent hallucinations that might drift apart.

Second, lighting consistency becomes manageable because the foundation image establishes light sources, shadow directions, and overall illumination that the motion model maintains rather than invents. Third, compositional control gives you precise framing and subject placement, with motion parameters specifying camera movement relative to that locked composition rather than hoping text descriptions produce desired framing.

Fourth, iteration efficiency improves because you can generate multiple motion variations from a single strong foundation image, testing different animation approaches without regenerating the visual content each time. This separation of concerns accelerates workflow once you’ve invested time creating high-quality foundation images.

The image-to-video approach aligns with professional film production workflows where cinematographers lock camera settings, lighting, and composition before shooting motion footage. The same creative principles apply to AI generation: make deliberate, controlled decisions about visuals first, then add motion that enhances rather than fighting those visual choices.

For beginners in 2026, image-to-video should be the default workflow for any content requiring character consistency, specific aesthetic control, or professional finish. Reserve text-to-video for rapid experimentation, concept exploration, and scenarios where exact visual control matters less than idea iteration speed.

Tools That Keep Characters and Style Consistent

Character consistency remains one of the most challenging aspects of AI video generation, with creators reporting significant difficulties keeping characters stable even in short 3-5 minute productions. The underlying issue stems from how diffusion models generate video: frame by frame without true memory of character identity, leading to drift where hair color shifts, eye shapes change, facial features morph, and outfits spontaneously transform.

Understanding these consistency mechanisms helps beginners choose tools and techniques that mitigate character drift effectively. The most reliable approaches in 2026 combine technical tools with strategic prompting practices.

Reference image systems form the foundation of modern character consistency. Advanced image-to-video platforms allow you to upload one or more reference images showing your character from different angles or in different poses. The model uses these references as visual anchors, comparing generated frames against reference characteristics to maintain consistency. Seedance 2.0 supports 0-5 reference images with feature extraction and fusion, making it particularly strong for commercial applications requiring precise character control across multiple shots.

When using reference image systems, provide clear, well-lit reference photos showing your character’s distinctive features: face structure, hair style and color, eye shape and color, characteristic clothing or accessories, and body type and proportions. Multiple references from different angles give the model more information to work with, reducing ambiguity and drift probability.

Seed locking mechanisms maintain consistency by using the same random seed number across generations. Each AI generation starts from a random seed that influences how the model samples from its learned distribution. Using identical seeds with identical or very similar prompts produces visually consistent results because you’re sampling from the same point in the model’s possibility space.

To implement seed locking effectively, generate your initial character image and note the seed number if your platform provides it. For subsequent generations featuring that character, use the same seed and maintain core descriptive elements in your prompt while varying only the specific aspects you want to change (expression, pose, lighting). This technique works best for maintaining character appearance across multiple scenes shot in similar conditions.

Style-lock prompts reinforce specific visual characteristics through detailed, consistent descriptions repeated across all generations. Rather than assuming the model will remember character details from previous outputs, explicitly state those details in every prompt: “woman, 28 years old, shoulder-length auburn hair, green eyes, heart-shaped face, wearing navy blue blazer.” These descriptive anchors reduce model uncertainty and drift by continuously reminding it of key character features.

The more specific your descriptive anchors, the less improvisation the model must perform, reducing consistency problems. Generic descriptions like “attractive woman” give the model enormous latitude for interpretation that will vary between generations. Specific descriptions like “woman with distinctive features: angular jawline, high cheekbones, almond-shaped hazel eyes, straight nose, full lips, olive complexion” constrain the model’s possibility space to interpretations matching those explicit characteristics.

Duration settings affect consistency stability. Shorter video clips minimize character drift because fewer frames means less opportunity for cumulative errors to compound. For maximum consistency, generate videos in 3-5 second segments rather than attempting longer single-take generations. You can then stitch these shorter consistent segments together in your editing layer, maintaining visual coherence across longer total runtime than single generations could achieve reliably.

Kling AI has built exceptional character consistency capabilities through its 3D spatiotemporal joint attention mechanism, which simulates real-world physics and maintains spatial relationships across frames more effectively than earlier models. This architecture helps Kling preserve not just character appearance but also natural motion physics, reducing the uncanny valley effects that occur when characters move in physically implausible ways despite looking visually consistent.

Seedance 2.0 specifically optimizes for multi-shot consistency, making it ideal for creators building longer narratives requiring the same character across multiple scenes with different camera angles, lighting conditions, and environments. The platform’s quad-modal input system supports simultaneous text, image, video, and audio inputs, providing unprecedented creative control precision for professional-grade content production.

Voiceovers, Sound Design, and Trustworthy Audio

Audio represents the hidden realism multiplier in AI video content, often making the difference between content that feels authentic and trustworthy versus content that triggers viewer skepticism and disengagement. Understanding why default approaches fail and how to build professional audio layers separates beginner content from advanced work.

The critical insight is that audio realism comes from texture and variation rather than technical perfection. Viewers don’t consciously notice great audio design; they simply feel that content is professional and authentic. Conversely, audio problems immediately signal low-quality production even when visuals are exceptional.

Default AI voices fail for specific, identifiable reasons that beginners must understand to avoid. The most obvious problem is flat rhythm where every word receives equal emphasis and duration, creating monotonous delivery that humans instantly recognize as synthetic. Natural human speech varies rhythm based on meaning, emotion, and emphasis, with important words receiving stress while connective words pass quickly and lightly.

Equal weight distribution throughout sentences destroys the melodic contour that characterizes authentic human communication. When we speak naturally, sentences have musical qualities with pitch rising and falling, pace accelerating and decelerating, and volume modulating based on emotional state and communicative intent. AI voices that maintain constant pitch, pace, and volume sound robotic regardless of how accurate the phoneme pronunciation might be.

Lack of emotional contour makes AI voices feel disconnected from content meaning. A human describing exciting news naturally injects enthusiasm through pace acceleration, pitch variation, and emphasis. Someone delivering sad news slows pace, lowers pitch, and softens volume. Default AI voices often ignore these emotional-semantic connections, delivering all content with identical affect regardless of meaning.

The absence of natural breath spacing and micro-pauses creates uncanny discomfort because human speech includes constant subtle pauses for breathing, thinking, and emphasis. We pause briefly before important words to create anticipation, pause after complex ideas to let them register, and pause naturally for physiological breathing. AI voices that eliminate these micro-pauses sound artificially compressed and rushed even at normal speaking speed.

Rhythm and accent provide the solution to these default failures. The key principle is that rhythm matters more than accent, but accent enables authentic rhythm. Accents introduce natural syllable weight patterns and melodic flow that vary by linguistic background. An Irish accent creates different melodic contours than a Southern American accent, which differs from an Indian accent or Australian accent.

Rather than trying to eliminate accent for supposed clarity, let accent dictate natural pace and rhythm. An authentic accent carries built-in timing patterns, stress positions, and melodic characteristics that make speech feel real. The accent provides the rhythmic framework that AI needs to avoid the flat, uniform delivery that fails authenticity tests.

When selecting AI voices, prioritize options with distinctive accent characteristics that match your content tone and target audience. ElevenLabs has become the industry leader specifically because its voice models capture rhythm, emotional nuance, and clarity unmatched by most competitors. The platform’s technology, which has driven it past $330 million in annual recurring revenue by 2026, uses advanced neural synthesis to achieve near-human realism in speech generation.

The three-layer audio stack creates professional audio depth that makes content feel authentic rather than produced. This approach layers three distinct audio components: primary voice, ambient room tone, and micro sound effects.

Layer one consists of your main voiceover content generated through platforms like ElevenLabs. This layer carries your script, message, and primary audio information. Focus on selecting voices with appropriate rhythm, accent, and emotional range for your content type, and adjust pacing to match your video’s visual rhythm.

Layer two adds ambient room tone because no real environment is absolutely silent. Even quiet indoor spaces have subtle background sounds: HVAC system hum, distant traffic, air movement through windows, computer fan noise, or building settling sounds. Outdoor environments include wind rustle, distant birds, traffic ambiance, or environmental echo characteristics.

These ambient layers do three critical jobs: they establish environmental authenticity by placing content in recognizable acoustic spaces, they mask the unnaturally perfect silence that signals synthetic production, and they provide consistent audio bed that smooths transitions between edited clips. You can source ambient tone from Pixabay, which offers completely free, royalty-free sound effects and music with no watermarks and full commercial usage rights.

Layer three incorporates micro sound effects that sync with visual action and add textural detail: fabric movement when characters shift position, light footsteps during walking animations, gentle object handling sounds when hands interact with items, subtle breathing or small mouth sounds during pauses, or environmental effects like door closes, glass clinks, or paper rustles.

These micro-layers create what audio professionals call “trust through texture,” the subtle imperfections and organic variation that make content feel real rather than produced. Similar to how visual texture prevents uncanny valley in images, audio texture prevents the “too clean” production quality that triggers viewer skepticism.

Best AI Voice Tools for Short-Form Video

Optimizing voiceovers specifically for short-form platforms requires understanding how TikTok, Instagram Reels, and YouTube Shorts differ from long-form content in pacing, attention dynamics, and acceptable audio characteristics.

Short-form voiceovers need faster baseline pace because platform algorithms reward watch time completion, and viewers scrolling feeds maintain shorter attention spans than viewers who deliberately selected long-form content. This doesn’t mean rushed or incomprehensible delivery, but rather energetic pacing that matches the rapid visual cuts and information density typical of successful short-form content.

Accent selection for short-form balances authenticity with broad comprehensibility. While distinctive accents create personality and memorability, extremely strong regional accents might limit audience reach if comprehension becomes challenging for viewers from different linguistic backgrounds. Moderate accent strength that’s distinctive enough to feel authentic but clear enough for international audiences often performs best.

ElevenLabs dominates the professional AI voice market in 2026 with exceptional raw vocal realism that consistently ranks at the top of blind listening tests for English content. The platform’s voice cloning technology requires approximately 60 seconds of clear audio to create custom voice models that capture timbre, speaking style, and emotional tendencies of the source speaker.

This voice cloning capability offers significant advantages for creators building personal brands or character-based content. You can create a consistent AI voice version of yourself for scaled content production, develop distinct character voices for narrative content with multiple speakers, or clone client voices for personalized video content at scale.

ElevenLabs achieves Character Error Rate around 0.4% and Word Error Rate around 0.8% according to published benchmarks, putting it among the most accurate voice synthesis systems in the industry. These metrics mean the generated speech accurately reflects input text with minimal transcription errors or pronunciation mistakes, critical for professional content where script accuracy matters.

The platform supports natural rhythm and emotional inflection through SSML tags and pronunciation guides that let you control emphasis, pauses, pitch variation, and speaking rate at granular levels. This control means you can fine-tune delivery for specific content needs: faster, more excited delivery for hook openings, slower, more thoughtful pacing for key information, and natural conversational rhythm for body content.

For short-form content specifically, ElevenLabs voices work well because they handle the rapid-fire pacing typical of TikTok and Reels without sounding artificially sped up. The model maintains natural phoneme transitions and realistic breath patterns even at accelerated speaking rates, avoiding the “chipmunk effect” that plagues simpler text-to-speech systems when tempo increases.

Alternative platforms serve specific niches within the voice AI market. Fish Audio requires just 10-15 seconds of sample audio for voice cloning compared to ElevenLabs’ 60-second requirement, making rapid experimentation more practical though potentially at some quality cost for complex voice characteristics. HeyGen integrates voice cloning with video avatar generation, useful for creating talking-head content where voice and visual character synchronization matters.

For beginners starting with free tiers, ElevenLabs offers limited monthly character generation in its free plan, sufficient for producing 5-10 short-form videos as you learn workflow and test content strategies. The paid subscription at approximately $11 monthly for the basic tier removes these limits and unlocks voice cloning, commercial usage rights, and higher-quality voice models.

Building a 3-Layer Audio Stack at Home

Implementing the three-layer audio approach requires understanding what each layer contributes and how to source, process, and balance these elements in your final edit.

Layer 1: Primary voice content comes from your AI voice platform, typically ElevenLabs for maximum quality. Generate your voiceover based on your script, focusing on appropriate pacing for your content type and platform. For TikTok and Reels, target speaking rates around 160-180 words per minute, slightly faster than conversational pace but not rushed. For YouTube Shorts and more information-dense content, 140-160 words per minute provides better comprehension while maintaining energy.

Export your voice audio as high-quality WAV or MP3 at minimum 192kbps bitrate to preserve fidelity through the editing and final export process. Lower-quality voice exports introduce compression artifacts that become obvious when layered with other audio elements and can trigger the “synthetic production” red flag you’re trying to avoid.

Layer 2: Ambient room tone establishes environmental context and masks the unnatural silence between voice segments. The specific ambiance you choose should match your video’s visual setting and mood. Indoor scenes need subtle room tone: quiet office ambiance with distant keyboard clicks and HVAC hum, cozy home environment with gentle background music or muffled outdoor sounds, or busy cafe atmosphere with distant conversation murmur and occasional coffee machine sounds.

Outdoor scenes require environmental ambiance: light wind rustle and distant bird calls for natural settings, urban environment with distant traffic and city soundscape for street scenes, or specific location audio like beach waves, forest sounds, or rain depending on visual content.

Pixabay provides completely free access to thousands of ambient sound effect options with no watermarks, attribution requirements, or usage restrictions. Search for terms like “room tone,” “ambient noise,” “office ambiance,” “outdoor atmosphere,” or specific environments matching your content. Download several options to test which best matches your video’s mood and visual setting.

In your audio editing, ambient tone should sit 20-30 decibels below your primary voice track, providing subtle presence without competing for attention. The goal is barely conscious awareness, a felt environmental presence rather than obvious background noise. If viewers specifically notice your ambient layer, it’s probably too loud or tonally mismatched to the visual content.

Layer 3: Micro sound effects sync with specific visual actions and add textural realism. These are short, quiet sounds that correspond to movement, object interaction, or environmental reactions shown in your video. Effective micro-SFX include fabric rustle when characters move or shift position, light footstep sounds during walking animations, gentle object handling when hands interact with items, subtle breathing or mouth sounds during speech pauses, door movement, glass, or container sounds for relevant actions, and paper or document sounds for office or reading content.

The key descriptor is “micro” because these effects should be subtle accent sounds rather than prominent foreground elements. They operate at similar volume to ambient tone, around 20-30 decibels below primary voice, providing texture without distraction. Source these effects from Pixabay using specific search terms matching your needed sounds.

Balancing the three-layer stack in CapCut involves setting appropriate volume relationships and applying subtle EQ to help each layer occupy its own frequency space. Import your AI-generated video clip, then add three separate audio tracks: your ElevenLabs voice export on track one, ambient room tone on track two, and micro SFX on track three.

Set your voice track as the reference volume at 0dB or your preferred level, then adjust ambient tone to approximately -25dB and micro SFX to -25dB initially. Play through your video and fine-tune these relationships by ear. Ambient tone should be barely audible consciously but create noticeable environmental presence. Micro-SFX should sync obviously with visual actions but not dominate attention.

Apply subtle EQ to separate frequency ranges. Your voice naturally occupies mid-range frequencies, so you can slightly boost your ambient tone’s low frequencies to add warmth and slightly boost your micro-SFX’s high frequencies to add clarity without frequency masking where elements compete in the same sonic space.

Editing, Pacing, and Beginner-Friendly Video Apps

The editing layer is where AI-generated assets, AI voice, and sound design combine into finished content with deliberate pacing, story structure, and platform-optimized formatting. Even with perfect assets from previous layers, editing determines whether your video hooks viewers in the first two seconds and maintains watch time through completion.

Understanding that editing creates pacing and story while AI generates clips represents a fundamental mindset shift for beginners. AI tools provide raw materials, but editing decisions about when to cut, how long to hold shots, when to introduce text overlays or captions, and how to build narrative progression determine content effectiveness. Professional-looking AI video requires professional editing principles regardless of how good your generation tools are.

Timeline simplicity without overwhelming features characterizes beginner-friendly editing platforms. Advanced professional editors like Adobe Premiere Pro or DaVinci Resolve offer hundreds of features that beginners don’t need and will never use, creating intimidating interfaces that slow learning and experimentation. The best beginner tools provide essential editing functions with clean, intuitive interfaces that make common operations obvious.

Essential functions for AI video editing include multi-track timeline for layering video, voice, ambient sound, and SFX, trim and cut operations for precise clip timing, transition effects for scene changes and visual flow, text and caption tools for accessibility and engagement, audio mixing with volume control and basic effects, and platform-specific export presets optimized for TikTok, Reels, and Shorts.

Automatic subtitle generation has become non-negotiable for short-form content in 2026. Platform algorithms favor videos with captions because they enable viewing without sound, a critical consideration given that significant percentages of social media video consumption happens in sound-off environments like public transport, workplaces, or late-night browsing.

Beyond accessibility and algorithm favoritism, subtitles increase comprehension and watch time completion by providing redundant information through both audio and visual channels. Viewers can follow content even if they miss audio segments, accent challenges comprehension, or environment noise interferes with clear hearing. This redundancy particularly benefits non-native speakers and viewers with hearing impairments, expanding your potential audience.

Mobile versus desktop editing presents workflow trade-offs that affect where and when you can produce content. Mobile editing apps enable creation anywhere using phones or tablets, perfect for creators who travel frequently, prefer touch-based interfaces, or want to capture and edit content in single sessions. Desktop applications provide more screen real estate for complex timelines, more precise control for detailed editing operations, and typically faster rendering and export for finished videos.

Why CapCut Is the Best First Editor in 2026

CapCut has established overwhelming dominance in the beginner editing market with over 318 million monthly active users by 2024, making it the number one video editing app by active engagement, significantly outperforming competitors like Canva at 100 million users, InShot at 60 million users, and Adobe Express at 1-2 million users. The platform has reached 1.5 billion cumulative downloads by 2024, demonstrating its global appeal and market dominance.

This dominance exists for concrete reasons that directly benefit beginners. CapCut offers entirely free access to all core features with no watermarks, no forced exports at reduced resolution, and no paywalls blocking essential editing functions. While premium features exist behind a CapCut Pro subscription, the free tier provides everything beginners need to produce professional-looking content for months before considering upgrades.

The platform operates on both mobile and desktop with feature parity, allowing beginners to start editing on phones where they’re already comfortable, then graduate to desktop for more complex projects without relearning a different application. This cross-platform flexibility means you’re never blocked from editing because you don’t have access to a specific device.

CapCut’s automatic subtitle generation uses advanced AI speech recognition to analyze audio and generate synchronized text captions with high accuracy. The workflow takes seconds: import your video, navigate to the Text menu, select Auto Captions, choose your audio language, and click Generate. CapCut analyzes speech and creates a complete subtitle track that you can then review and edit for any recognition errors.

The subtitle customization options let you adjust text styling, positioning, animation effects, and timing to match your content aesthetic and platform best practices. For TikTok and Reels, animated text that appears word-by-word or phrase-by-phrase maintains visual interest and syncs obviously with audio. For YouTube Shorts, simpler persistent captions with clear contrast and readability often perform better.

CapCut’s template system accelerates learning by providing pre-built editing structures you can customize. Templates include complete timing patterns, transition styles, text animation presets, and audio sync frameworks optimized for viral short-form formats. You can import your AI-generated clips and voice audio into template structures, then adjust timing and styling to match your specific content.

This template approach teaches editing principles through reverse engineering. By examining how successful templates structure hooks, build pacing, and create visual rhythm, you learn professional editing techniques that you can then apply to custom projects. The template library essentially provides editing education disguised as production shortcuts.

Integration with AI-generated assets makes CapCut particularly well-suited for the four-layer beginner stack. The timeline easily accommodates multiple video clips from Kling AI or Seedance 2.0, voice tracks from ElevenLabs, ambient audio from Pixabay, and micro-SFX layers. The audio mixing interface provides enough control to balance your three-layer audio stack without overwhelming complexity, letting you set appropriate volume relationships and apply basic EQ without requiring audio engineering knowledge.

Export options include platform-specific presets that automatically configure resolution, aspect ratio, codec, and quality settings optimized for TikTok, Instagram Reels, YouTube Shorts, and other destinations. This removes the technical decision-making about export parameters, ensuring your finished videos meet platform specifications without requiring you to research codec options or bitrate requirements.

CapCut’s revenue growth from $0.4 million in Q1 2022 to $59 million in Q1 2024 reflects sustained demand and rapid trajectory, signaling that the platform continues investing in feature development and infrastructure. This growth trajectory suggests CapCut will remain a major player in editing tools for the foreseeable future, reducing risk that beginners invest time learning a platform that might become unsupported or obsolete.

End-to-End Beginner Workflow: From Prompt to Posted Clip

Walking through a complete production workflow from initial concept to published content demonstrates how the four-layer beginner stack integrates in practice and where common challenges arise that beginners should anticipate.

Step 1: Generate foundation image in Midjourney or Nanobanana PRO. Start with a detailed prompt specifying your character or scene, lighting characteristics, lens type, depth of field, environmental context, and any specific atmospheric qualities. For example: “Professional business woman, 32 years old, shoulder-length dark brown hair, confident expression, wearing modern gray blazer, shot on 50mm lens at f/2.8, natural window lighting from left creating subtle shadows, modern office interior with blurred background, professional headshot style, realistic skin texture with natural detail.”

Generate 3-4 variations to give yourself options, then select the strongest result that exhibits clear lighting, good compositional balance, appropriate depth of field, realistic texture detail, and motion-friendly characteristics. Note the seed number if available and save the image at maximum resolution.

Step 2: Animate via Seedance 2.0 or Kling AI. Upload your selected foundation image to your image-to-video platform. Specify subtle motion parameters that respect your image’s composition and lighting: “slow subtle pan right, maintain lighting consistency, gentle natural head movement, hold expression, 5 second duration, smooth motion” for a character shot, or “slow tilt up, maintain focal point, gentle revealing movement, atmospheric, 6 second duration” for an environmental shot.

Generate 2-3 motion variations to test different animation approaches from your single foundation image. Select the result with smoothest motion, best lighting consistency, and most natural character or object movement. Export at maximum available resolution and quality settings.

Step 3: Create voiceover in ElevenLabs. Write your script optimized for your video duration and platform. For a 15-20 second TikTok or Reels clip, target 40-60 words at energetic pacing. For a 30-45 second YouTube Short, target 70-105 words at moderate pacing.

Select an ElevenLabs voice that matches your content tone and target audience. Generate your voiceover, testing different voice options if the first selection doesn’t feel right. Export as high-quality WAV or 192kbps+ MP3.

Step 4: Source ambient audio and micro-SFX from Pixabay. Search Pixabay for ambient tone matching your video’s environmental setting: office ambiance, outdoor nature sounds, urban environment, or indoor home atmosphere. Download 2-3 options to test which best complements your visual content.

Search for specific micro sound effects that sync with visible actions in your animated video: fabric movement, footsteps, object handling, or environmental sounds. Download these individual effect files for precise timing in your edit.

Step 5: Edit and assemble in CapCut. Import your animated video clip, ElevenLabs voice file, ambient tone audio, and micro-SFX files into CapCut. Place your video clip on the primary video track, then add audio tracks for voice, ambient tone, and SFX.

Trim your video clip to match your voiceover duration, cutting at natural pauses or visual transitions to maintain smooth flow. Position ambient tone to run continuously throughout your video at -25dB to -30dB below voice volume. Place micro-SFX precisely synced to corresponding visual actions at similar quiet volume.

Generate automatic captions through CapCut’s Auto Captions feature, review for accuracy, and customize styling to match your content aesthetic. Add text overlays for hook phrases, key information, or calls-to-action. Apply any transitions between clips if your video includes multiple scenes.

Step 6: Export with platform-specific settings. Select the CapCut export preset matching your target platform: TikTok, Instagram Reels, or YouTube Shorts. These presets automatically configure correct aspect ratio (typically 9:16 vertical), resolution (1080p minimum), codec, and quality settings.

Review the preview, then export your finished video. CapCut processing typically completes within 1-3 minutes for short-form content depending on effects complexity and device performance.

Step 7: Publish to platform. Upload your finished video to your target platform, write engaging captions incorporating relevant hashtags, and post according to optimal timing for your audience and platform algorithm. Monitor early performance metrics to identify successful hooks, pacing patterns, and content angles that resonate with viewers, informing future production decisions.

This complete workflow, from initial prompt to published content, becomes faster and more intuitive with practice. First attempts might require 45-90 minutes as you learn each tool’s interface and make generation decisions. After completing 10-15 videos, the same workflow often compresses to 20-30 minutes as tool familiarity increases and you develop prompt libraries, voice presets, and editing templates for repeated use.

Pricing, Free Tools, and Picking the Right Stack

Understanding AI video tool pricing models helps beginners make strategic budget decisions that balance capability with affordability. The 2026 landscape offers more pricing diversity than ever, with platforms competing through various subscription structures, credit systems, and hybrid models designed to capture different creator segments.

The fundamental challenge beginners face is that pricing complexity has increased alongside feature sophistication. Simple monthly subscription models have given way to multi-tier systems with credit allocations, usage-based charges, resolution-based pricing, and feature gates that can make cost comparison difficult without deep analysis. Making informed decisions requires understanding not just headline prices but the actual cost per video produced given your specific workflow and production volume.

Credit-based systems dominate the AI video generation market in 2026, with most platforms charging credits per generation rather than flat monthly fees. The rationale stems from the significant and variable costs of running sophisticated AI models, where training and deployment requires substantial computing power billed on usage basis by cloud providers. By implementing credit systems, platforms align pricing with operational costs while enabling granular pricing of different features.

Credit consumption varies dramatically based on generation parameters. Generating a simple 10-second video in 720p might cost 20 credits, while the same video in 1080p could cost 40 credits and 4K output might require 80 credits or more. Advanced features like extended duration, complex motion, or multiple reference images typically consume additional credits beyond base generation costs. This granular pricing means beginners must understand not just how many credits their subscription includes but how quickly those credits deplete based on actual production requirements.

Subscription tier structures layer monthly or annual payments with included credit allocations. Higher tiers typically include larger monthly credit allowances, lower per-credit costs for additional purchases beyond allocations, priority access to computing resources for faster generation, and early access to new features and model versions. This hybrid model adds complexity because you must evaluate whether a subscription with included credits or purely pay-as-you-go credit purchasing is more economical for your production volume.

Consider practical scenarios: a basic subscription offers 100 credits monthly for $20, while pay-as-you-go charges $0.25 per credit. If you only use 50 credits monthly, the subscription costs $20 for 50 credits, effectively $0.40 per credit, making pay-as-you-go at $12.50 for those 50 credits clearly cheaper. However, if you use 150 credits, the subscription with additional purchases might still be more expensive than a higher tier subscription including 200 credits for slightly higher monthly fee.

Hybrid pricing models combining free tiers, credits, and subscriptions represent the most common structure in 2026, and unfortunately the most confusing for beginners. Tools like Higgsfield and similar platforms offer daily free credits for experimentation, subscriptions to unlock specific models or features, and additional credit purchases layered on top for heavy usage. This three-layer structure optimizes for different user segments: free tier attracts newcomers for testing, subscriptions capture regular users, and credit purchases accommodate occasional heavy usage spikes.

Free tier daily credit allocations typically provide 5-10 credits per day, sufficient for 1-2 test generations daily but insufficient for serious production work. These free tiers serve primarily as evaluation mechanisms, letting you test interface usability and output quality before committing to paid plans, but rarely providing enough capacity for consistent content creation.

Commercial licensing considerations affect whether you can legally monetize content created with specific tools and pricing tiers. Many platforms restrict commercial usage to paid subscriptions, meaning free tier content cannot be used in videos you monetize through ads, sponsorships, or product sales. Read licensing terms carefully before building content strategies dependent on monetization, as retroactive license purchases or platform switches can disrupt established workflows.

Understanding AI Video Pricing Models in 2026

Breaking down the specific pricing mechanics helps beginners predict actual costs rather than being surprised by bill shock or usage exhaustion.

Resolution-based pricing charges more for higher-quality outputs, with 720p generations typically consuming 1x base credits, 1080p consuming 2-3x base credits, and 4K consuming 4-6x base credits. For beginners focused on mobile-first platforms like TikTok and Instagram Reels where most viewing happens on phones, 1080p represents the sweet spot balancing quality with credit efficiency. Paying premium for 4K generation makes sense only when targeting YouTube main feed, desktop viewing, or professional client work where maximum resolution matters.

Duration-based pricing scales credits with video length, often in 5-second or 10-second increments. A 5-second clip might cost 10 credits while a 30-second clip costs 60 credits, creating linear scaling that rewards shorter content. For beginners producing short-form content optimized for TikTok and Reels where 10-20 seconds is ideal, this pricing structure aligns well with actual needs. Avoid generating longer videos than necessary just because credits are available, as you’ll exhaust allocations faster without corresponding content value increases.

Feature-based pricing charges additional credits for advanced capabilities beyond basic text-to-video or image-to-video generation. Reference image systems for character consistency, motion control parameters for precise animation, voice synchronization for talking heads, and upscaling operations for resolution enhancement typically consume extra credits. Beginners should focus on mastering basic generation features before investing credits in advanced options, as skill development often produces better results than feature complexity.

Watermark removal pricing separates free and paid tiers more than any other single factor. Free plans almost universally apply visible watermarks, typically positioned in bottom corners or as translucent overlays across frames. These watermarks dramatically reduce content usability for professional purposes, brand accounts, or monetized distribution. Watermark removal alone justifies paid subscriptions for creators moving beyond testing into serious production, as the credibility cost of watermarked content often exceeds the subscription fee.

However, watermark removal is a gateway benefit rather than the primary value of paid tiers. The deeper advantages include increased resolution from 720p to 1080p or 4K, expanded monthly generation capacity from 3-5 videos to 30-50 or unlimited, improved voice options with natural rhythm and emotional range, custom branding capabilities for personalized content, and full commercial usage rights for monetization.

Annual versus monthly billing typically offers 15-20% savings through annual commitment, but beginners should start monthly to maintain flexibility during the learning and testing phase. Committing to annual plans before understanding actual usage patterns and tool effectiveness risks locking into subscriptions that don’t match your evolved needs six months later. Once you’ve produced 30-50 videos and identified your core production tools, annual upgrades become strategic cost optimizations.

Platform-specific pricing examples for 2026 help contextualize these abstract concepts. Midjourney offers a basic plan at approximately $10 monthly for limited fast generations plus relaxed mode unlimited slower generations, standard at $30 monthly for extended fast hours, and pro at $60 monthly for maximum capacity. ElevenLabs starts at $11 monthly for basic tier removing character limits and enabling voice cloning. Kling AI and Seedance 2.0 operate on credit systems with free daily allocations plus paid tiers starting $15-25 monthly for increased credits. CapCut remains entirely free for core features, with CapCut Pro at approximately $8-12 monthly for advanced effects and templates.

Beginner-Friendly Stacks on a Tight Budget

Constructing effective tool stacks at different budget points demonstrates how strategic tool selection maximizes value regardless of spending capacity.

The zero-dollar stack proves you can produce complete AI videos without any financial investment, though with workflow compromises and output limitations. This stack includes Midjourney or Nanobanana PRO free trials for initial image generation testing, Kling AI or Seedance free daily credits for animation (typically 3-5 generations daily), ElevenLabs free tier for voice generation (approximately 10,000 characters monthly), Pixabay for completely free ambient audio and micro-SFX with no restrictions, and CapCut entirely free for editing and final assembly.

This configuration produces watermarked 720p output with limited daily generation capacity, but provides complete workflow functionality for learning and testing. Beginners can create 15-20 complete test videos over their first month using only free resources, sufficient to build foundational skills, understand prompt engineering principles, develop editing rhythm, and identify which layer creates the biggest bottleneck in their specific workflow.

The zero-dollar stack teaches critical discipline: working within constraints forces efficiency and creativity. When you have unlimited generations, it’s easy to waste attempts on poorly-considered prompts. When you have 3-5 daily generations, you think carefully before committing credits, improving prompt quality and reducing iteration waste.

The $15-30 monthly starter stack targets beginners ready to remove one critical bottleneck while maintaining budget consciousness. The strategic approach is identifying which single layer limits your production most, then upgrading only that layer to paid tier while keeping others on free plans.

For visually-driven creators where image quality and variety matter most, upgrade image generation first: Midjourney basic plan at $10 monthly or Nanobanana PRO paid tier at $15-25 monthly for unlimited watermark-free images. Keep Kling/Seedance on free daily credits for animation, ElevenLabs on free tier for voice, Pixabay for audio, and CapCut for editing.

For animation-focused creators needing more daily video generations, upgrade image-to-video first: Kling AI or Seedance paid plan at $15-25 monthly for increased credit allocation and watermark removal. Keep Midjourney on free trial or occasional use, ElevenLabs on free tier, Pixabay for audio, and CapCut for editing.

For voice-driven content where audio quality determines engagement, upgrade voice generation first: ElevenLabs paid tier at $11 monthly for unlimited characters and voice cloning. Keep image and animation tools on free tiers, Pixabay for environmental audio, and CapCut for editing.

This focused single-layer upgrade typically increases production capacity from 5-7 videos weekly to 15-25 videos weekly, a 3x improvement for minimal cost increase.

The $40-60 monthly serious beginner stack removes watermarks across all paid layers and provides professional-grade output capacity for creators treating AI video as business infrastructure rather than casual experimentation. This configuration includes Midjourney standard plan at $30 monthly for substantial fast generation hours, Kling AI or Seedance paid tier at $15-25 monthly for watermark-free animation, ElevenLabs paid tier at $11 monthly for voice cloning and unlimited characters, Pixabay remaining free for audio resources, and CapCut with optional CapCut Pro at $8-12 monthly for advanced templates.

This stack produces 1080p watermark-free content with sufficient generation capacity for 30-50 finished videos monthly, supporting daily posting schedules across multiple platforms. The total monthly cost of $40-60 positions well below hiring freelance video editors at $500-2000 monthly or purchasing stock footage subscriptions with voice talent separately.

Cost optimization strategies help beginners extract maximum value from limited budgets regardless of stack configuration. Batch generation reduces waste by planning multiple videos before starting generation sessions, creating detailed prompt lists with variation parameters, generating multiple image variations from single prompting sessions, and creating animation variations from single strong foundation images. This batching approach improves credit efficiency by reducing context switching and leveraging existing successful prompts.

Content repurposing multiplies value from single generation investments: one long-form script becomes 5 short-form clips, strong foundation image generates multiple animation variations, single voiceover repurposed across different visual content, and visual clips remixed with different audio for platform-specific versions. This repurposing transforms 10 generation sessions into 30-40 finished videos through creative recombination.

Progressive quality upgrading means starting production in lower resolution or with watermarks, then upgrading only successful high-performing content to premium versions. Generate initial tests at 720p or with watermarks, distribute to gauge audience response, regenerate top performers at 1080p without watermarks, and invest premium features only in proven content. This approach prevents wasting expensive high-resolution credits on content that doesn’t resonate with audiences.

Using AI Video Tools for TikTok, Reels, and Shorts

Optimizing AI video specifically for short-form platforms requires understanding how TikTok, Instagram Reels, and YouTube Shorts differ in discovery mechanisms, content preferences, and algorithmic priorities. While these platforms share the vertical format and sub-60-second duration constraints, their algorithms reward different content characteristics and creator strategies.

The fundamental shift in 2026 is that all three platforms now prioritize watch time efficiency over raw view counts. TikTok’s recommendation system optimizes for efficiency of attention rather than volume, making average watch duration the primary ranking signal. A 12-second average watch duration on a 15-second video significantly outperforms 20-second average on a 60-second video because relative retention indicates content delivered value efficiently.

This efficiency optimization fundamentally changes content strategy. Creating longer videos hoping for higher total watch time backfires if completion rates suffer. Shorter, highly-retentive content consistently outperforms longer, loosely-watched content in algorithmic distribution, meaning beginners should target the minimum duration needed to deliver complete value rather than inflating length artificially.

TikTok algorithm priorities for 2026 include completion rate as the pass-fail metric determining whether content enters wider distribution. Videos must achieve 70-90% completion rates depending on length to trigger algorithmic scaling. This ruthless efficiency filter means the first 2-3 seconds determine survival, and every subsequent second must justify its existence or viewers drop off and kill distribution.

Average watch duration functions as TikTok’s efficiency score, with the algorithm evaluating how well content held attention relative to length. High average watch duration tells TikTok that viewers stayed because content delivered value, pacing matched expectations, and the video deserves expanded distribution to broader audiences.

Checkpoint-based retention scoring evaluates performance at 3-second, 15-second, 30-second, and 60-second marks, with each checkpoint carrying different weights depending on video length. For videos under 30 seconds, maintaining 90% retention becomes the baseline for algorithmic promotion. This checkpoint system means you can’t hide weak middles behind strong endings, as drop-off at any checkpoint damages overall performance scores.

Topic coherence and thematic focus measured through TikTok’s AI evaluation of caption alignment with spoken content, visual consistency with stated topic, and clear narrative structure throughout creates what TikTok terms “AIO” or AI Index Optimization. Videos with scattered topics or mismatched captions and content perform poorly even with strong production quality because the algorithm can’t confidently categorize and distribute them to relevant interest audiences.

Instagram Reels algorithm priorities favor content from accounts with established followings more than TikTok’s pure meritocracy, making growth slightly more challenging for new creators. However, Reels can achieve significant reach through trending audio exploitation and strategic hashtag usage. The algorithm weights engagement signals including likes, comments, shares, and saves heavily, meaning content that sparks conversation and saving behavior for later reference performs exceptionally well.

Instagram’s social graph integration means Reels distribute both through discovery mechanisms and to existing followers, creating dual distribution paths. Content that performs well with your existing audience gets amplified to broader discovery audiences, while content that resonates with discovery audiences gets shown more prominently to follower feeds. This dual-path system rewards consistency and relationship-building alongside viral content creation.

The platform’s integration with shopping, direct messaging, and profile discovery means Reels function as top-of-funnel awareness content that can directly convert to profile visits, follows, and commercial actions. This conversion potential makes Instagram Reels particularly valuable for creator monetization and brand building compared to TikTok’s more entertainment-focused positioning.

YouTube Shorts algorithm priorities focus on comparative performance against similar content rather than absolute metrics. Your videos are served to initial small audiences and their retention and engagement compared to similar content determines whether distribution expands. If 100 initial viewers watch your content more completely than they watch similar videos, your Short gets promoted to 200 viewers. If those 200 also outperform comparable content, promotion continues to 400, then 800, exponentially scaling until a tier reacts poorly and views plateau.

This comparative system means YouTube Shorts success depends on outperforming niche competition rather than achieving arbitrary universal benchmarks. Strong performance in a specific micro-niche can drive substantial views even without mass market appeal, as the algorithm optimizes for relative satisfaction within interest categories.

YouTube’s integration with long-form content creates unique cross-promotion opportunities unavailable on TikTok and Instagram. Shorts can drive traffic to main channel videos, community posts, and subscription conversions, making Shorts valuable funnel content even when individual Short metrics seem modest compared to TikTok viral hits.

The platform’s monetization through YouTube Partner Program revenue sharing provides direct financial incentives for Shorts creation beyond brand deals and external monetization, though 2026 rates remain significantly lower per-view than long-form content.

Tool Choices That Fit Short-Form Algorithms

Aligning your four-layer tool stack with platform-specific requirements maximizes algorithmic performance and audience retention across TikTok, Reels, and Shorts.

Fast hook visuals in the first 2 seconds determine whether viewers continue watching or scroll past. Your image generation and animation choices must prioritize immediate visual impact: high-contrast compositions that pop on mobile screens, clear subject focus without cluttered backgrounds, human faces or eyes when possible as these naturally capture attention, unexpected or pattern-interrupting imagery that forces mental pause, and motion that begins immediately without slow build-ups.

Generate foundation images specifically optimized for these first-frame requirements. Test multiple variations focusing solely on whether the initial visual forces a pause response when scrolling rapidly. Mediocre hook frames kill great content before it has opportunity to perform, so invest generation attempts in perfecting opening visuals even if it means simpler execution in later frames.

Subtitle workflows become non-negotiable as significant portions of viewing happen in sound-off environments or with audio competing against environmental noise. CapCut’s automatic subtitle generation with animated text-per-word appearing synchronized to speech provides the standard approach for TikTok and Reels. The platform’s AI speech recognition analyzes audio and generates synchronized captions within seconds, which you can then customize for styling, positioning, and animation effects.

For maximum effectiveness, position subtitles in the safe zone avoiding platform UI elements that might overlap text. TikTok’s description area sits at the bottom right, so position subtitles bottom center or upper third. Instagram’s username and audio information appears at bottom, making upper third positioning safer. YouTube Shorts’ UI is cleanest, allowing more flexible subtitle placement.

Subtitle styling should prioritize readability over aesthetics: high contrast between text and background using either white text with black outline or colored text with strong outline, font sizes large enough for mobile viewing without squinting, animation that emphasizes key words while avoiding distracting overanimation, and avoiding excessive effects that reduce legibility.

Vertical framing optimization means composing specifically for 9:16 aspect ratio rather than cropping horizontal content. Generate foundation images with vertical composition in mind: subjects positioned in upper two-thirds where faces appear in TikTok and Reels feed thumbnails, important visual information kept in center safe zone away from edges where platform UI might overlap, environmental context that works in vertical rather than horizontal framing, and depth that utilizes vertical space effectively rather than fighting the constraint.

Many beginners make the mistake of generating standard horizontal 16:9 images then cropping to vertical, losing compositional control and often cutting off important elements. Instead, specify vertical aspect ratio directly in your image generation prompts: “vertical composition, 9:16 aspect ratio, portrait orientation” to ensure the AI model composes appropriately from the start.

Rapid iteration and testing capacity becomes critical because short-form success depends on high-volume experimentation rather than perfecting individual pieces. The most successful short-form creators test multiple hooks per concept, kill poor performers quickly, and double down on winners. Your tool stack must support this iteration speed without bottlenecks.

This means prioritizing tools with fast generation times even if individual output quality is slightly lower than slower alternatives, credit allocations that support 10-20 daily generations during testing phases, batch generation workflows where you can queue multiple variations simultaneously, and editing tools like CapCut that enable rapid assembly and export without render bottlenecks.

The testing mindset treats each video as an experiment providing data rather than precious creative work requiring perfection. Generate 5 hook variations for the same concept, post all across platforms, analyze which performs best in first 24 hours, then create follow-up content doubling down on the winning approach. This data-driven iteration outperforms perfectionism consistently in short-form environments.

Cross-posting optimization maximizes value from single generation investments by posting identical or minimally modified content across all three platforms. Some creators resist cross-posting fearing audiences see duplicate content, but platform algorithm segregation means your TikTok audience rarely overlaps significantly with Instagram or YouTube audiences, making cross-posting efficiency gains far outweigh theoretical duplication concerns.

Minor platform-specific optimizations include adjusting subtitle positioning for each platform’s UI, slightly different caption strategies with platform-appropriate hashtags, and aspect ratio tweaks if one platform performs better with slightly different framing. However, these optimizations should be quick adjustments rather than complete reworks, as the primary goal is maximizing content distribution from single production investments.

From AI Influencers to Clones: Monetizing Your Beginner Stack

The same beginner tool stack powering personal content creation enables several proven monetization models in 2026, allowing creators to generate revenue while building skills and audiences.

AI influencer model creates hyper-real AI characters running independent accounts with their own personalities, content themes, and follower bases. These AI personas post daily lifestyle clips, product integrations, POV-style content, and trend adaptations with visual realism advanced enough that many followers engage without realizing they’re interacting with synthetic characters. Brand deals, affiliate commissions, digital product sales, and platform monetization all function identically to human influencers.

AI influencer monetization in 2026 spans multiple revenue streams with established rate structures. Fashion and beauty brand sponsorships typically pay $2,000-15,000 per campaign depending on follower count and engagement rates. Tech company partnerships range $1,500-10,000, lifestyle brands $1,000-8,000, and gaming companies $500-5,000. These rates rival or exceed human micro-influencer pricing because brands care about reach and engagement metrics rather than whether the model ages or requires management overhead.

Package deal negotiations for AI influencers can command premium rates through multi-platform posting bundles with 30% rate increases, story plus feed post combinations, long-term 3-6 month partnerships providing consistency, and content usage rights licensing for brand’s own channels. The advantage AI influencers provide over human counterparts is perfect consistency, no scheduling conflicts, no personal controversies or brand misalignments, infinite scalability without fatigue, and complete creative control.

Creating AI influencer accounts requires slightly advanced consistency techniques beyond basic beginner workflows: establishing character seed locks across all generations, building reference image libraries showing character from multiple angles, developing distinctive personality traits reflected in captions and content themes, maintaining strict aesthetic guidelines for lighting and composition, and gradual follower growth through authentic-feeling content before monetization attempts.

Client services model positions your beginner stack as production capability for businesses needing AI ads, product visualization, UGC-style AI spokespeople, and social media content at scale. Small businesses, e-commerce brands, local service providers, and online coaches all need consistent video content but lack budgets for traditional video production. Your AI tools let you deliver professional-looking content at a fraction of traditional costs, creating profitable service offerings.

Service packages might include social media content packages at $500-1500 monthly for 15-30 short-form videos optimized for client’s platforms, AI spokesperson services at $750-2000 per campaign for character development and scripted content delivery, product showcase videos at $100-300 per product for e-commerce listings and ads, and UGC-style testimonial content at $150-400 per video for social proof and conversion optimization.

The key positioning is competence rather than massive portfolios or celebrity status. Businesses care whether you can deliver consistent quality on schedule and understand their marketing objectives, not whether you personally have millions of followers. Demonstrating 20-30 strong portfolio pieces and clear understanding of platform algorithms and conversion principles wins clients more reliably than inflated follower counts.

Clone monetization model creates AI versions of yourself that scale personal presence without scaling time investment. Your AI clone posts daily advice automatically, explains trends and industry developments, delivers educational hooks and insights, and repurposes long-form content into short-form variations. This omnipresence builds authority faster than traditional posting schedules while you focus on high-value activities like product development, client delivery, or strategic partnerships.

Creators using AI clones report production increases of 10-100x because there’s no reshoot requirements, scheduling friction, gear setup overhead, or physical fatigue limiting output. Fortune magazine notes that influencers already deploy clones publishing across multiple platforms while they sleep, enabling truly global 24/7 content presence.

Clone monetization comes through authority positioning that drives downstream revenue: community subscription models where consistent content delivery justifies recurring membership fees, education products where your clone delivers course content and coaching while you develop curriculum, agency hybrid models where your clone handles content while you close deals and manage strategy, and service businesses where your clone qualifies leads and nurtures prospects while you deliver high-value client work.

The strategic insight is that views and engagement are top-of-funnel metrics, but leverage and offers drive actual revenue. Your AI clone generates the attention and authority positioning while you convert that positioning into profitable business models. This separation of content production from monetization strategy allows simultaneous scaling of both without the physical limits that constrain traditional creator businesses.

Content arbitrage model repurposes single creative concepts across multiple formats and platforms, maximizing value extraction from each production investment. One long-form idea becomes five short-form clips with different hooks, three hook variations testing different angles, two format variations for different platforms, and one authority version establishing thought leadership. This multiplication approach treats each generation as raw material for extensive remixing rather than single-use content.

The highest earners using this model build complete ecosystems rather than just posting content: authority positioning through consistent valuable content, audience building through platform algorithms, product infrastructure selling information or services, community layers with subscription access and exclusivity, and agency hybrid models offering done-for-you services. AI acts as a multiplier that scales all ecosystem components simultaneously if you understand positioning and business model design.

Frequently Asked Questions

What is the best AI video tool for beginners in 2026?

There’s no single best tool because effective AI video production requires a four-layer stack rather than one platform handling everything. For beginners in 2026, the recommended starter stack includes Midjourney or Nanobanana PRO for cinematic foundation image generation, Kling AI or Seedance 2.0 for image-to-video animation with strong temporal consistency, ElevenLabs for realistic AI voice generation with natural rhythm, Pixabay for free ambient audio and micro sound effects, and CapCut for final editing and assembly.

This combination balances ease of use with professional output quality, offers generous free tiers for learning without financial commitment, and optimizes specifically for short-form content on TikTok, Instagram Reels, and YouTube Shorts. The modular approach lets you upgrade individual layers as budget permits rather than committing to expensive all-in-one platforms that compromise on specialized capabilities.

Do I need multiple AI video tools or just one?

You need multiple specialized tools because no single platform in 2026 handles all four essential layers of professional AI video production at beginner-friendly quality levels. All-in-one platforms exist, but they consistently underperform compared to specialized tool stacks in at least one critical dimension.

The four-layer approach provides several advantages over single-tool solutions: you can upgrade individual layers independently without rebuilding entire workflows, you avoid vendor lock-in to proprietary ecosystems with limited flexibility, you gain access to best-in-class capabilities for each production stage rather than compromised implementations, and you maintain flexibility to adapt as new superior tools emerge in specific categories.

Think of it like professional photography where specialists use different tools for capture, editing, and output rather than expecting a single app to handle everything optimally. The integration overhead is minimal as files export and import cleanly between tools, while quality and control benefits are substantial.

Are there any free AI video tools I can start with?

Yes, you can create complete professional-quality AI videos using entirely free resources while learning foundational skills. The zero-dollar starter stack includes Midjourney or Nanobanana PRO free trials providing limited daily image generations for testing, Kling AI or Seedance free tiers offering 3-5 animation generations daily, ElevenLabs free tier providing approximately 10,000 characters monthly for voice generation, Pixabay with unlimited free access to sound effects and music with no watermarks or restrictions, and CapCut completely free with all core editing features unlocked.

This configuration produces 720p output with watermarks from image and animation tools, but provides complete workflow functionality for creating 15-20 test videos monthly while you build skills and identify which layer justifies your first paid upgrade. The limitations teach valuable discipline in prompt quality and generation efficiency because constrained resources force thoughtful creative decisions rather than wasteful trial-and-error.

Free tiers serve genuine learning purposes, but expect to upgrade at least one or two layers within your first 2-3 months once you’re producing consistently and ready to remove watermarks for serious distribution.

How do AI video tools actually work under the hood?

AI video generation tools use sophisticated neural networks trained on millions of video clips to understand relationships between text descriptions, visual appearance, motion physics, and temporal consistency. The core technology is diffusion models that generate content through iterative refinement, starting from random noise and gradually sculpting recognizable images or video frames that match input prompts.

For text-to-image generation, models learn semantic associations between language and visual concepts, understanding that “golden hour sunlight” implies warm color temperature, long shadows, and soft atmospheric quality. These learned associations let models compose novel scenes never seen during training by combining understood concepts in new configurations.

For image-to-video animation, models predict plausible motion by analyzing how real-world objects and cameras move, learning physics principles like gravity, momentum, and realistic material behavior. The model generates each new frame by predicting what the next moment should look like given the previous frames and motion parameters, maintaining consistency through attention mechanisms that track object boundaries and lighting characteristics across time.

Voice generation models learn acoustic characteristics of human speech, training on thousands of hours of recordings to understand phonemes, prosody, emotional expression, and natural rhythm variations. These models can then generate entirely synthetic speech matching desired characteristics by sampling from learned distributions of speech patterns.

The key insight is that none of these models store specific training examples; instead they learn statistical patterns and relationships that let them generate novel content following the same patterns. This generalization capacity explains both their power and limitations.

What industries and use cases are AI video tools best for in 2026?

AI video tools excel across diverse industries and use cases where visual content drives engagement and conversion but traditional video production costs or time constraints create bottlenecks.

Marketing and advertising teams use AI video for rapid campaign testing, generating multiple creative variations for A/B testing at scale, creating platform-specific content optimized for TikTok, Reels, and Shorts simultaneously, and producing localized versions with different voices and cultural references. The speed advantage lets marketing teams test 10-20 creative concepts in the time traditional production delivers one or two, accelerating learning and optimization cycles.

Education and training applications leverage AI video for course content delivery, explainer videos breaking down complex concepts with custom visuals, language learning content with pronunciation examples in multiple accents, and safety training scenarios showing dangerous situations without physical risk. The cost efficiency makes video-based education accessible to smaller organizations and independent educators previously priced out of video production.

Solo creators and content entrepreneurs build personal brands, establish thought leadership through consistent valuable content, develop multiple revenue streams from platform monetization to products and services, and create content volume impossible through traditional filming. The scale advantages let individual creators compete with larger production teams on content consistency and platform presence.

Agencies and creative services firms deliver client work more efficiently, creating social content packages at margins traditional video can’t match, rapidly prototyping concepts for client approval before committing to expensive production, and offering services to small business clients previously unable to afford regular video content. This market expansion creates new business opportunities serving previously underserved client segments.

Small and medium businesses use AI video for product showcases eliminating photography and videography costs for e-commerce catalogs, social media presence maintaining consistent posting schedules without dedicated content teams, customer testimonials and UGC-style social proof at scale, and recruitment and employer branding content showcasing company culture. The accessibility of AI video tools democratizes video marketing for businesses operating on constrained budgets where traditional production remains cost-prohibitive.

The universal thread is that AI video tools shine where volume, speed, and cost-efficiency matter more than absolute maximum production value, and where iteration and testing cycles determine success more than single perfect executions. As the technology continues improving, the quality gap between AI and traditional production narrows while the speed and cost advantages widen, expanding viable use cases continuously.

Ready to start creating AI videos?

Join 8,200+ creators in the world's largest paid AI image & video community.

Join AI Video Bootcamp