Photorealistic AI prompting is the practice of writing structured text instructions that guide AI image generation models to produce outputs indistinguishable from reality. It involves using specific language around camera settings, lighting conditions, texture detail, colour grading, and composition to push AI models away from their default stylised outputs and toward true photographic realism. In 2026, mastering this skill is the single biggest factor separating amateur AI images from professionally convincing ones.
Most people assume that photorealism in AI images comes from using a more powerful model. While model quality matters, the reality is that prompting technique accounts for the majority of the difference between images that look obviously AI-generated and those that pass as genuine photography. Research published in Frontiers in Artificial Intelligence examining human perception of AI-generated images confirms that subtle visual cues — lighting inconsistencies, texture smoothness, and colour saturation — are what viewers use to distinguish AI images from photographs. Tiny wording changes inside your prompt can dramatically affect whether a face looks human or synthetic, whether skin reacts to light naturally or appears plastic, and whether an image feels captured by a camera or rendered by software.
The scale of people attempting this is enormous. Midjourney alone has over 21 million registered users, with between 1.2 and 2.5 million daily active users. Across all platforms, the AI image generator market was valued at $412.51 million in 2025 and is projected to reach $1.75 billion by 2034 at a 17.4% CAGR, according to Fortune Business Insights.
This guide teaches the exact phrases, structures, and techniques that consistently push AI models toward true photographic realism, especially when generating people, avatars, and influencer-style content. If your goal is images that look like they were shot by a real camera, these techniques will transform your output.
For generating realistic people specifically, NanoBanana PRO (accessible through Higgsfield AI or Gemini) currently produces the most convincing results for human subjects. It is the model most recommended by AI Video Bootcamp after extensive testing across all major models.
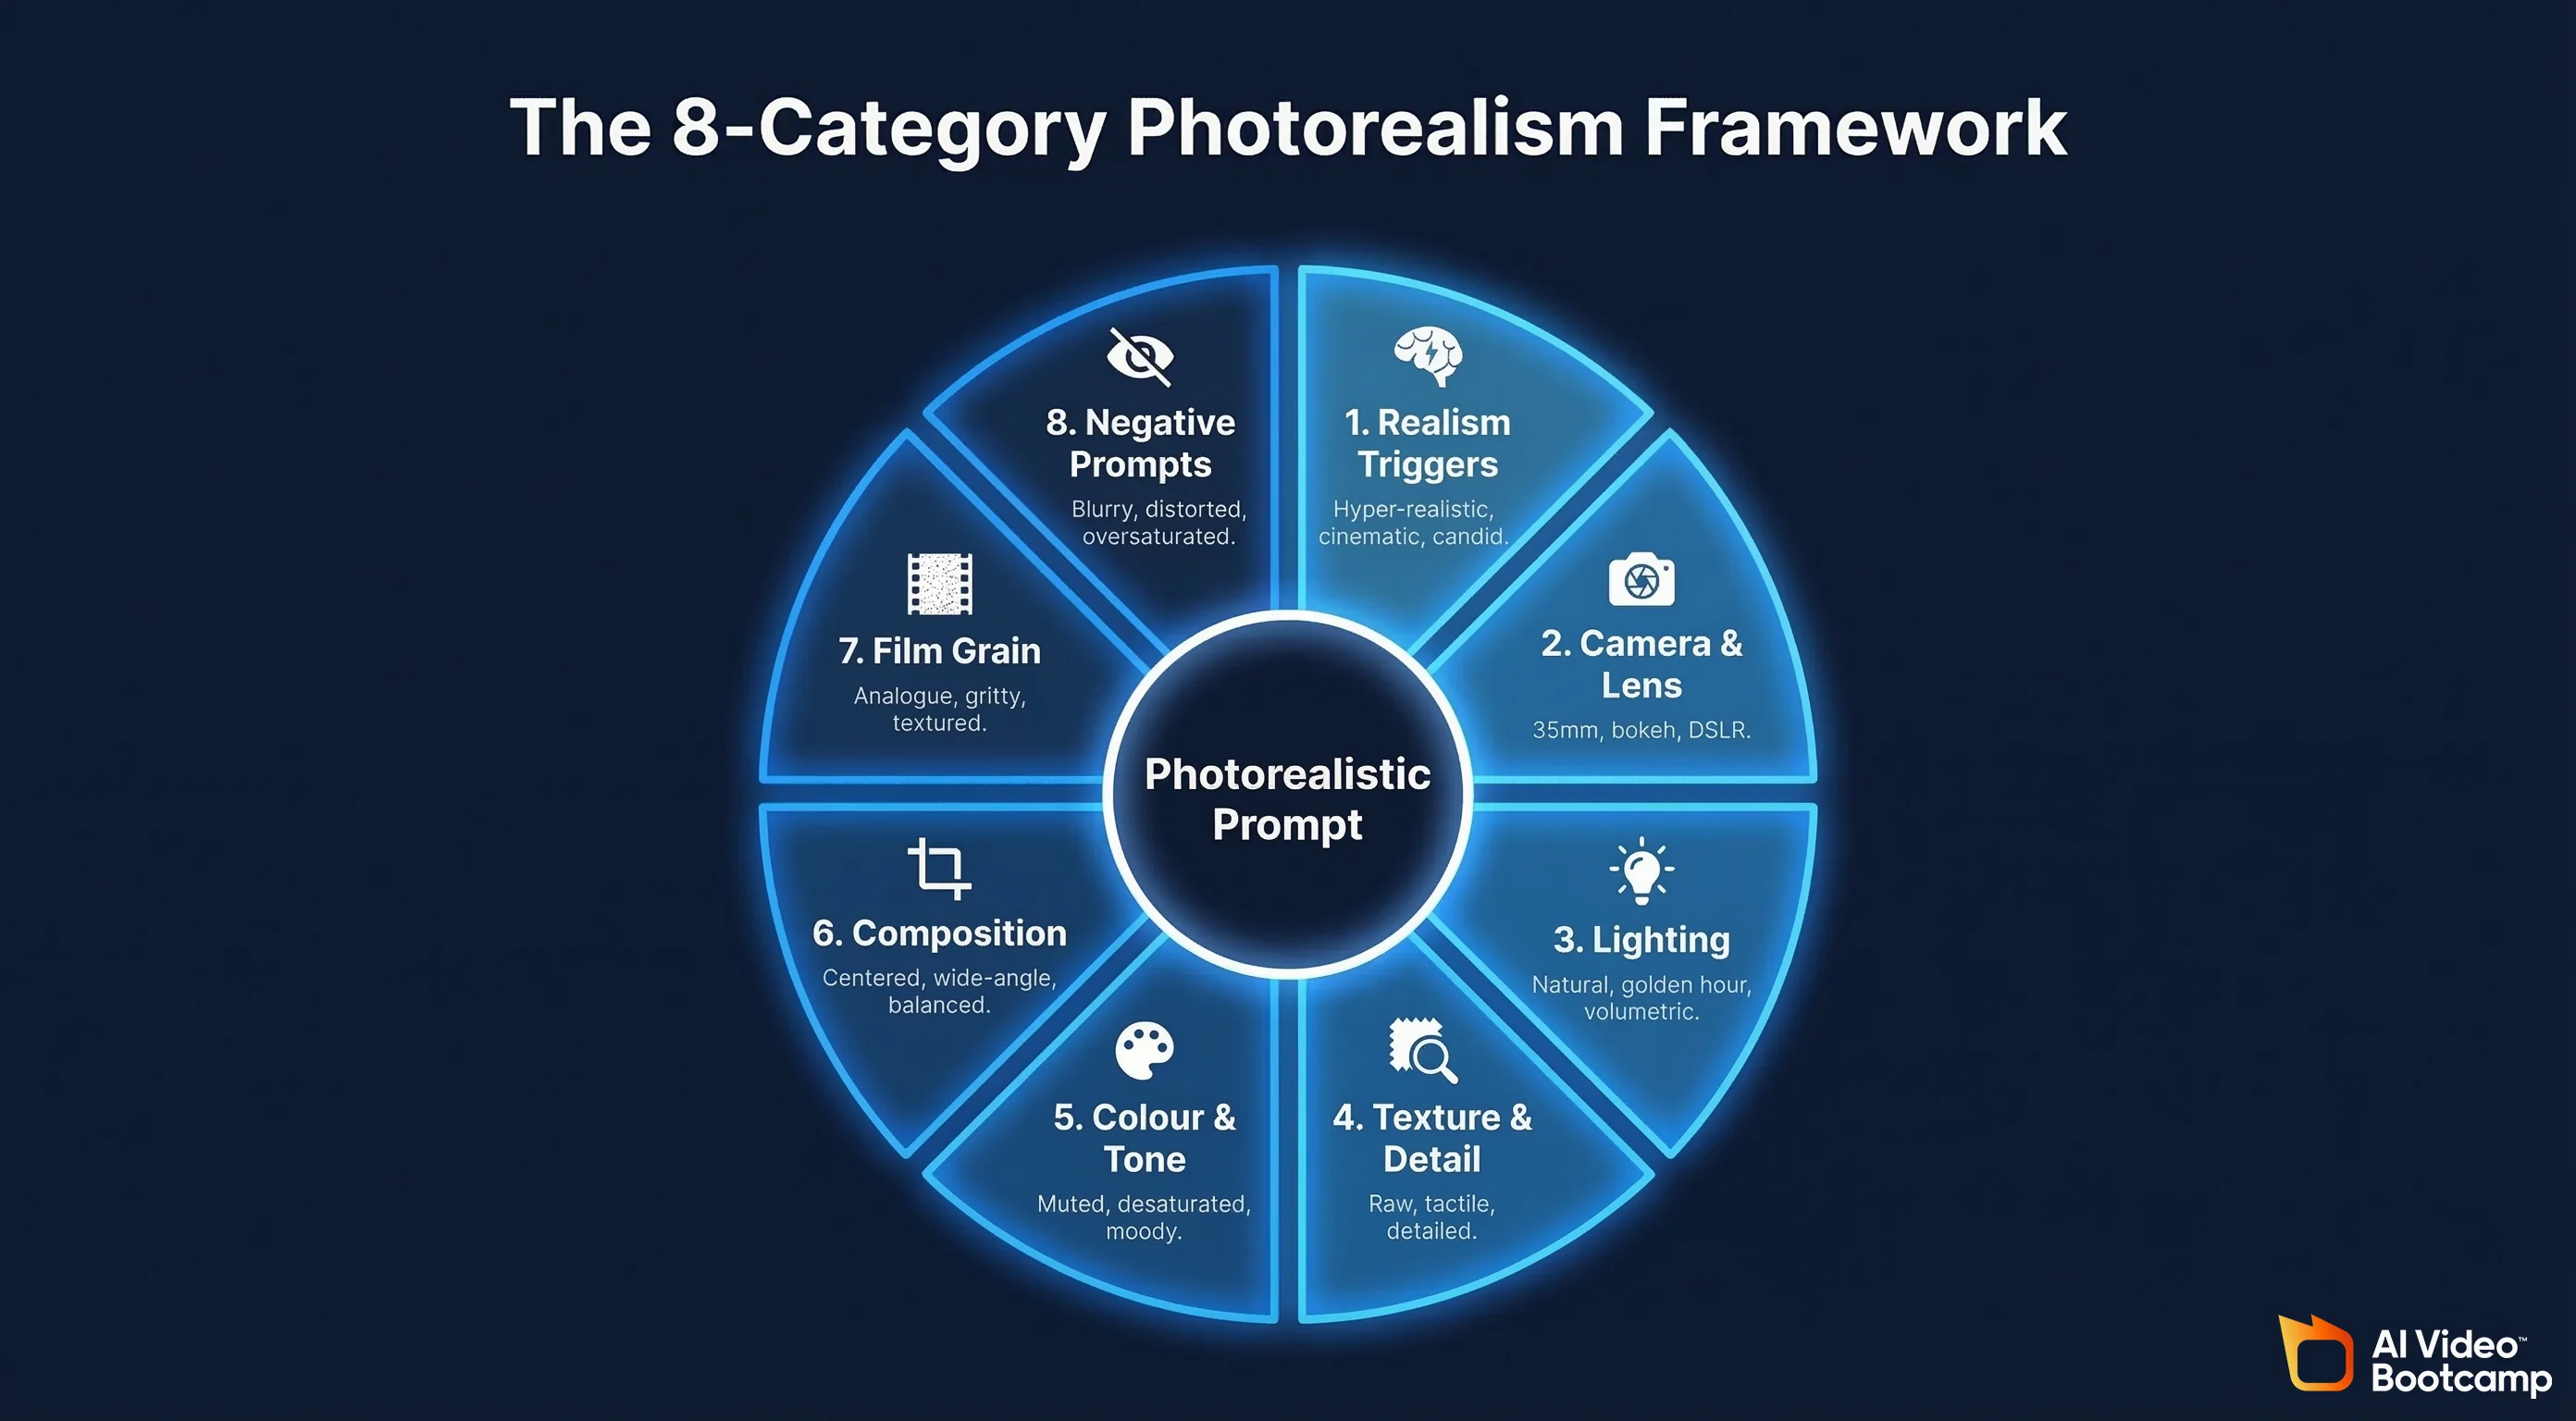
1. Core Photorealism Triggers
These are the foundation phrases that instruct the AI model to target realism rather than stylised or illustrative output. Always include two or three of these in every prompt where photorealism is your goal.
Essential trigger phrases: photorealistic, ultra-realistic, real-world photography, cinematic realism, lifelike details, natural imperfections, true-to-life textures, realistic skin.
Example: Ultra-realistic cinematic photography with natural imperfections.
These phrases act as a baseline instruction. Without them, most AI models default to outputs that are subtly stylised: overly smooth, digitally perfect, or slightly illustrative. Being explicit about wanting realism removes the guesswork and sets the right foundation for every subsequent element of your prompt.
The reason this matters is that AI image generation models are trained on datasets that include photography, illustrations, digital art, 3D renders, and more. A comprehensive survey of text-to-image diffusion models published on arXiv demonstrates how these models learn from diverse training data and require specific conditioning signals to produce photographic-quality outputs. The model does not inherently know you want photography unless you tell it. Realism triggers narrow the model’s output space toward photographic aesthetics specifically.
2. Camera and Lens Language
One of the biggest mistakes beginners make is forgetting to tell the AI that the image should look like a photograph taken by a real camera. Camera language pushes the model into photography mode rather than illustration mode, and this distinction is one of the most impactful changes you can make to your prompting.
Camera terms: DSLR photography, mirrorless camera, cinematic film still, documentary-style photography, street photography, studio portrait photography.
Lens and optics terms: 35mm lens (produces the most natural realism), 50mm lens (closest to human eye perspective), 85mm portrait lens (ideal for faces and headshots), shallow depth of field, natural bokeh, realistic focal length.
Example: Shot on a 35mm lens with shallow depth of field and natural bokeh.
These phrases instruct the AI to simulate real optical behaviour: the way a physical lens focuses, how background elements blur, and how light falls across the frame. A real camera produces specific optical characteristics that human eyes recognise subconsciously, and prompting for these characteristics triggers the model to reproduce them.
3. Lighting Language
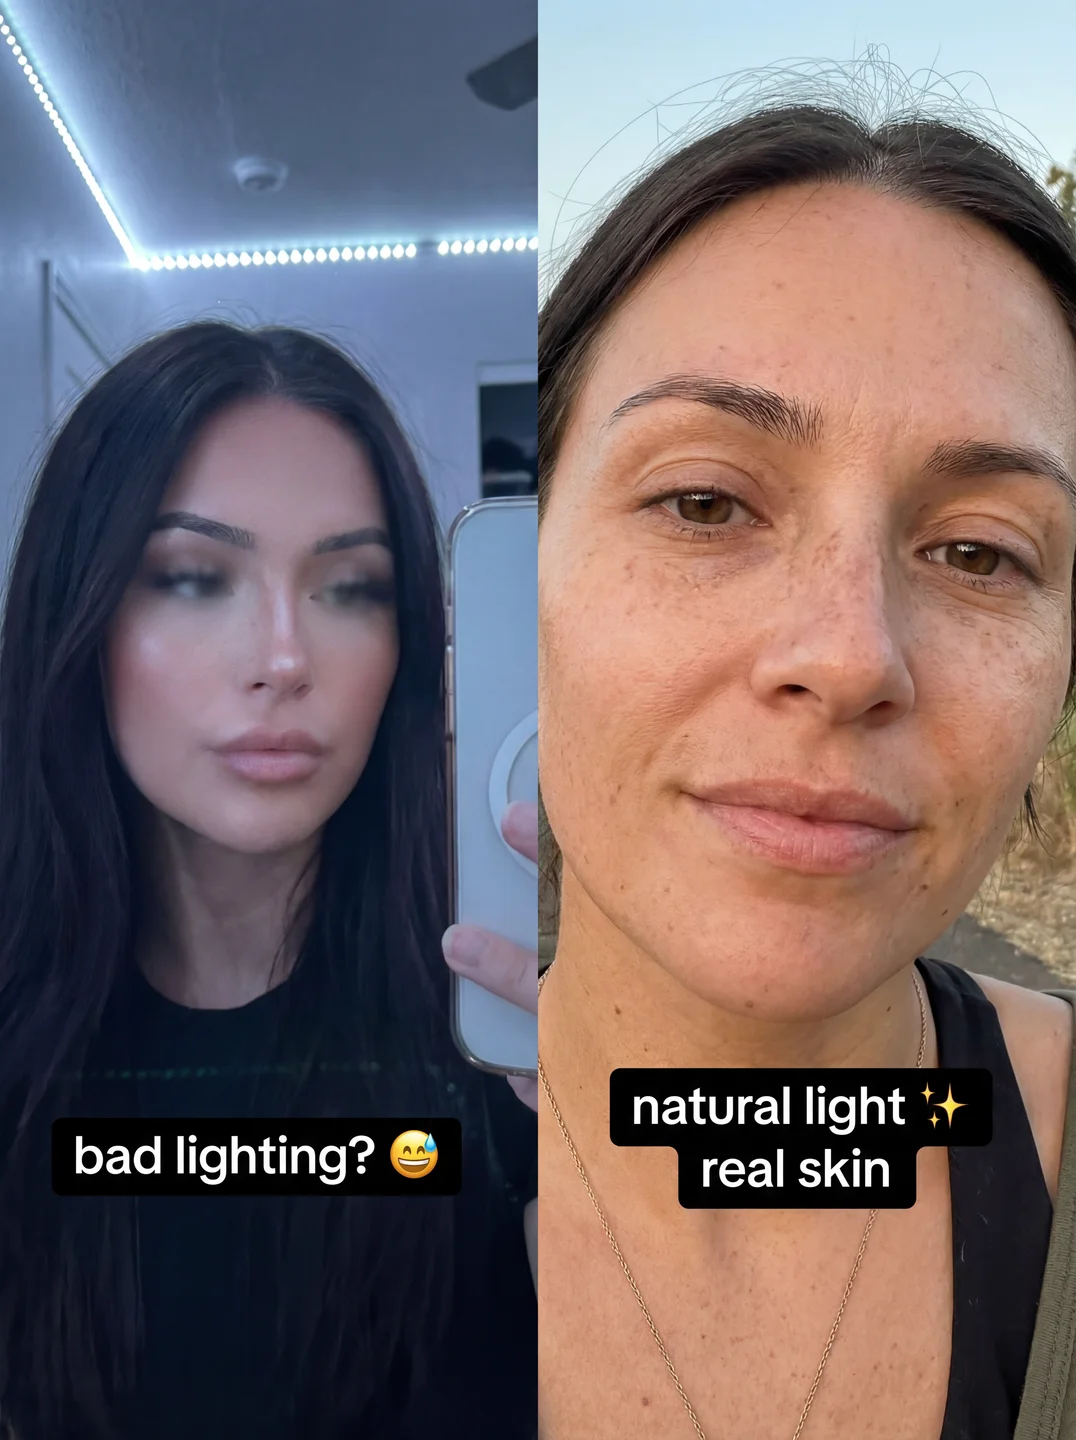
Lighting is one of the strongest signals of photographic realism. The human eye is extraordinarily sensitive to how light behaves, and even subtle inaccuracies in lighting make an image feel artificial. The more your lighting description resembles real-world photography scenarios, the more believable your output will be.
Realistic lighting phrases: natural light, soft window light, golden hour sunlight, overcast daylight, practical lighting, studio softbox lighting, subtle rim light, realistic shadows.
Phrases to avoid (unless intentionally creating stylised work): neon glow, magical lighting, fantasy lighting, dramatic HDR.
Example: Soft natural daylight with realistic shadows.
Natural daylight is particularly powerful as a prompting term because it highlights imperfections and texture, which are the hallmarks of authentic photography. Studio lighting terms like softbox and rim light work well for portrait and product photography scenarios. The key principle is specificity: do not just say “good lighting.” Describe what kind of light, where it comes from, and how it interacts with the subject.
4. Texture and Detail Language
AI images often look fake because surfaces appear too smooth. Human skin, fabric, metal, and natural materials all have micro-texture that cameras capture and eyes expect to see. Adding texture instructions to your prompts prevents the common plastic look that betrays AI-generated content.
Texture phrases: high-detail textures, realistic surface detail, visible pores, fabric grain, skin micro-details, dust and scratches, slight imperfections, tactile materials.
Example: Visible skin pores, natural fabric grain, slight imperfections.
The single most important concept here is imperfections. Real life is imperfect. Real skin has pores, blemishes, and tonal variation. Real fabric has wrinkles and wear. Real surfaces have dust and scratches. AI images are often too perfect, which paradoxically makes them look fake. By intentionally introducing imperfections through your prompt, realism increases dramatically. This is the technique that produces the most visible improvement in output quality, and it is the one most beginners overlook.
5. Colour and Tone Control
Real photography rarely uses extreme colours. The images that look most authentically photographic use restrained, natural colour palettes. Controlling colour language in your prompt keeps outputs grounded in photographic reality rather than drifting into digital illustration territory.
Realistic colour phrases: natural colour grading, muted tones, earthy colour palette, cinematic colour balance, realistic contrast, soft highlights and deep shadows.
Phrases to avoid: hyper-saturated colours, neon colour palettes, cartoon colour grading, vibrant rainbow tones.
Subtlety is the principle here. Real photographs, especially those shot in natural light, have a restrained colour palette with natural variation. Over-saturated colours are one of the fastest ways to make an AI image look generated. Prompting for this restraint produces images that feel photographed rather than rendered.
6. Composition Language
Composition phrases influence how the AI frames the scene, and they subtly push the output toward feeling like it was captured by a photographer making conscious framing decisions rather than generated by software.
Composition terms: rule of thirds, eye-level shot, candid moment, unstaged composition, natural framing, foreground and background separation, over-the-shoulder angle, Dutch angle.
These instructions guide the AI toward photographic composition conventions that audiences associate with real imagery. A “candid moment” instruction, for example, produces output that feels spontaneous rather than posed, which significantly increases the perception of authenticity.
7. Film Grain and Image Quality
Once the fundamentals are correct, adding film and sensor characteristics provides the final layer of photographic authenticity. Real cameras produce subtle grain, noise, and optical imperfections that digital renders do not. Including these in your prompt adds the finishing touches that make images feel captured rather than computed.
Useful phrases: subtle film grain, cinematic grain, high dynamic range (use sparingly), sharp focus, clean but not overly polished, sensor noise in shadows.
Film grain and sensor noise are natural photographic imperfections that the human eye associates with real imagery. Adding these signals to your prompt is particularly effective for portraits and street photography scenarios where a slightly raw, unprocessed aesthetic increases authenticity.
8. Negative Prompts
If the AI keeps producing results that look too artificial despite your positive prompting, negative instructions act as guardrails that prevent the model from drifting into non-photographic styles.
Essential negative phrases: no cartoon style, no CGI, no 3D render, no game engine, no plastic skin, no unrealistic lighting, no text, no logo, no watermark.
Negative prompts are particularly important when generating human subjects. The plastic skin problem — where AI-generated faces have unnaturally smooth, waxy-looking skin — is one of the most common signs of AI imagery. Explicitly instructing the model to avoid this forces it to produce more natural-looking skin texture. Combine negative prompts with positive texture instructions for the strongest results.
Putting It All Together: The Photorealism Formula
A complete photorealistic prompt combines elements from each category into a single, structured instruction. Here is the formula:
[Realism trigger] + [Subject description] + [Camera/lens] + [Lighting] + [Texture/detail] + [Colour/tone] + [Composition] + [Grain/quality] + [Negative instructions]
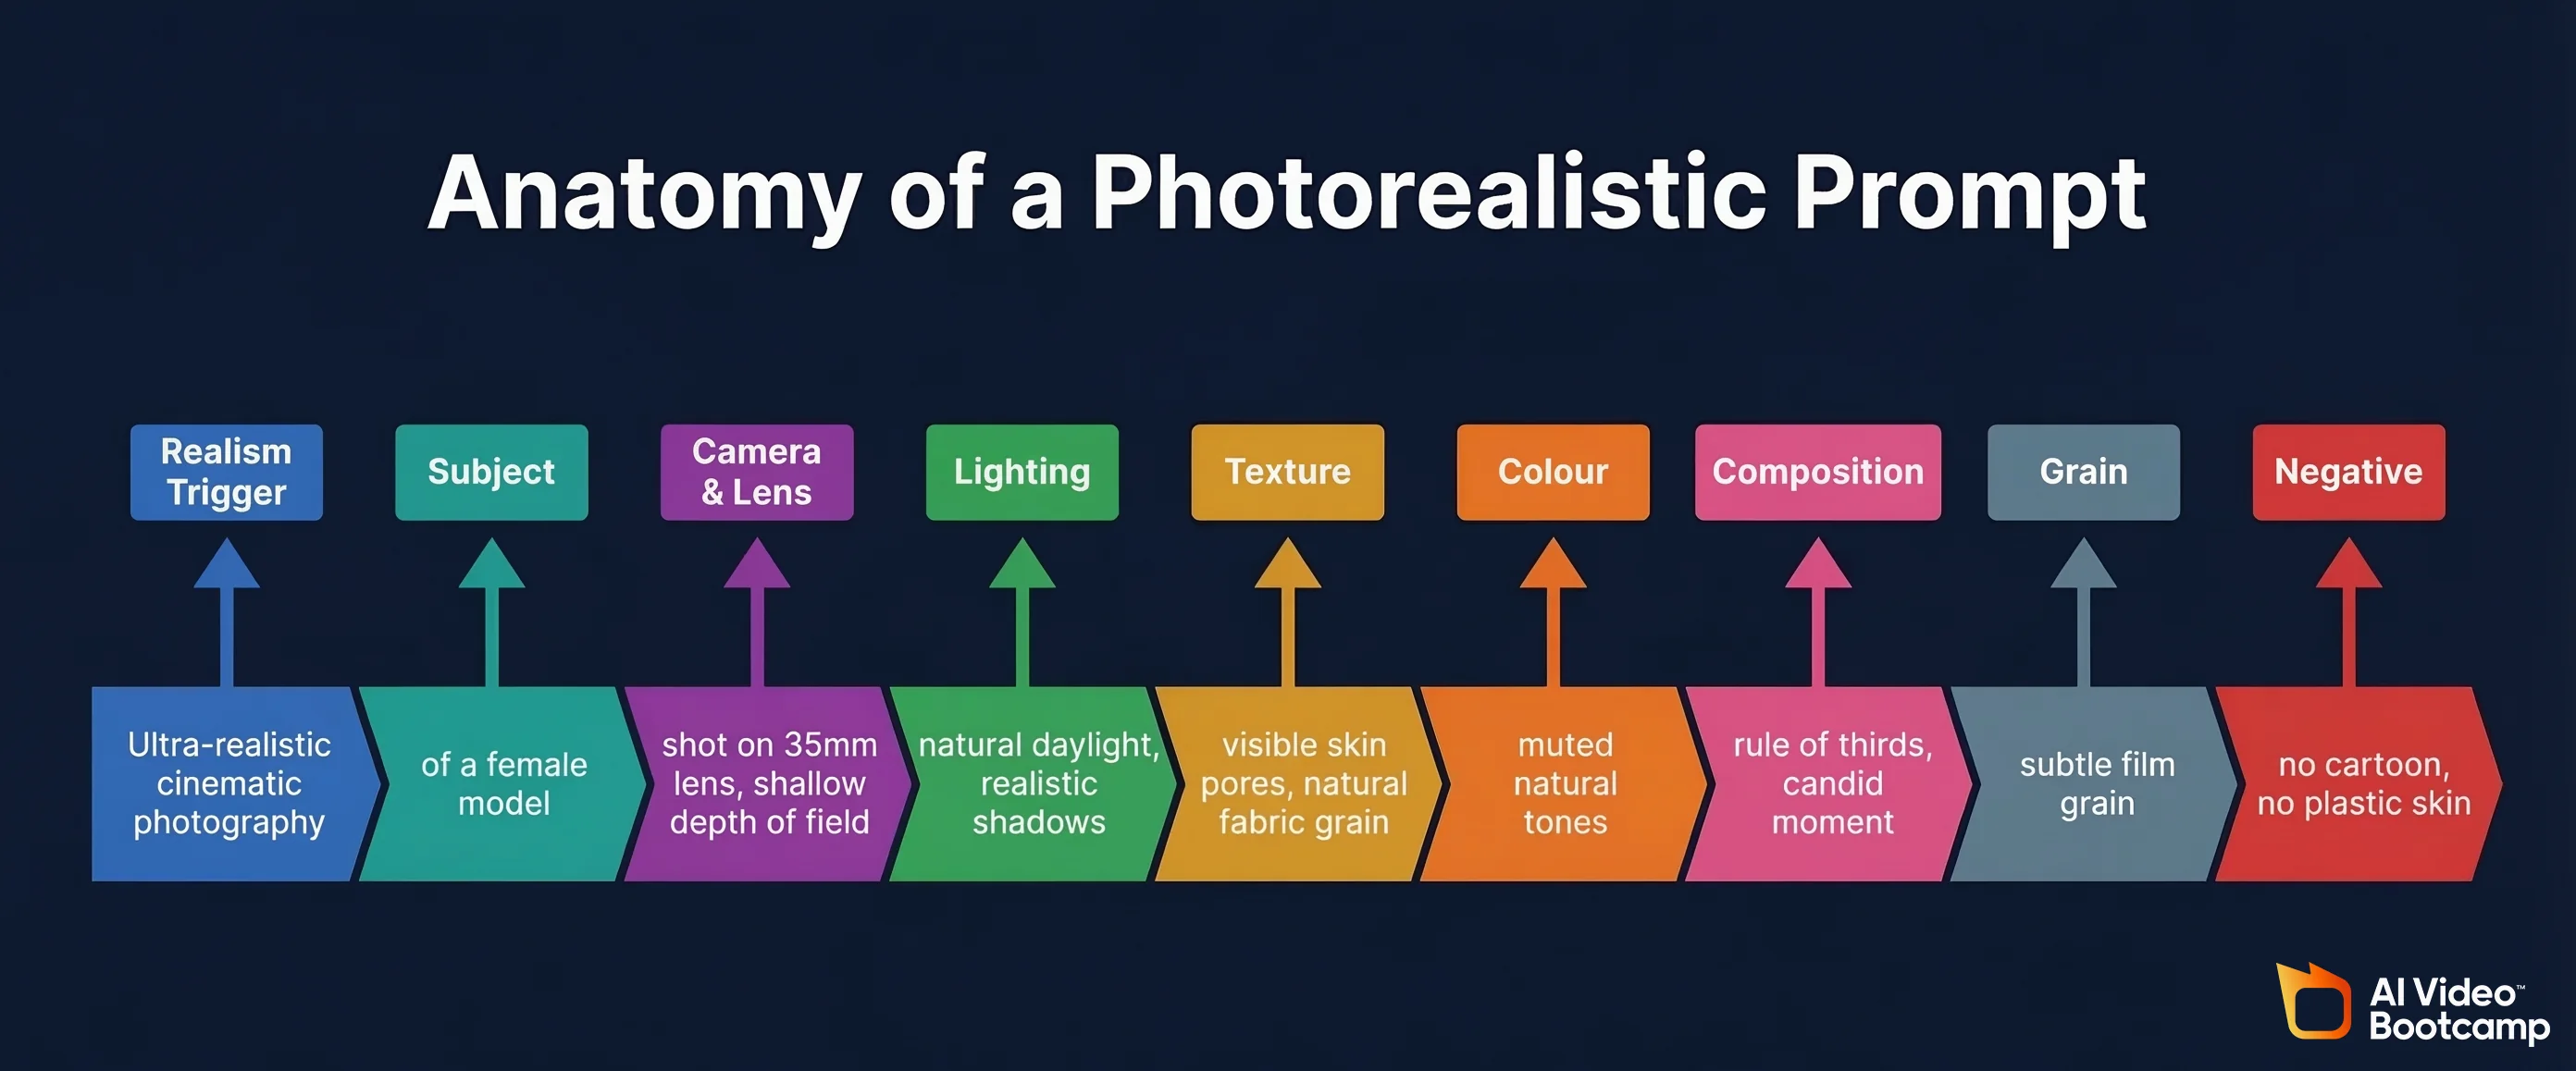
Example prompt: Ultra-realistic cinematic photography of a female model, shot on a 35mm lens with natural daylight lighting, realistic shadows, shallow depth of field, true-to-life textures, visible skin imperfections, subtle film grain, natural colour grading. No cartoon style, no plastic skin.
From this foundation, you add context: what the person is doing, where the scene takes place, and what style of photograph it represents. The realism framework stays constant while the subject and scenario change with each generation.
Using ChatGPT to Expand Your Prompts
Once you have a basic prompt using the framework above, you can use ChatGPT to expand it into a much more detailed instruction that covers every aspect of the image. Paste your prompt into ChatGPT and ask it to make it far more detailed and cinematic. ChatGPT will expand your core prompt into a comprehensive instruction that specifies precise lens settings, detailed lighting behaviour including bounce light and ambient occlusion, micro-texture details for skin and materials, exact colour grading characteristics, and atmospheric elements that add depth.
This technique is especially powerful for creating avatar and influencer content where maximum realism is essential. A prompt expanded by ChatGPT might specify details like physically accurate soft highlights, natural tonal variation in skin, realistic weave patterns in fabric, and organic film grain that makes the image indistinguishable from real photography.
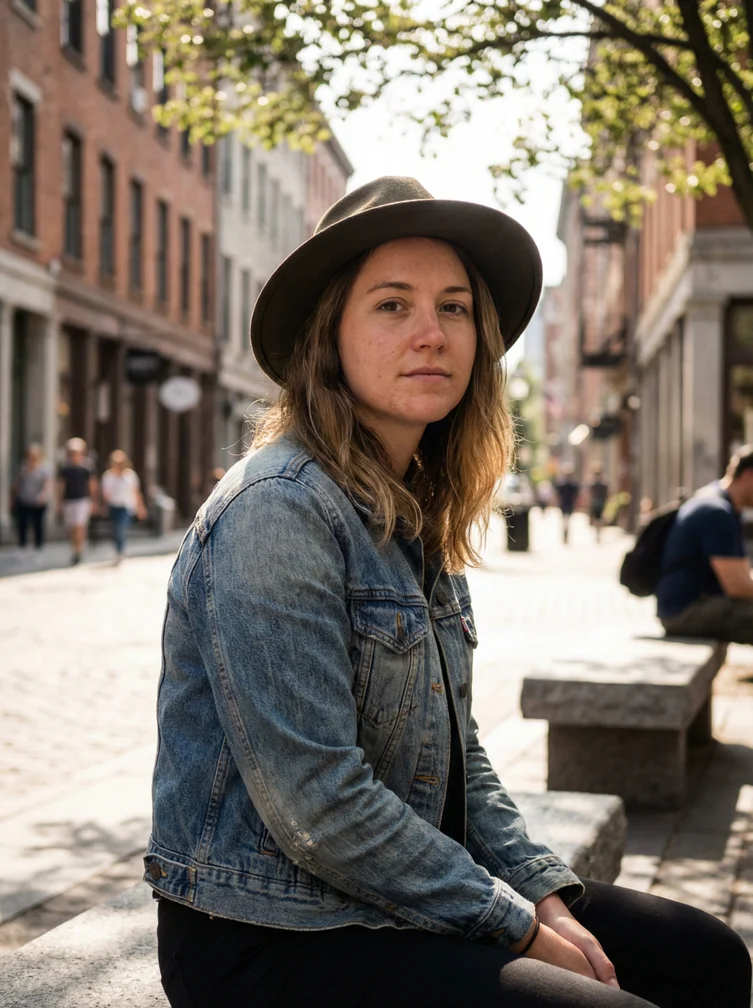
Photorealistic Avatar and Influencer Prompts
AI influencer and avatar content represents one of the fastest-growing applications of photorealistic image generation. The virtual influencer market was valued at $6.06 billion in 2024 according to Grand View Research, with the human avatar segment accounting for over 68% of revenue. Creating convincing human avatars requires the most demanding application of every technique in this guide.
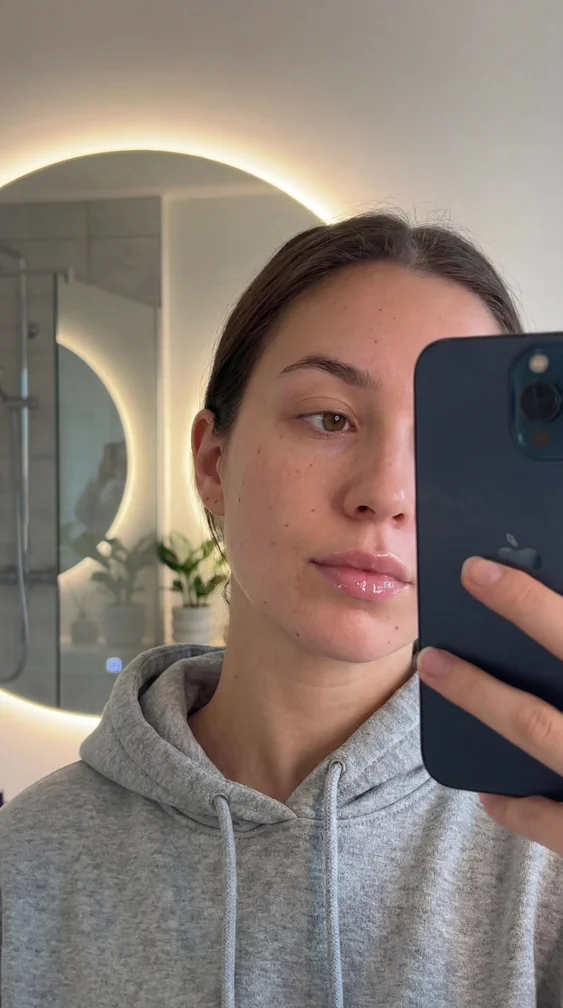
For avatar content, the key additions to your standard realism prompt are device-specific camera references (iPhone selfie aesthetic, front-facing camera), context-specific settings (bathroom mirror, coffee shop, gym), natural human behaviours (messy hair, casual pose, unstaged expression), and platform-specific formatting (vertical aspect ratio for TikTok and Instagram Stories, square for feed posts).
Example avatar prompt: Ultra-realistic, close-up front-facing smartphone selfie of a beautiful young woman standing in a modern, softly lit bathroom, captured as if filmed on a real iPhone Pro front camera in 8K resolution. She is holding her phone slightly angled in front of her face, partially obscuring it in a natural, casual influencer pose, with her fingers and phone edges visible in the frame. The lighting comes from warm white LED strips and ceiling lights, creating soft facial highlights, realistic skin shine, and gentle light bloom in the mirror. Her skin shows real-world micro-detail including pores, faint blemishes, subtle redness, and natural oiliness — nothing airbrushed or plasticky. She is wearing a loose, casual hoodie with visible fabric fibers, folds, and natural wrinkles. The mirror shows authentic reflections, slight glare, and depth, with soft background blur from shallow depth of field. The overall look is raw, unfiltered UGC influencer style, like a real bathroom mirror selfie posted to TikTok or Instagram Stories, with natural phone camera sharpness, slight digital noise, and zero artificial beauty retouching.
Model-Specific Prompting Tips
While the core framework applies universally, each AI image generation model responds slightly differently to prompting. Understanding these nuances allows you to maximise photorealism on whichever platform you use.
NanoBanana PRO (via Higgsfield / Gemini)
This is currently the strongest model for photorealistic human subjects. It responds exceptionally well to detailed skin texture instructions and camera-specific language. When using NanoBanana PRO, lean heavily into micro-detail descriptions: individual hair strands, skin pores, subtle oiliness, natural tonal variation. The model’s character consistency features also make it ideal for AI influencer workflows where the same face must be maintained across many images.
Midjourney
With over 21 million registered users and 26.8% global market share, Midjourney is the most widely used image generation platform. Version 7 introduced significant improvements to hand and face rendering, which are the areas where photorealism matters most. Midjourney responds well to photographic style references and lens specifications. Its Draft Mode enables faster iteration, allowing you to generate and refine concepts quickly before committing to full-resolution outputs.
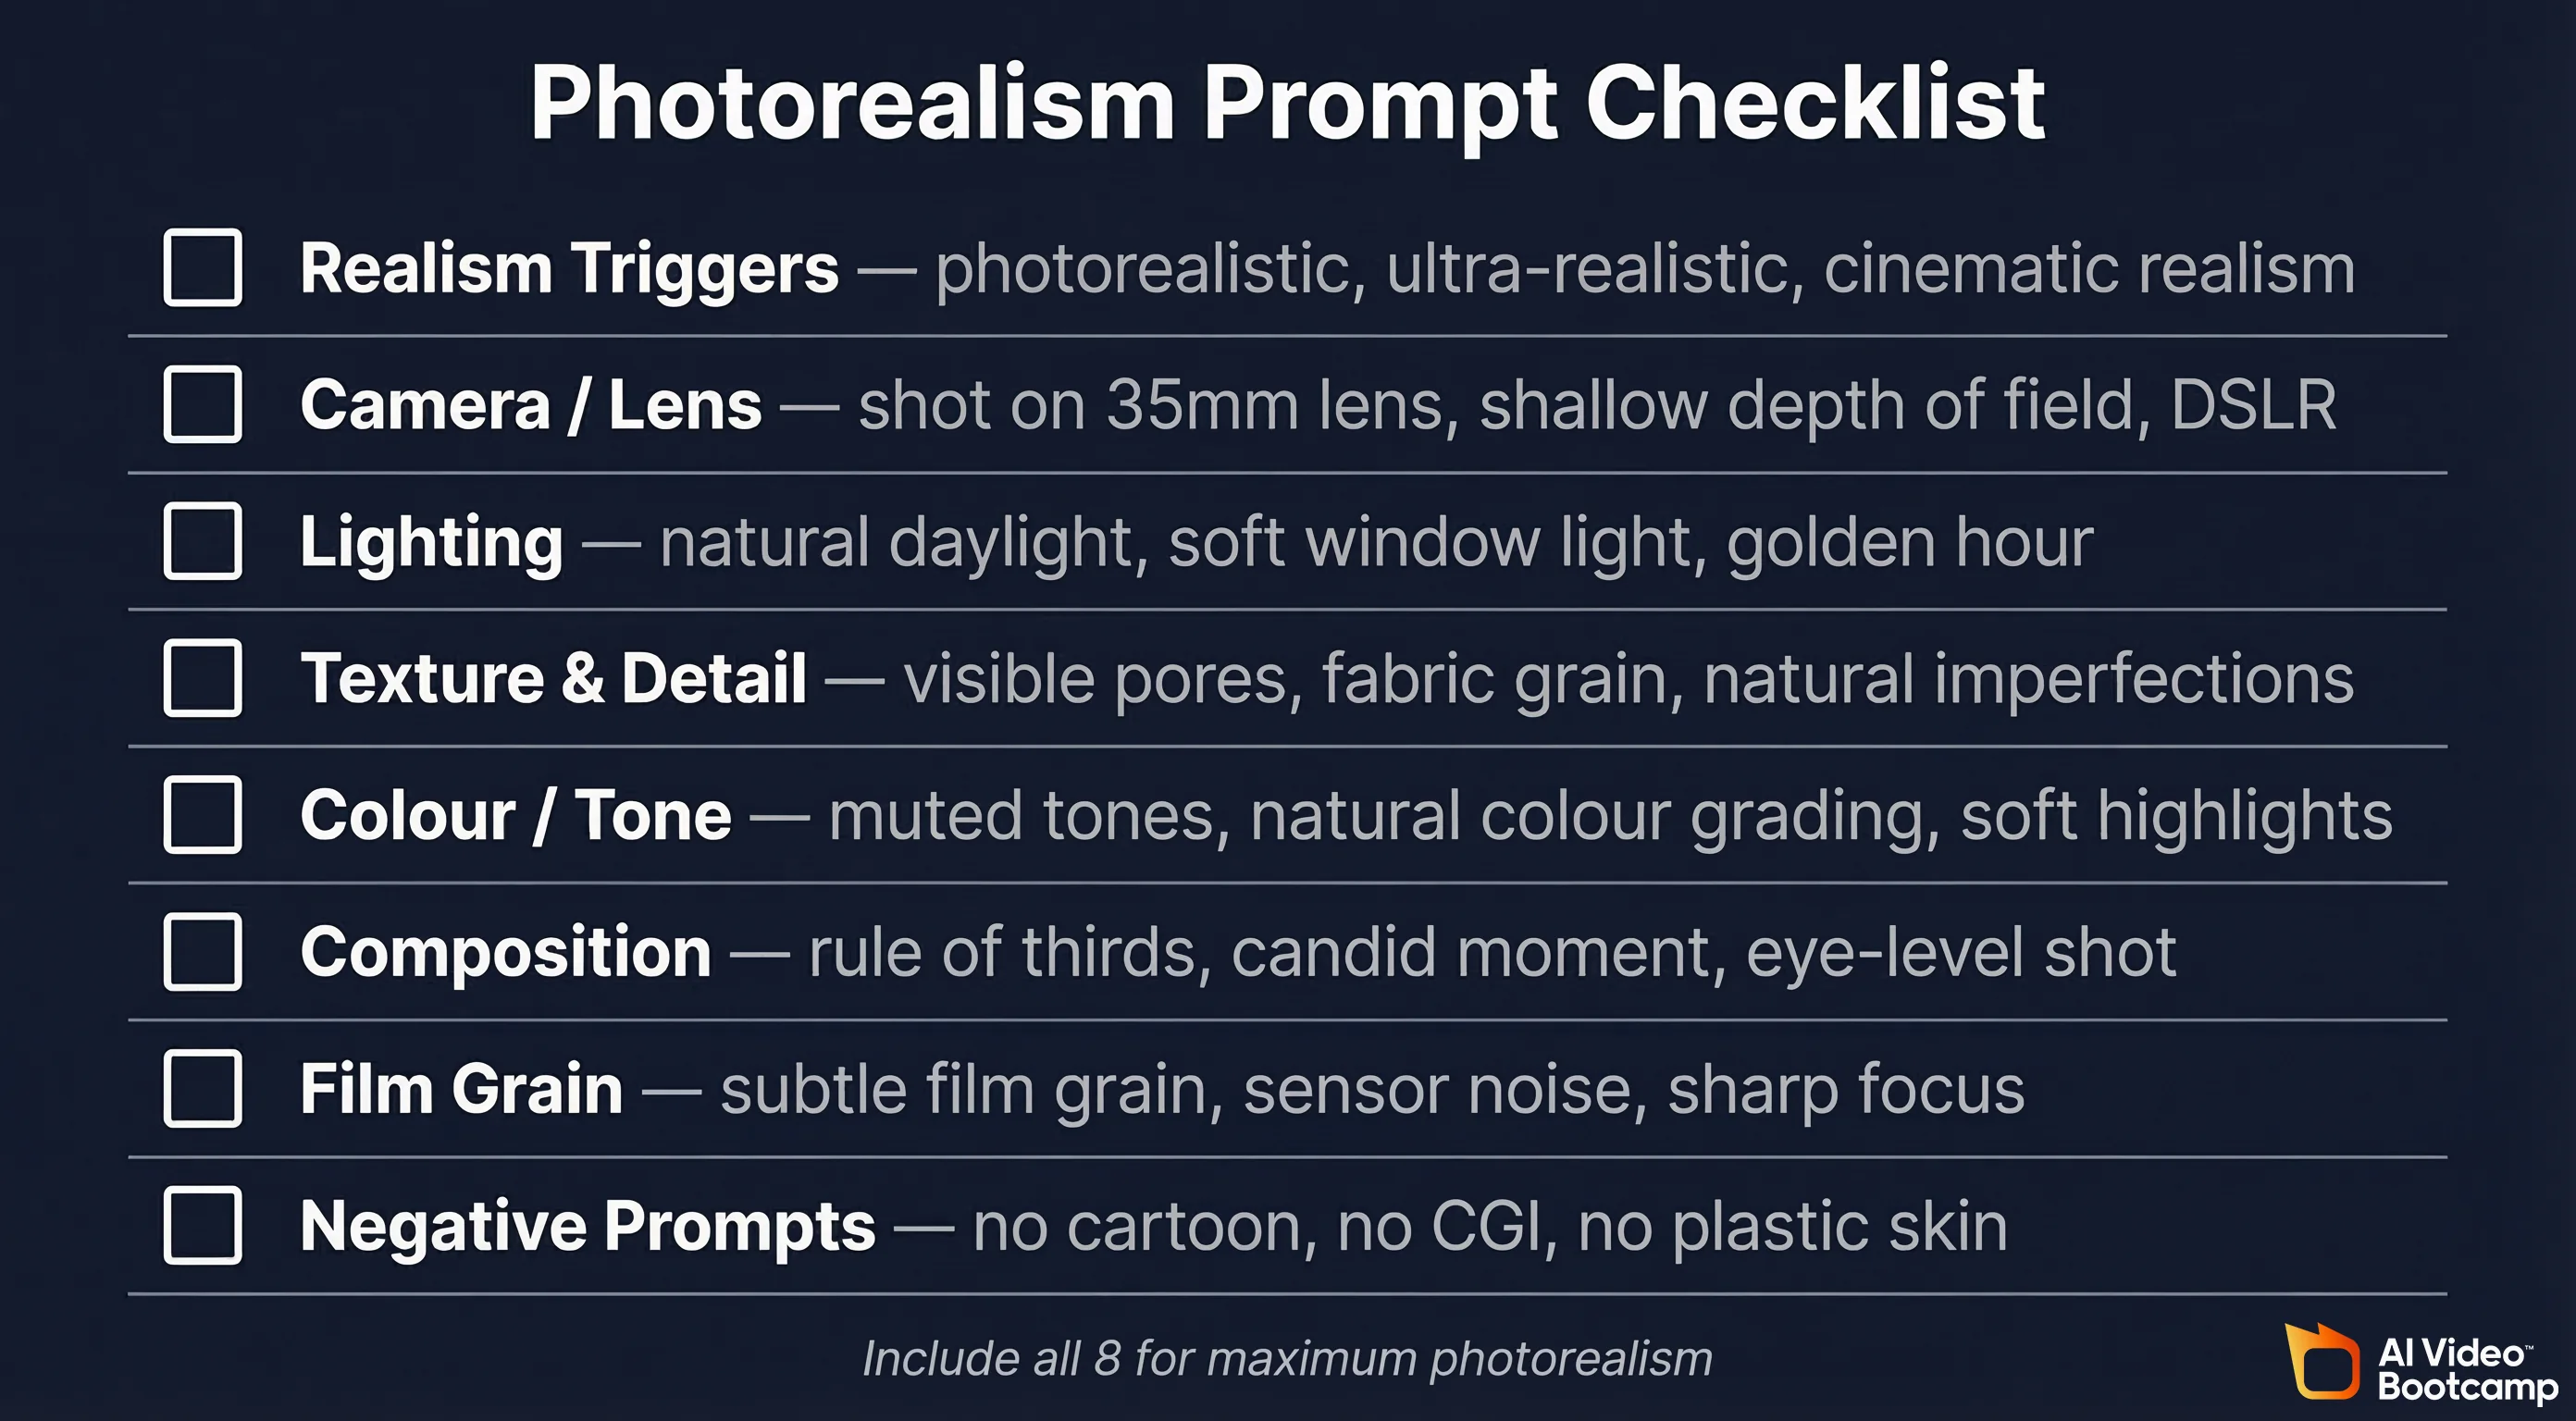
The Photorealism Prompt Checklist
Before generating any image where photorealism is your goal, run through this checklist to ensure your prompt covers the essential elements.
| Category | Have You Included? |
|---|---|
| Realism Triggers | At least 2–3 phrases: photorealistic, ultra-realistic, cinematic realism |
| Camera / Lens | Specific camera type and lens focal length: shot on 35mm lens, DSLR |
| Lighting | Real-world lighting source: natural daylight, soft window light, golden hour |
| Texture / Detail | Micro-detail instructions: visible pores, fabric grain, imperfections |
| Colour / Tone | Restrained colour language: natural colour grading, muted tones |
| Composition | Framing instruction: rule of thirds, candid moment, eye-level |
| Grain / Quality | Photographic texture: subtle film grain, sensor noise, sharp focus |
| Negative Prompts | Style guardrails: no cartoon, no CGI, no plastic skin, no 3D render |
Common Prompting Mistakes That Kill Realism
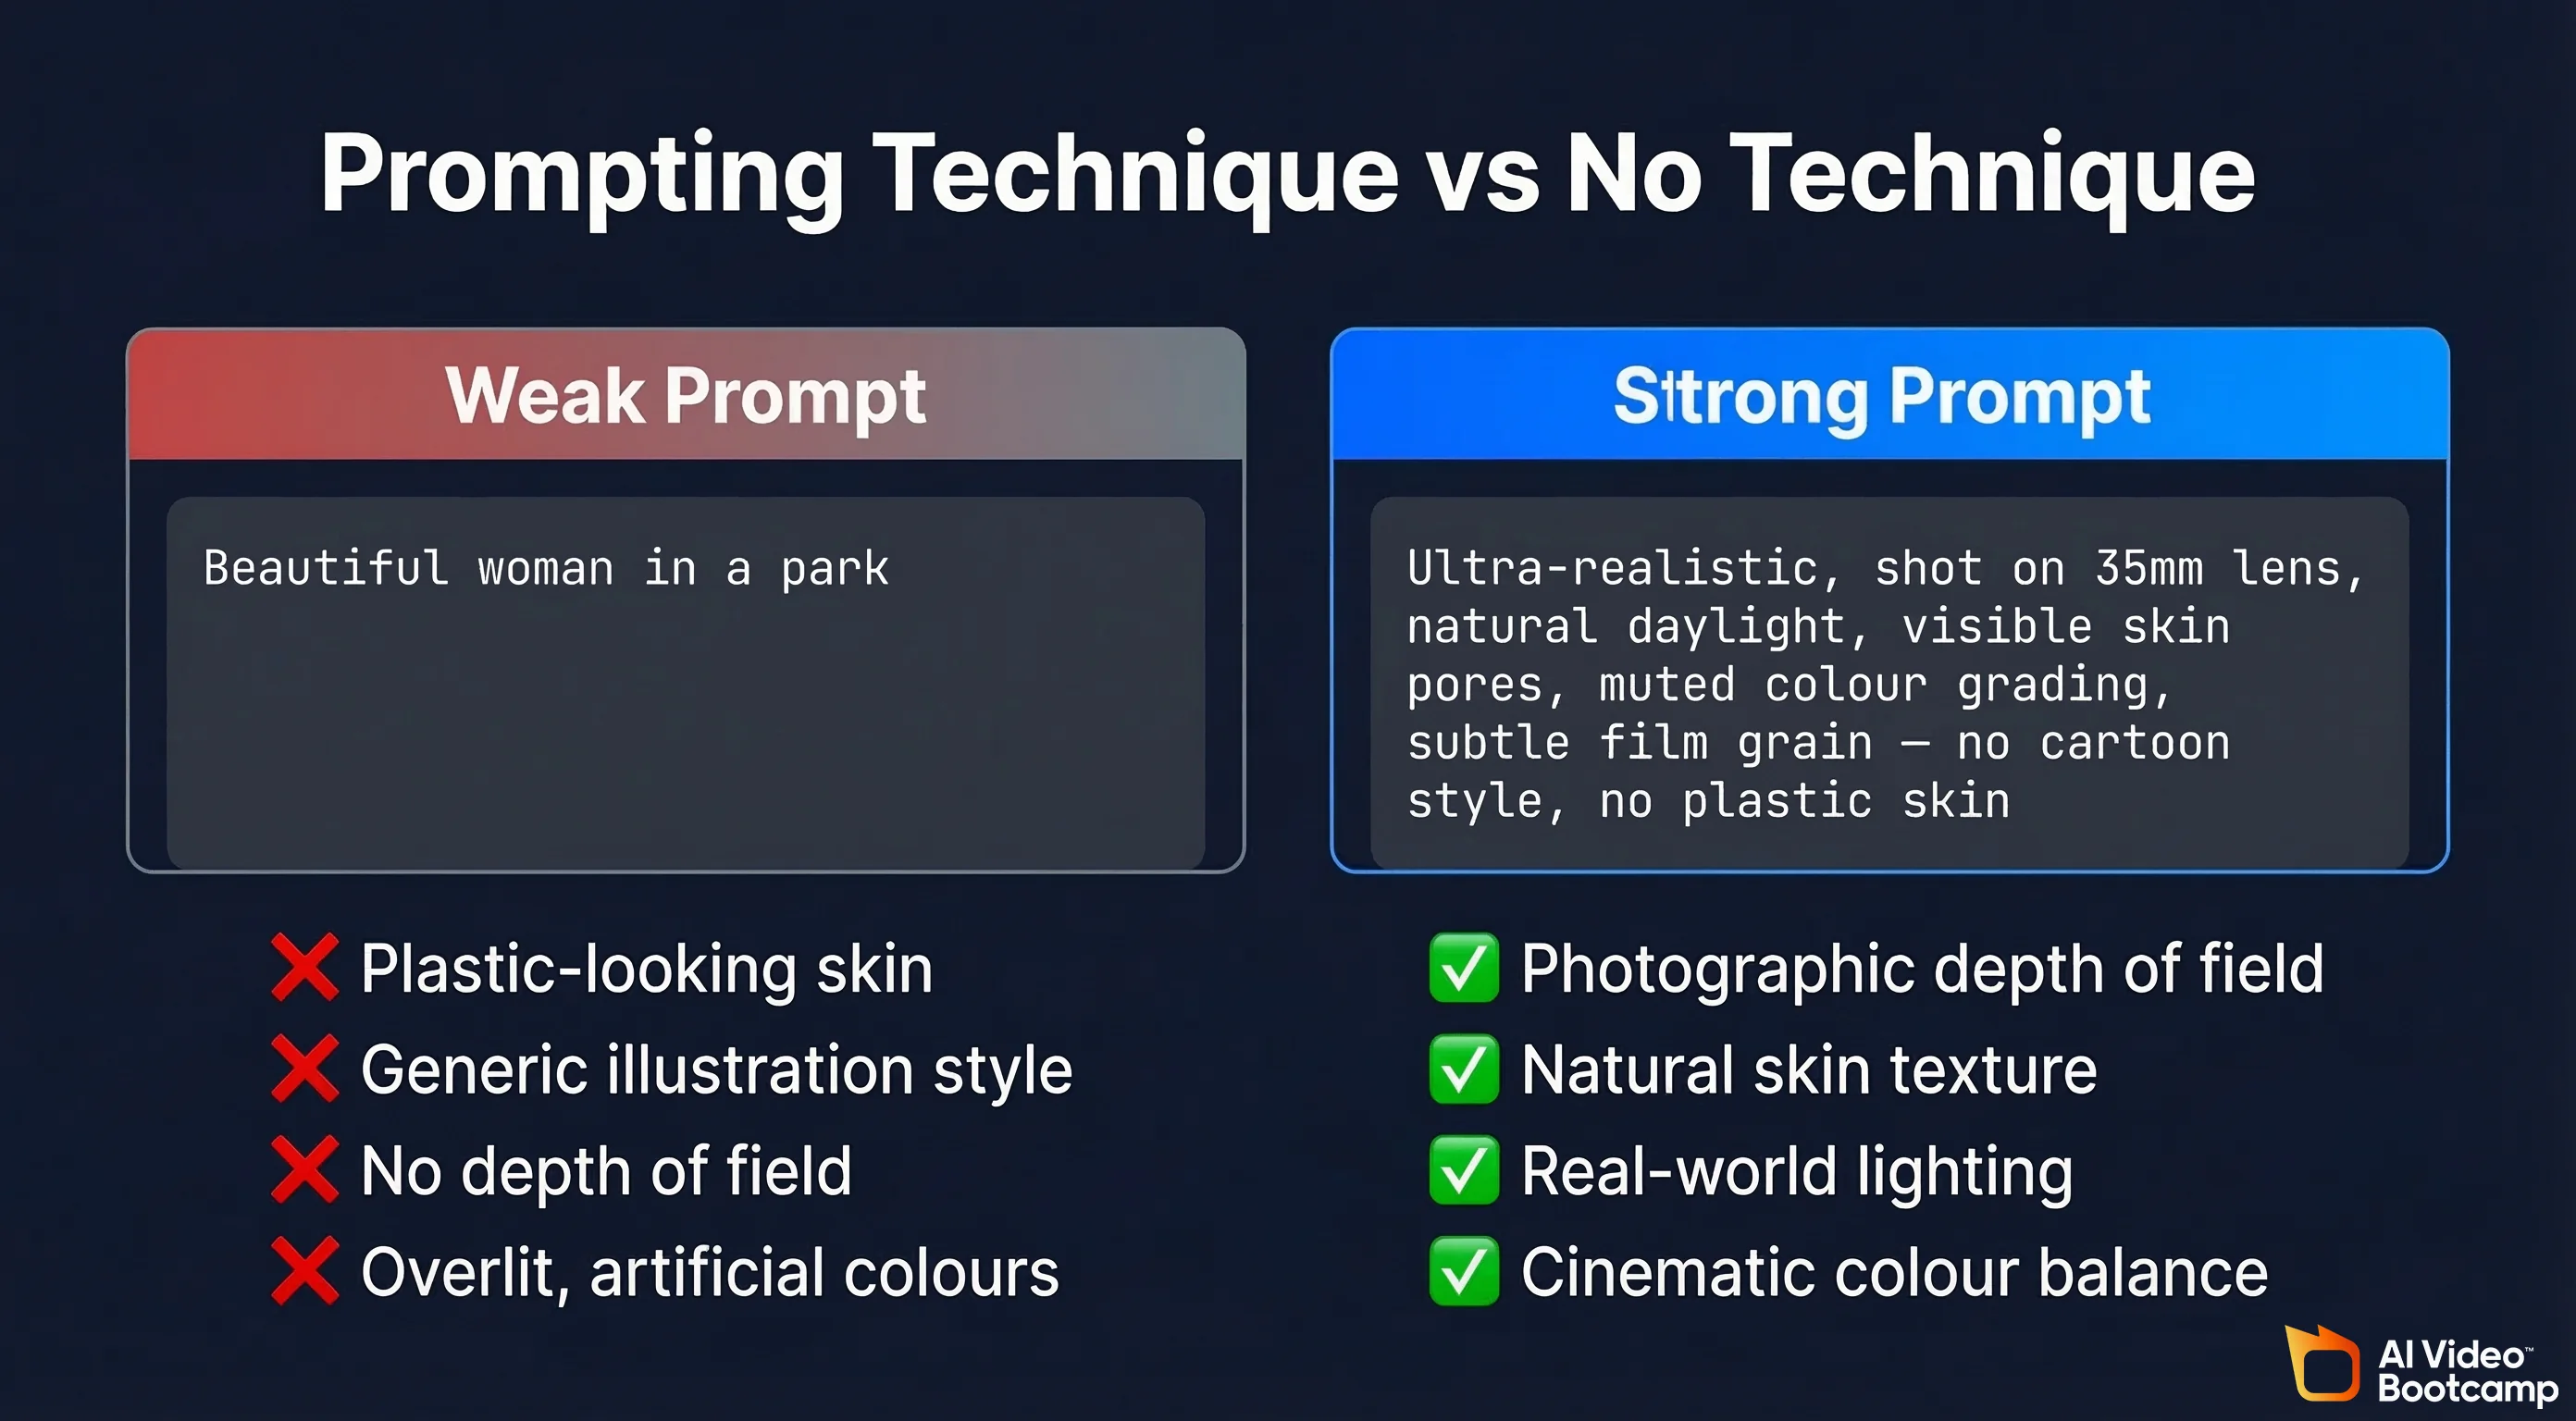
Being Too Vague
Prompts like “beautiful woman in a park” produce generic, obviously AI-generated output. Specificity is the engine of realism. Describe the exact lighting, the lens, the skin detail, the colour palette. Every specific instruction you add narrows the model’s output toward photographic authenticity.
Forgetting Imperfections
Perfect symmetry, flawless skin, and ideal proportions are the hallmarks of AI-generated imagery. Real people have asymmetry, blemishes, pores, and irregular features. Explicitly prompting for natural imperfections is one of the highest-impact changes you can make.
Using Fantasy or Illustration Language
Words like “magical,” “ethereal,” “dreamlike,” or “stunning” push the model away from photographic realism and toward stylised, illustrative output. If your goal is photorealism, avoid any language that implies artistic interpretation. Stick to photographic vocabulary: captured, shot on, natural daylight, candid moment.
Over-Specifying Colours
Describing “vivid blue eyes,” “bright red lipstick,” or “vibrant green dress” can push the model toward over-saturated, unnatural colour rendering. Use restrained colour descriptions: soft blue eyes, muted red lip, olive-toned dress. Subtlety in colour language produces subtlety in output.
Ignoring the Background
Many beginners focus entirely on the subject and forget to describe the background. An unrealistic background instantly destroys the photographic illusion, even if the subject looks perfect. Describe the background environment with the same specificity you give the subject, including its depth of field, lighting conditions, and level of detail.
Practice Exercises to Build Your Photorealism Skills
Reading about prompting techniques is useful. Practising them is what builds skill. Here are five structured exercises that will accelerate your development.
Exercise 1 — The Baseline Test: Generate an image of a person using a simple, unprompted description like “portrait of a woman.” Then generate the same concept using the full eight-category framework from this guide. Compare the two outputs side by side. This single exercise demonstrates the power of structured prompting more convincingly than any explanation.
Exercise 2 — The Lighting Challenge: Generate the same subject under five different lighting conditions: golden hour sunlight, overcast daylight, soft window light, studio softbox, and harsh midday sun. Observe how each lighting instruction changes the feel and realism of the output. This builds your intuition for which lighting terms produce the most natural results.
Exercise 3 — The Imperfection Test: Generate two versions of the same portrait: one with no texture or imperfection instructions, and one with detailed skin micro-texture, visible pores, faint blemishes, and natural tonal variation. The difference will be striking and will permanently change how you prompt for human subjects.
Exercise 4 — The Platform Match: Generate three images of the same character formatted for different platforms: a vertical TikTok-style selfie, a square Instagram feed post, and a horizontal cinematic landscape shot. This trains you to adapt your prompts for different commercial applications.
Exercise 5 — The ChatGPT Expansion: Write a basic 30-word realism prompt, then use ChatGPT to expand it to 150+ words. Generate both versions and compare. This teaches you how much additional detail the model can use and what level of specificity produces the best results.
Share your practice results in the AI Video Bootcamp community for feedback from 14,000+ creators who are working on the same skills.
Frequently Asked Questions
What is the best AI model for photorealistic images?
For human subjects and avatar content, NanoBanana PRO (accessible through Higgsfield AI or Gemini) currently produces the most consistently realistic results with locked-in character consistency.
Do I need to use all eight prompting categories in every image?
Not always. For quick iterations, using core realism triggers, camera language, and lighting language will produce a significant improvement over unprompted generation. For maximum photorealism, especially with human subjects, include all eight categories. With practice, you will develop a feel for which elements matter most for each type of image.
How do I make AI-generated skin look real?
This is the most common challenge. Use texture phrases like “visible pores,” “natural skin micro-texture,” “faint blemishes,” “subtle oiliness,” and “natural tonal variation.” Combine these with negative prompts like “no plastic skin” and “no airbrushing.” Specify realistic lighting that interacts naturally with skin, such as “soft natural daylight with realistic shadows.” The combination of positive texture instructions and negative smoothness restrictions produces the most convincing skin rendering.
Can I use these techniques across different AI models?
Yes. The principles of photorealistic prompting — camera language, lighting description, texture detail, and negative instructions — transfer across all major image generation models. The specific phrasing may need slight adjustment for each platform, but the underlying framework works universally. Research from the Oxford Academic National Science Review on diffusion model capabilities confirms that conditioning signals (prompts) fundamentally shape output quality regardless of the specific architecture.
How long should a photorealistic prompt be?
There is no strict rule, but effective photorealistic prompts typically range from 50 to 200 words. Shorter prompts of 20 to 30 words can work if they hit the key categories, but longer prompts give the model more information to work with and generally produce more consistent realism. The prompt expansion technique using ChatGPT is particularly useful because it takes your core concept and adds the level of detail that produces the most convincing results.
Do these techniques work for product photography as well as people?
Yes. The same principles apply to product photography, though the emphasis shifts. For product images, texture and material descriptions become even more important: realistic metal reflections, subtle surface scratches, natural material grain, accurate glass transparency. Lighting language is equally critical for products, as incorrect lighting is the fastest giveaway that a product image is AI-generated.
Key Takeaways
Photorealistic AI images are not primarily a product of better models. They are a product of better prompting. The eight categories covered in this guide — realism triggers, camera language, lighting, texture, colour control, composition, film grain, and negative prompts — form a complete framework that works across all major AI image generation platforms.
The difference between an image that looks obviously AI-generated and one that passes as real photography often comes down to a handful of specific phrases. Camera and lens specifications push the model into photography mode. Texture and imperfection language prevents the plastic look. Lighting descriptions ground the image in physical reality. Negative prompts act as guardrails against stylisation.
The AI image generation market continues to grow rapidly, with advances in diffusion model architecture — as documented in a comprehensive survey by Springer’s Artificial Intelligence Review — pushing photorealism capabilities forward with each model release. The prompting framework in this guide will continue to be relevant because the underlying principles of photographic realism do not change, even as the tools improve.