
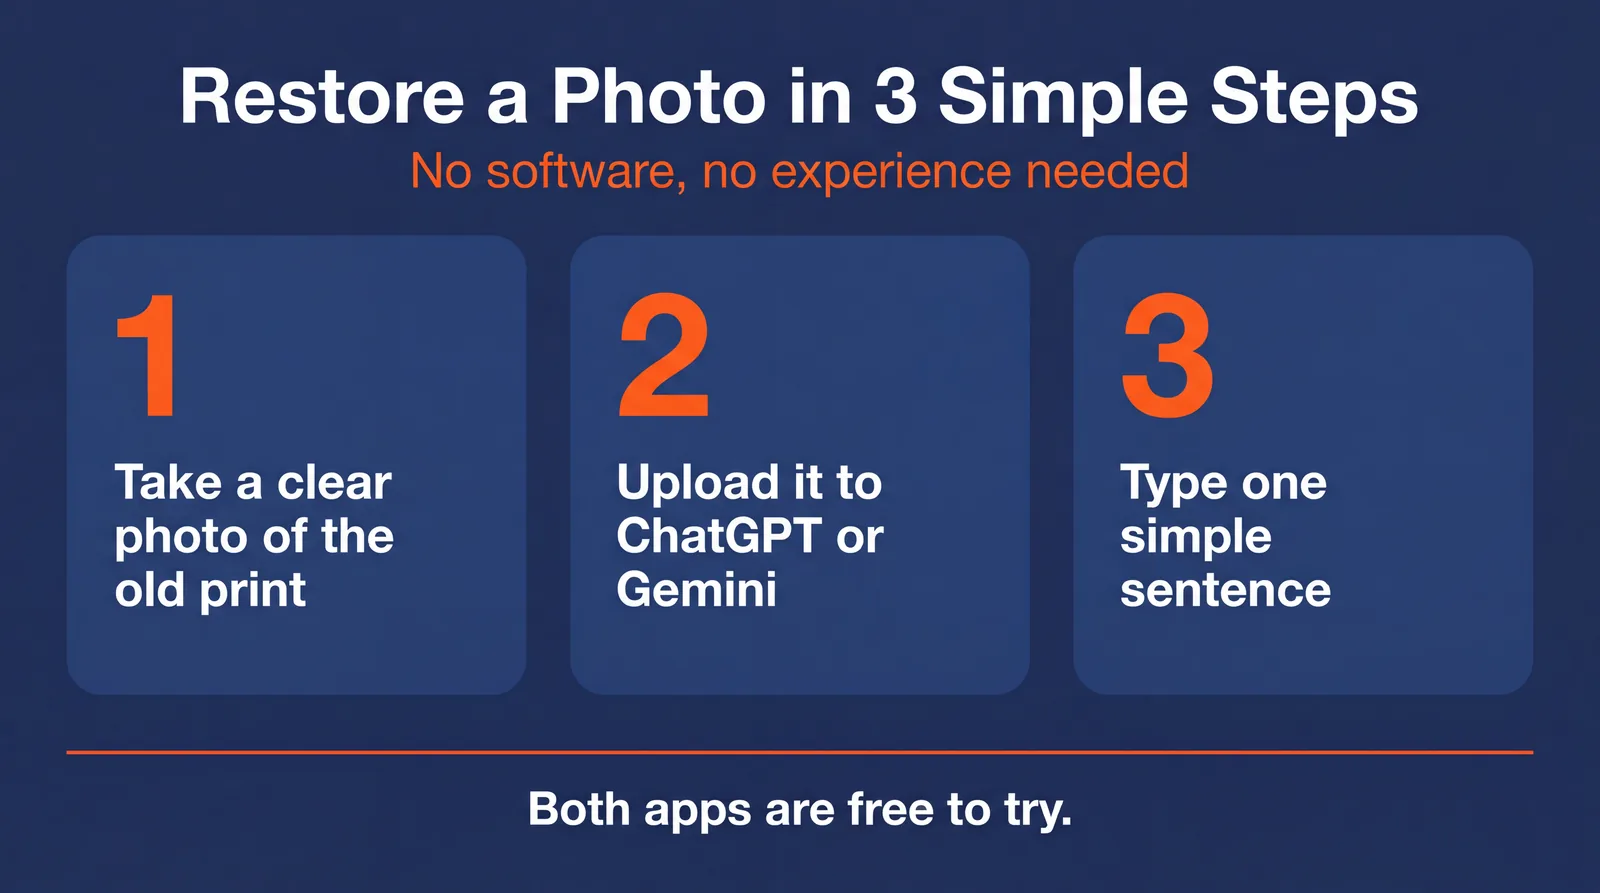
You can restore an old, damaged, or faded family photo for free, in a few minutes, using an app you may already have on your phone. There is no software to buy and nothing complicated to learn. You take a clear picture of the old print, upload it to ChatGPT or Google Gemini, type one simple sentence, and the app hands you back a repaired version.
This guide is written for someone who has never edited a photo in their life. If you can send a text message and take a picture, you can do this. We will go step by step, give you the exact words to type, show you how to keep faces looking like the real person, and tell you honestly where these tools can get it wrong. By the end you will be able to bring an old photo of your parents, grandparents, or childhood back to life.
The 60-Second Answer
To restore an old photo with AI, take a clear, glare-free picture of the original print with your phone, open ChatGPT or the Google Gemini app, upload the picture, and type a sentence like “Please restore this old photo: remove the scratches and creases, fix the fading, and gently sharpen the faces, keeping everyone looking exactly the same.” Both apps have a free version. For photos of people, Gemini tends to keep faces truer to the real person. Always keep your original.
What You Need (Less Than You Think)
You only need three things, and you probably already have all of them. First, the old photo itself, the physical print. Second, a phone or a computer. Third, a free account on either ChatGPT or Google Gemini. That is the entire shopping list. No scanner, no Photoshop, no paid program.
Both apps are made by the biggest names in the field. ChatGPT is from OpenAI and uses an image tool called GPT Image 2.0. Google Gemini uses an image tool nicknamed Nano Banana, which has become famous for repairing and colorizing old photos. You do not need to remember any of those names. You just need to open one of the two apps.
If you want to understand the engine behind the Google side, the Nano Banana Pro complete guide goes deeper, but it is not required reading for this tutorial.
Step 1: Take a Good Photo of the Old Print
The single biggest thing that decides your result is the picture you start with, so spend one extra minute here. You do not need a scanner. The best free option is an app called Google PhotoScan, which is free on both iPhone and Android and is made specifically for copying printed photos. It even removes the shiny glare that ruins most phone pictures of old prints. You can open it from inside the Google Photos app under Create, then “Scan photos with your phone.”
Whether you use PhotoScan or just your normal camera, follow three simple rules. Lay the photo flat on a table. Use soft, even light, like daylight from a window, and turn off any harsh overhead lamp. And if you see a bright glare spot on the photo, move to a shadier spot or let PhotoScan cancel the glare for you. Hold the phone steady, directly above the photo, and fill the frame with the picture. That is it.
Step 2: Pick Your App (and Why Gemini Is the Safer Choice for People)
Both apps work, and both have a free version, so you can try either. But there is one important difference when the photo has people in it.
When you ask an AI to fix a face, it does not simply clean up the existing pixels. It quietly redraws the face based on what it thinks the person probably looked like. ChatGPT is more likely to redraw a face into someone who looks a bit different, a stranger who resembles your relative. Google Gemini tends to stay closer to the real person. So for precious photos of family members, especially close-ups of faces, start with Google Gemini. For a photo that is mostly a building, a landscape, or a wide group where faces are tiny, either app is fine.
We will come back to this face point in its own section, because it matters more than anything else in this guide.
Step 3: Upload Your Photo and Type One Sentence
The actual restoration is the easy part. Here is how to do it in each app.
In Google Gemini, open the Gemini app on your phone or go to gemini.google.com in a web browser. Tap the little plus or paperclip icon to add your photo, choose the picture you took in Step 1, then type your request and send it. You will need to be signed in to a Google account, and you must be 18 or older to edit images. In a few seconds, Gemini shows you the restored photo, and you can tap to download it.
In ChatGPT, open the ChatGPT app or go to chatgpt.com. Tap the plus icon, choose “Add photos and files,” pick your photo, type your request, and send. To fix just one spot, you can click on the image after it appears and use the select tool, then describe what to change there.
That is the whole process: add the photo, type a sentence, get the result. The next section gives you the exact sentences to type.
The Magic Words: Copy-Paste Prompts for Every Problem
The app does exactly what your sentence tells it, so a clear sentence gives a better photo. Below are plain-English prompts you can copy word for word. Pick the one that matches your photo’s main problem, paste it, and attach your picture.
For a torn, creased, or water-damaged photo: “Please restore this old photo. Repair the tears, creases, missing corners, and stains. Rebuild the damaged areas to match the parts of the photo around them. Keep every person’s face, age, expression, pose, and clothing exactly the same. Do not replace anyone’s face or add anything that was not there.”
For scratches and spots: “Please remove the scratches, dust, and surface spots from this old photo. Blend the repairs in naturally. Keep all the faces, clothing, and background exactly as they are. Do not over-smooth the picture.”
For a blurry or soft photo: “Please gently sharpen this old photo so it looks clearer, while keeping the same people, expressions, and old-fashioned feel. Do not make anyone look younger or more modern.”
For a faded or yellowed photo: “Please fix the fading and yellow color in this old photo. Keep the original mood and time-period look. Make it clearer without turning it into a modern digital picture.”
For grain or a speckled look: “Please reduce the graininess in this old photo but keep a natural film look. Do not make it look like a cartoon or plastic.”
A reusable safety line to add to any prompt: “Most important: keep the people looking exactly like themselves. Same face shape, eyes, nose, mouth, expression, age, hair, and pose. Do not beautify, modernize, or change anyone.”
Two helpful tricks people have discovered. First, if the app keeps asking you questions instead of just doing the job, add this to the end of your request: “No questions and no explanation, just give me the restored photo, please.” Second, always double-check that your photo actually attached before you send. If you send a restore request with no photo attached, the app will sometimes invent a fake old photo out of thin air rather than telling you the picture is missing.
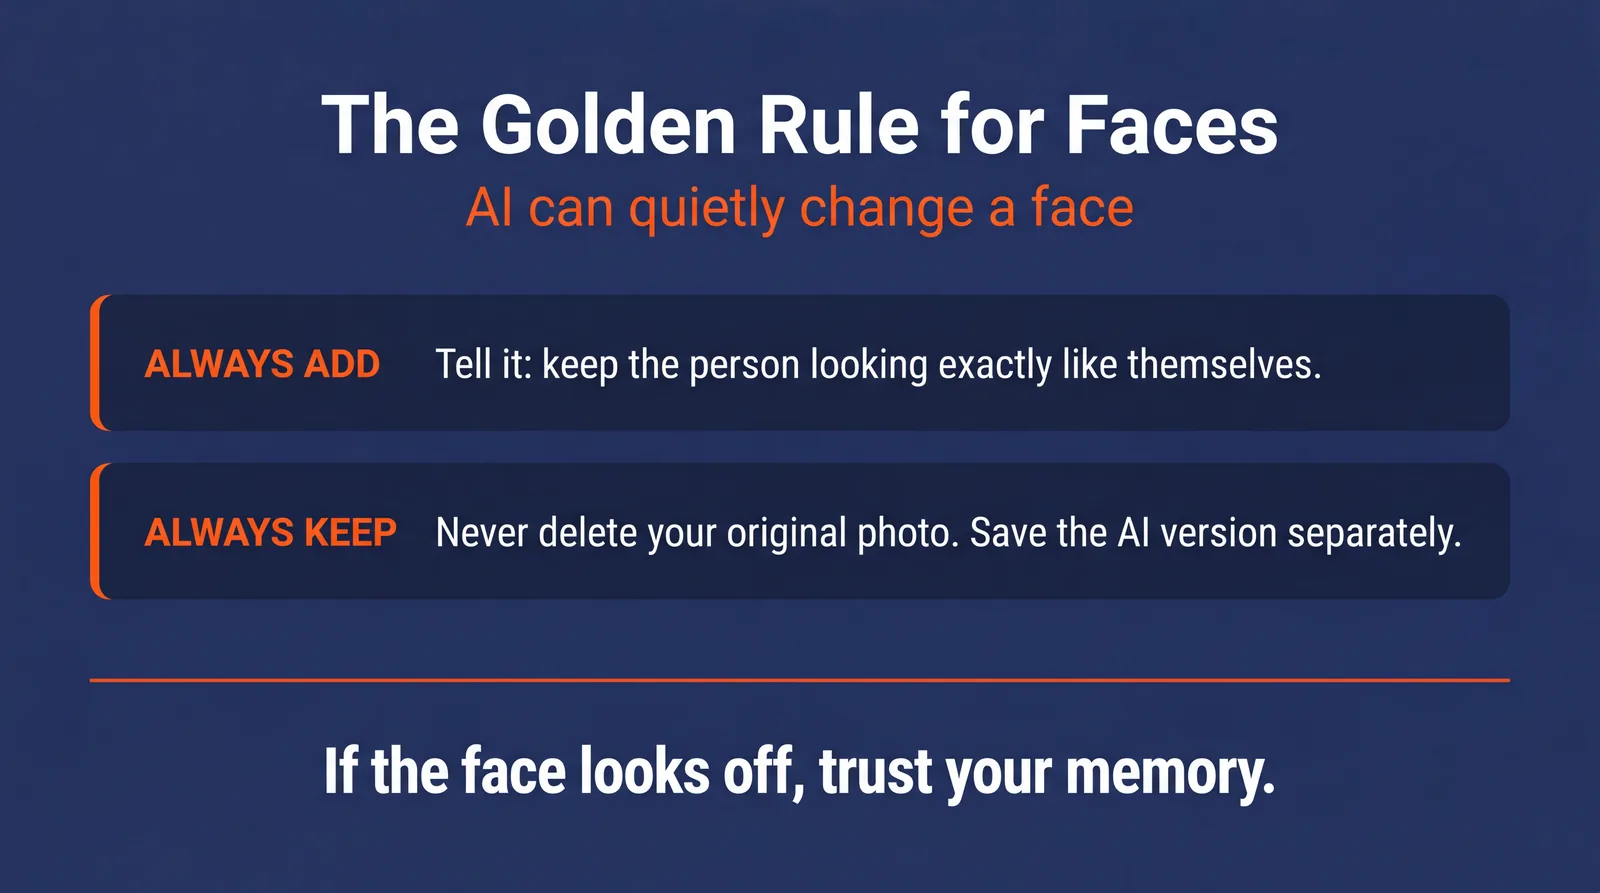
Restoring Faces: The One Thing to Be Careful About
This is the most important section in the guide, so please read it before you restore a photo of a person who has passed away.
AI photo restoration does not repair a face the way a person with a brush would. It generates a brand new face that it believes fits, based on millions of other faces it has seen. Most of the time this looks wonderful. But on a small, blurry, or badly damaged face, the AI is guessing, and it can produce someone who looks close but is subtly not your relative. Photo experts have warned that AI can turn family members into “lookalikes” or even “grotesque” versions of themselves, and one widely shared example showed a man’s grandfather “restored” into someone resembling a completely different, famous person.
This matters more than a scratch or a faded color, because for someone who has died, that photo may be the only record of their face. If the AI quietly changes it, your family could lose the real memory without realizing it. So follow two simple safeguards. Always add the “keep the people looking exactly like themselves” line to your prompt. And never delete or overwrite your original photo. Save the AI version as a new, separate picture, and compare the two faces side by side. If the restored face does not look right, trust your memory over the AI and keep the original. The same honesty applies if you ever share a restored photo publicly, which the AI disclosure guide covers in more detail.
Add Color to a Black-and-White Photo
One of the most loved things these apps can do is add natural color to an old black-and-white photo, and Google Gemini is especially good at it. Use this prompt:
“Please restore and add natural color to this old black-and-white photo. First repair any damage, then add gentle, realistic colors that fit the time period, the clothing, and the skin tones. Keep everyone looking exactly the same. Do not use bright modern colors or make it look like a painting.”
For the best result, do it in two steps. First ask the app to repair the damage, then in a second message ask it to add the color. Remember that the colors are the AI’s best guess, not a record of the true colors, so a green dress in the result was not necessarily green in real life.
Real Before and After Examples
Here are three real family photos, each repaired and colorized in Google Gemini using the prompts above. Notice how the scratches and fading disappear and the gray turns to natural color, while the people still look like themselves. Each result is an AI-generated visualization, and the original was kept untouched.
Example 1: a scratched, faded snapshot
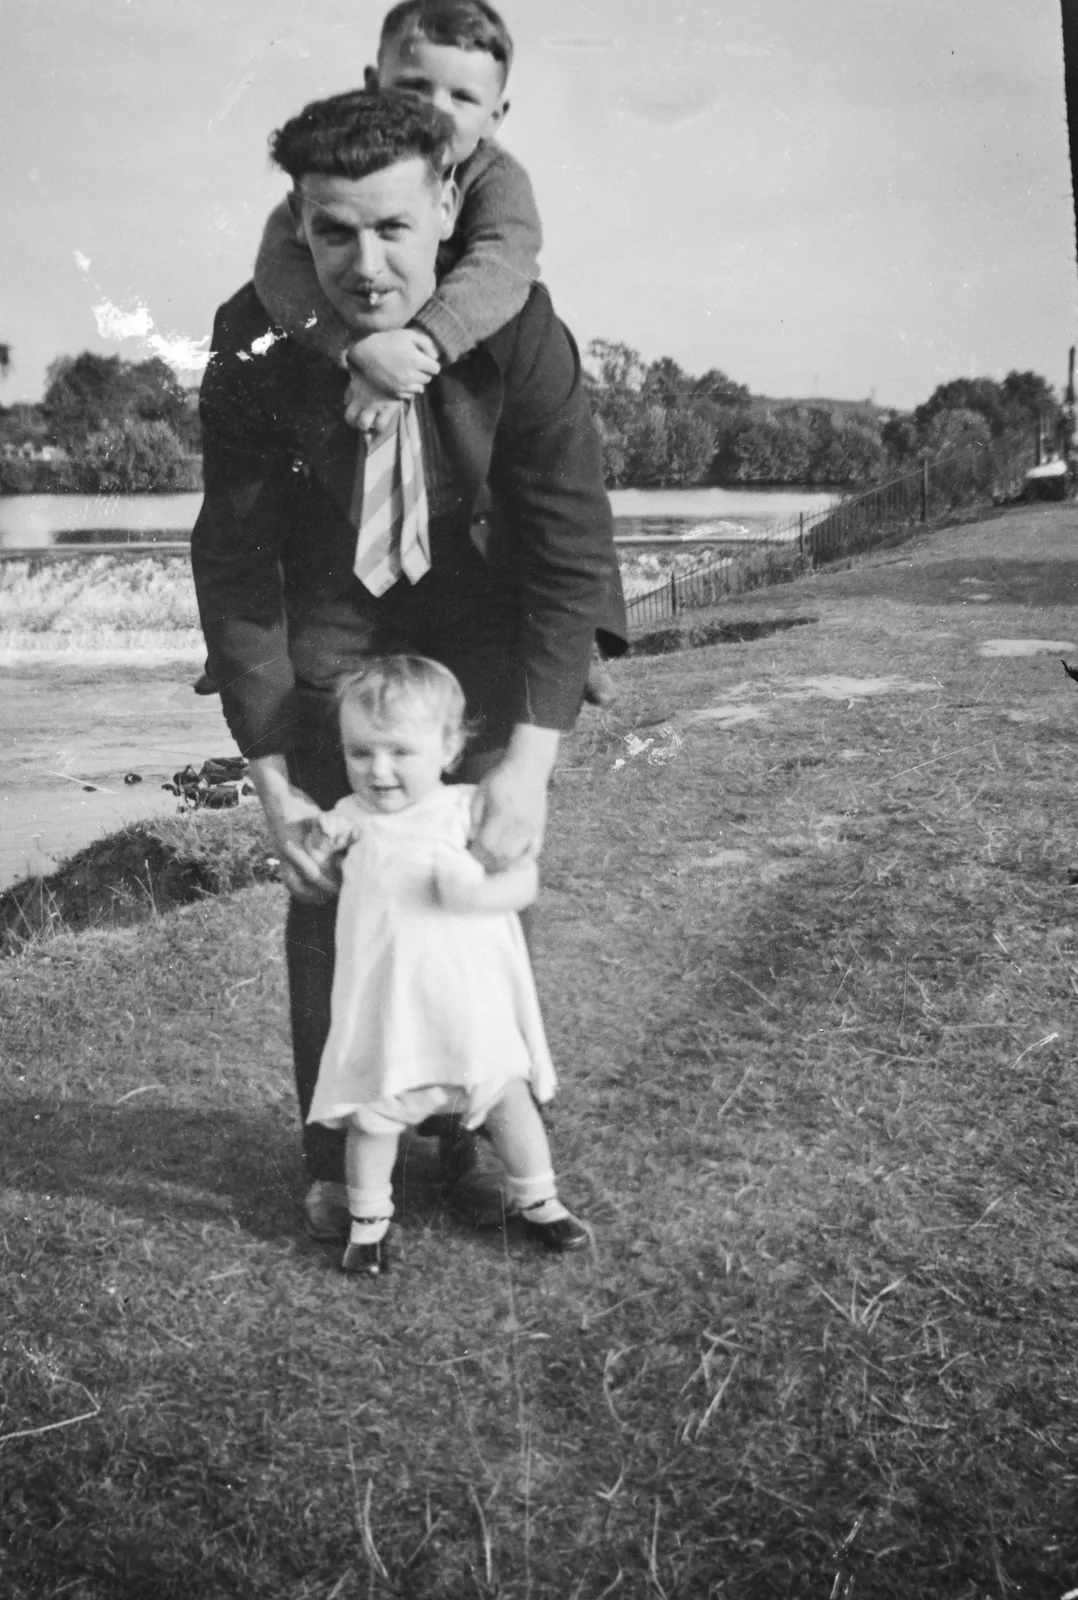
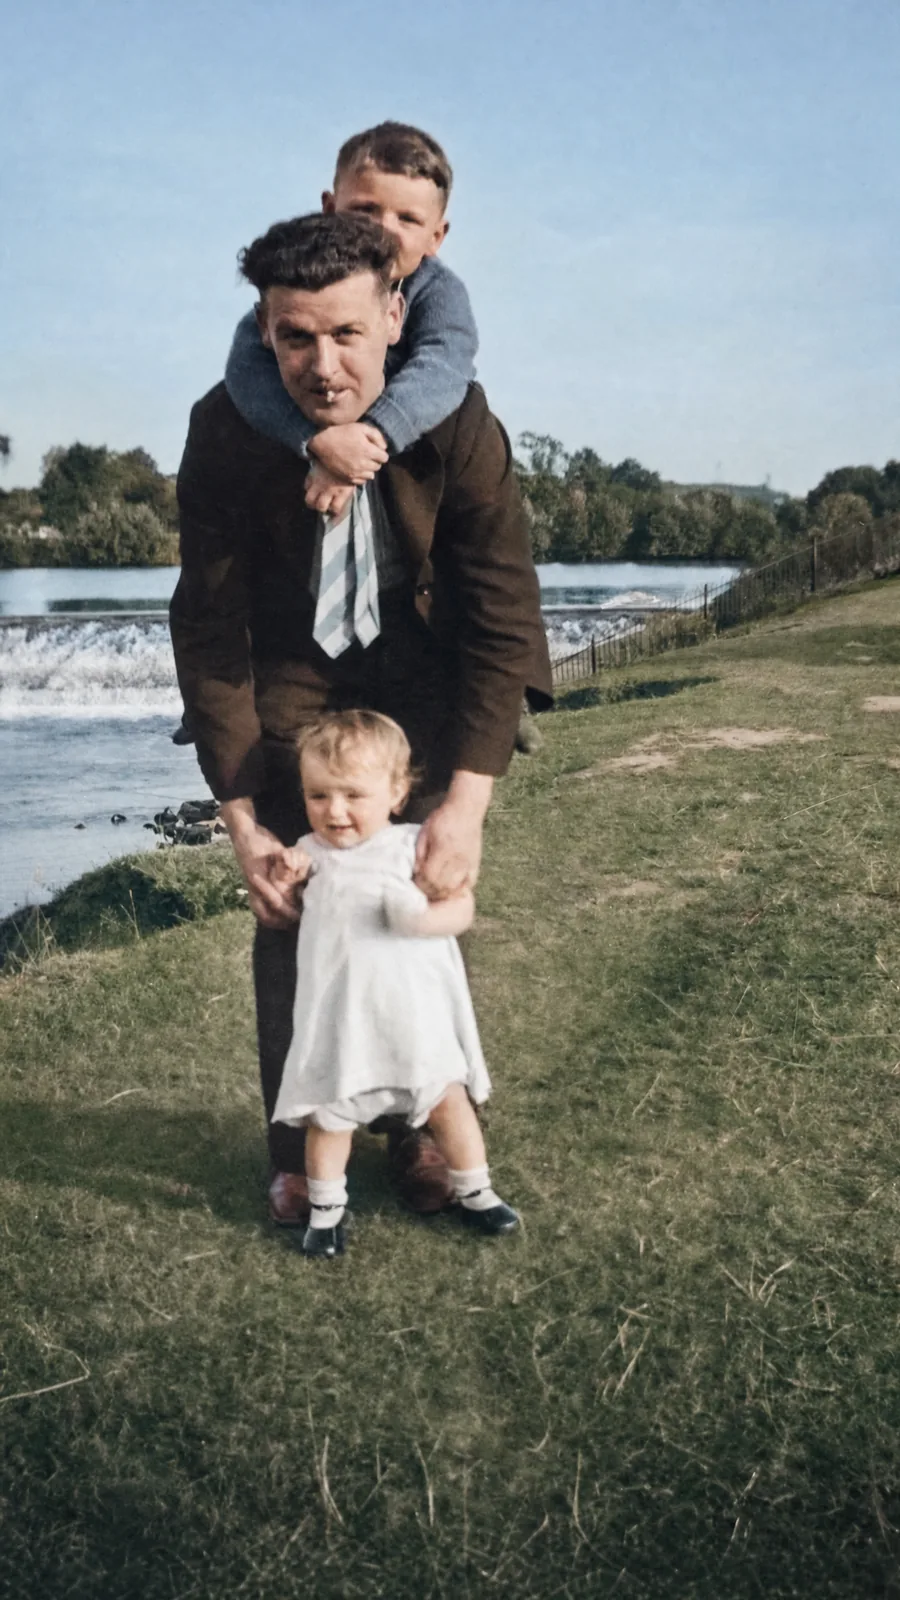
Repaired and colorized in Google Gemini. AI-generated visualization.
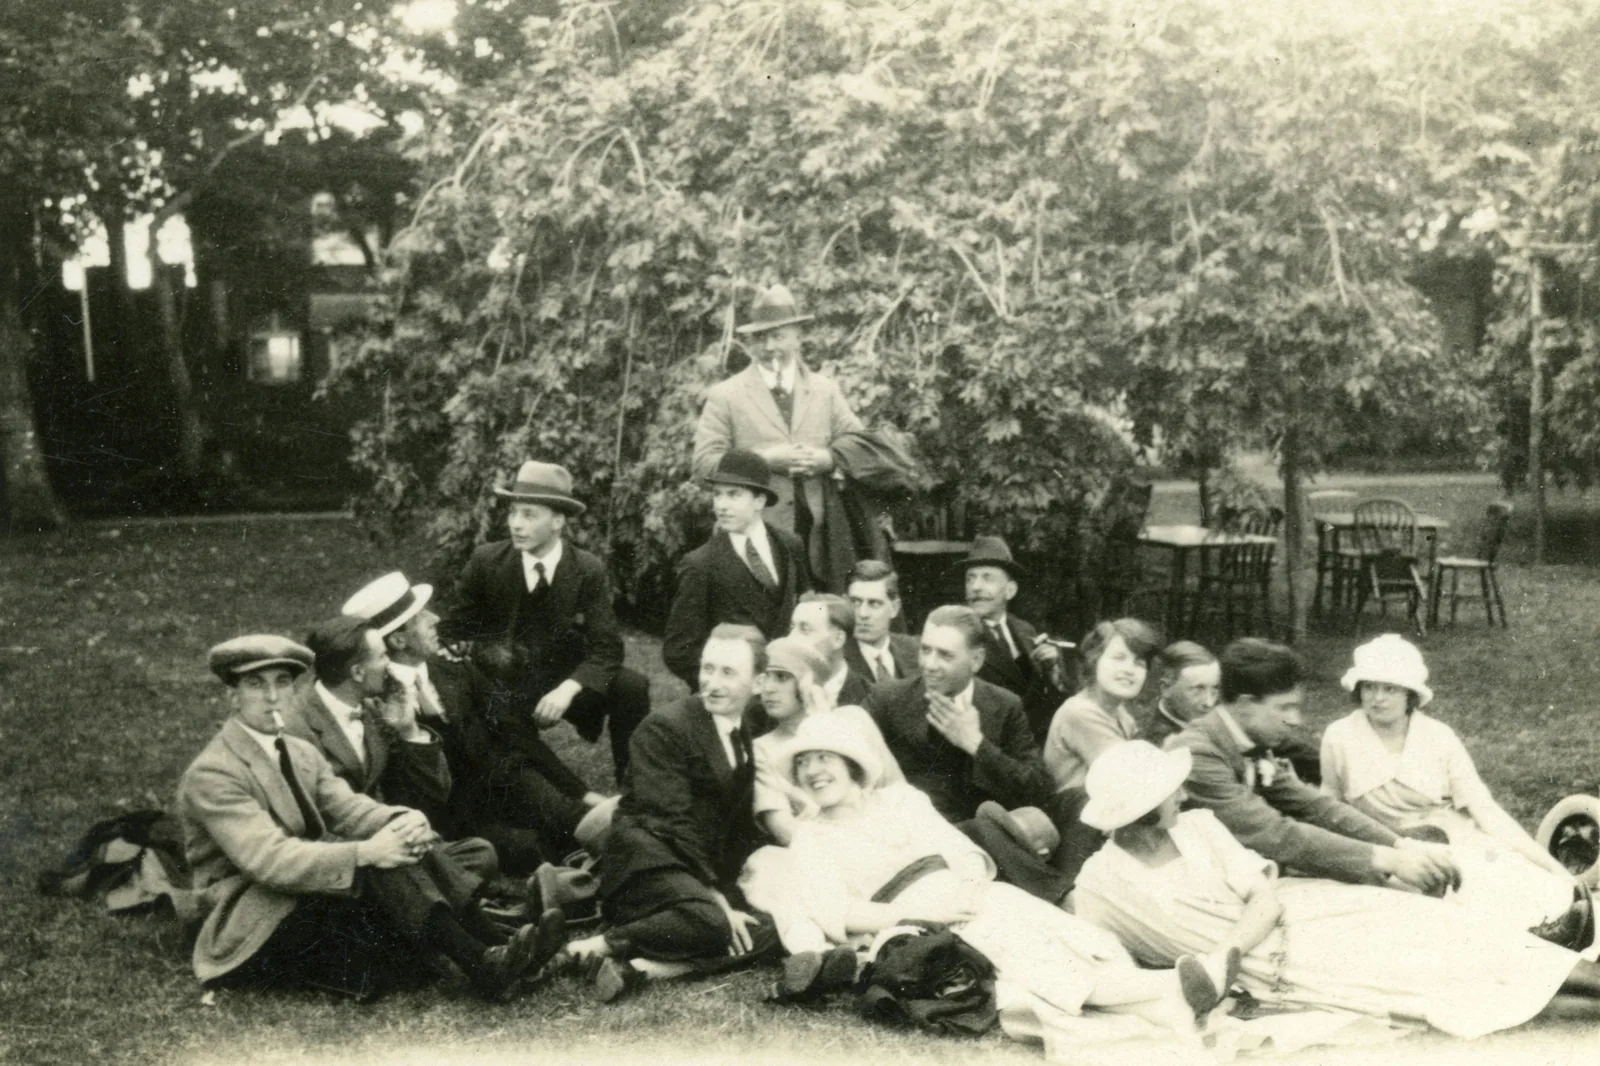
Example 2: an old garden gathering
Repaired and colorized in Google Gemini. AI-generated visualization.
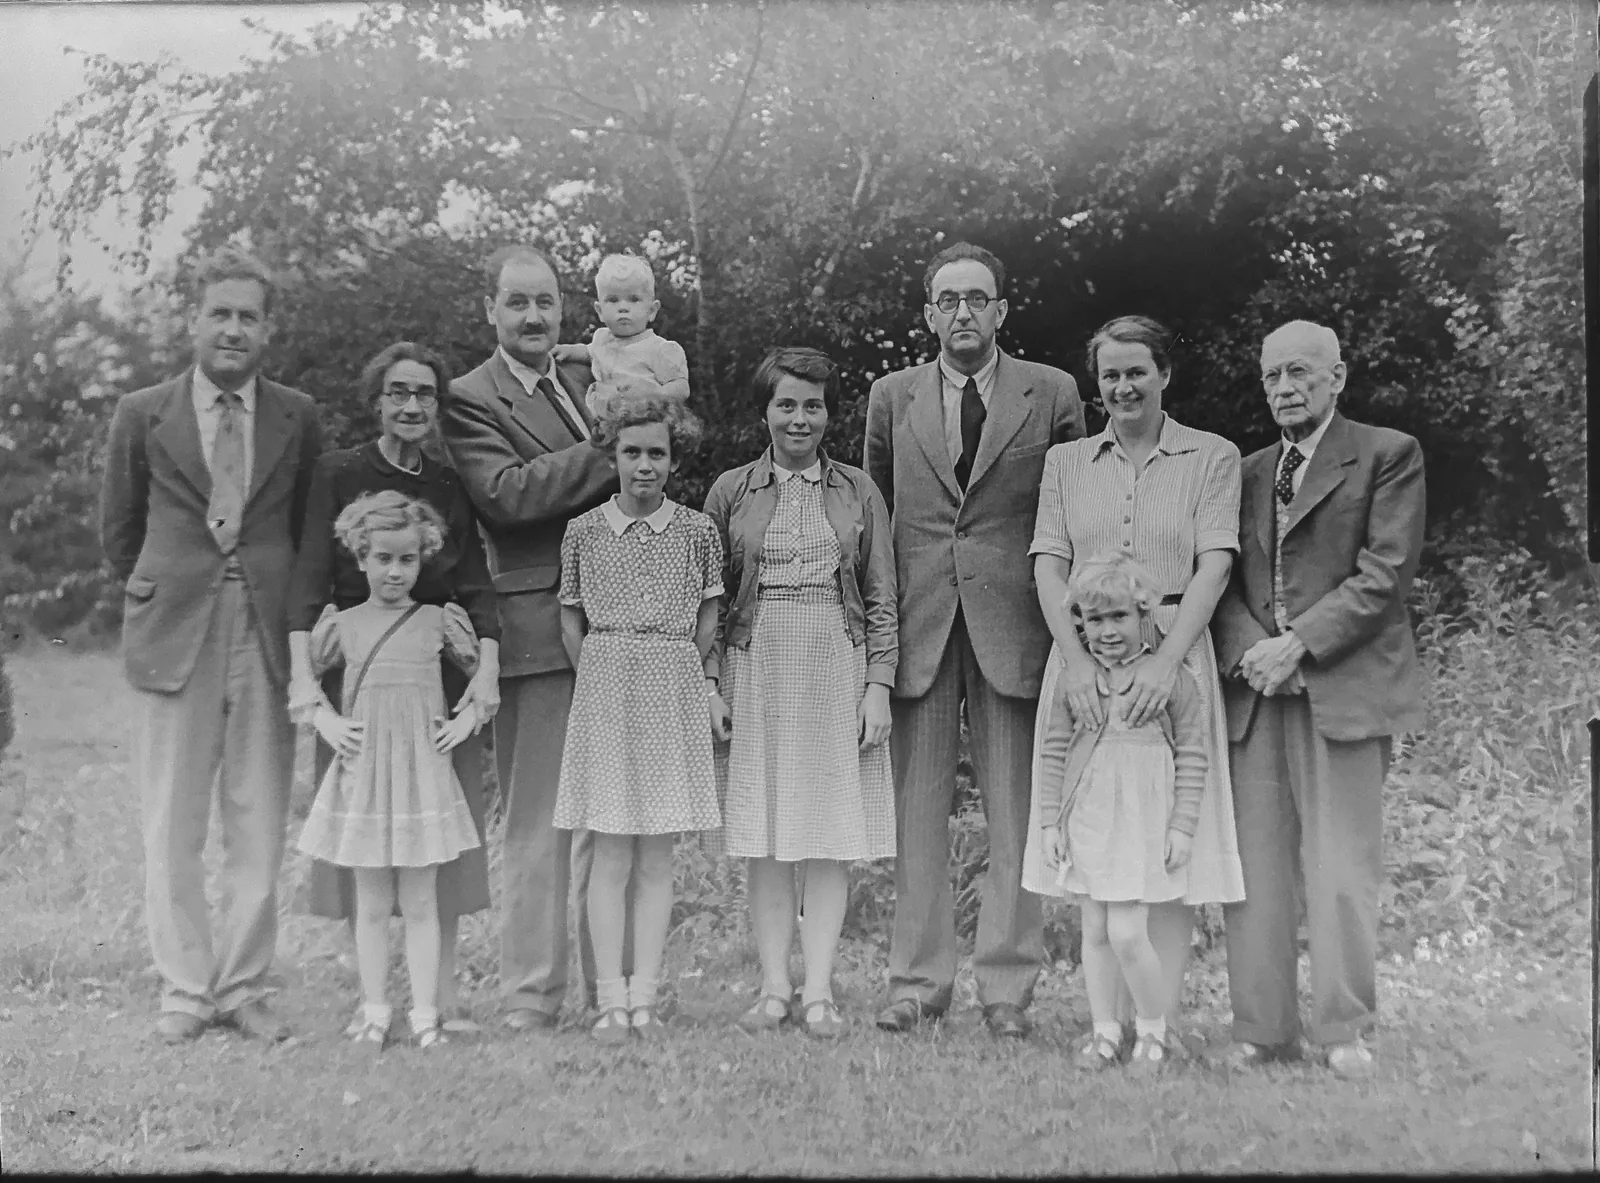
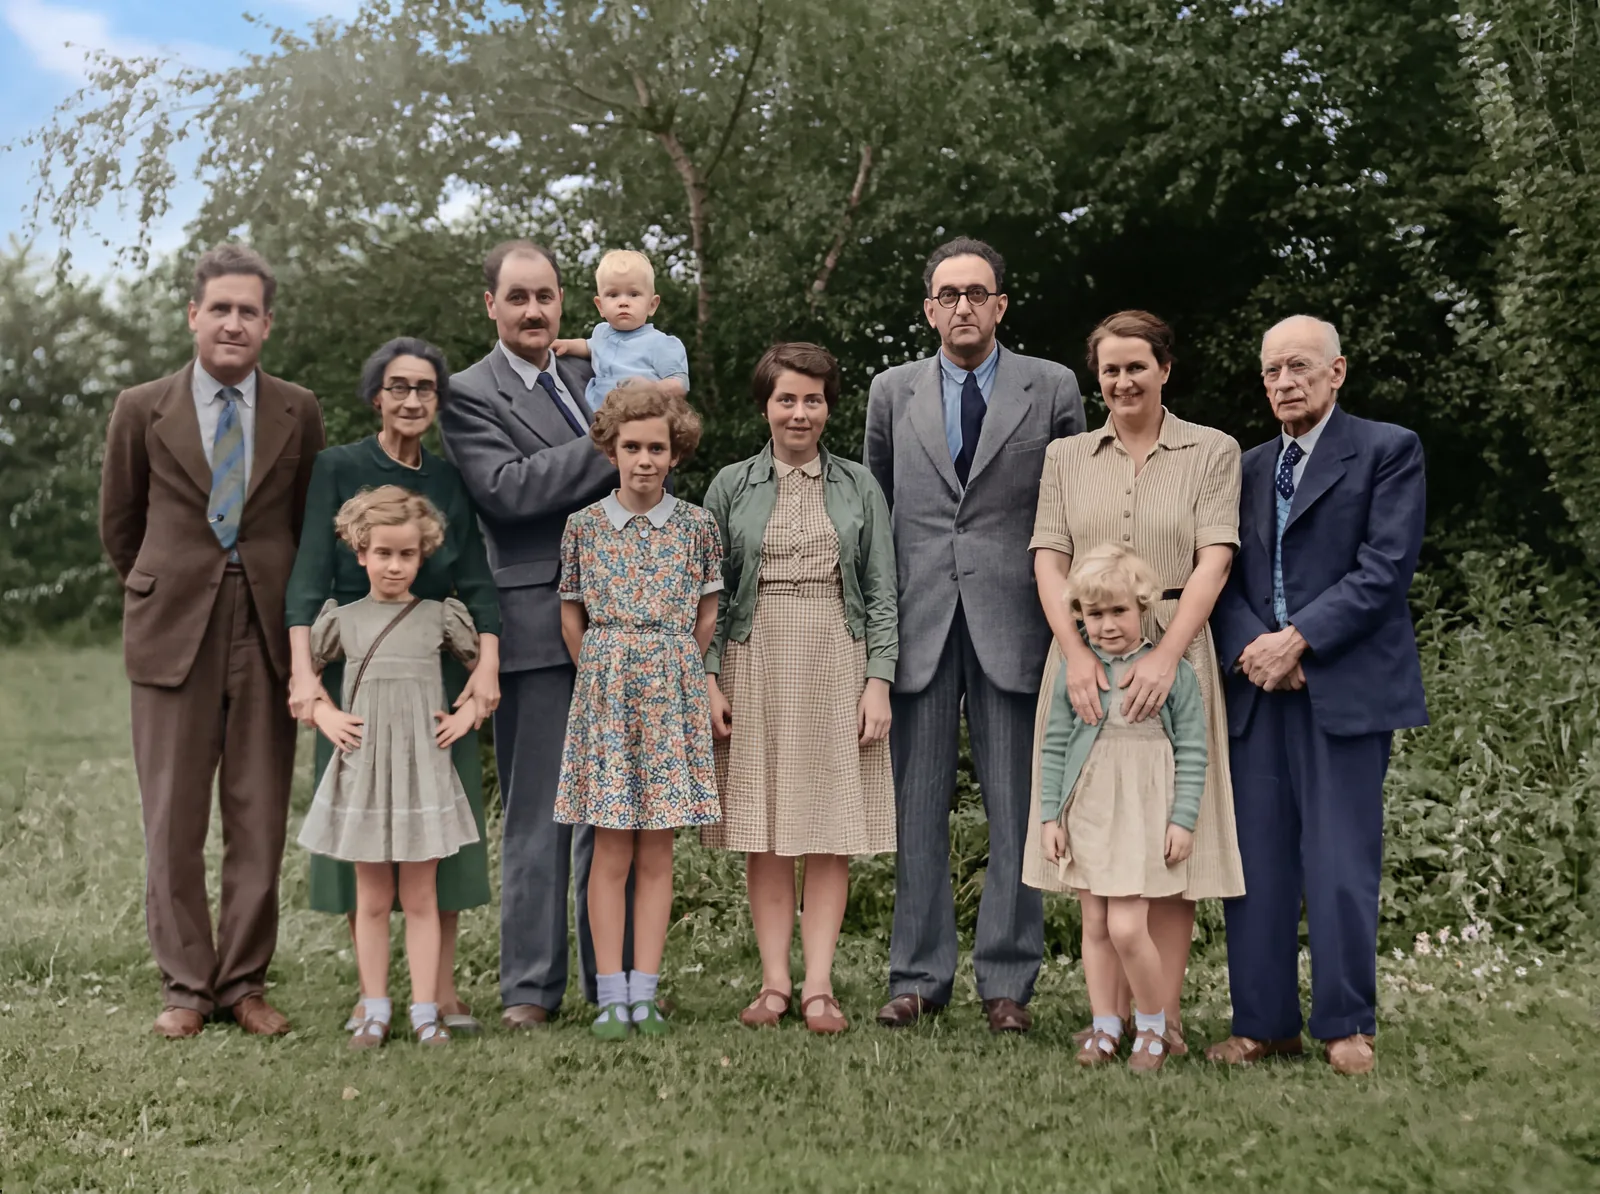
Example 3: a family portrait

Repaired and colorized in Google Gemini. AI-generated visualization.
Is It Really Free?
Yes, you can restore a photo without paying anything. Both apps include a free version that can repair and colorize photos. The free versions limit how many images you can make in a day, and they download at a normal everyday size rather than the largest, sharpest size. For fixing one or two family photos, the free version is all you need.
If you want to restore many photos, or you want the largest size for printing, the cheap upgrades are modest. On the Google side, the Google AI Plus plan is $4.99 per month and unlocks the higher-quality Nano Banana Pro and larger downloads. On the OpenAI side, ChatGPT Go is $8 per month and ChatGPT Plus is $20 per month, both with much higher daily limits than the free tier. None of this is required to get a great single restoration; it only helps if you are doing this in bulk. (Prices are current as of 2026 and can vary by country.)
ChatGPT vs Google Gemini: Which Should You Use?
Here is the simple version. For photos with people, start with Google Gemini, because it keeps faces truer. For coloring a black-and-white photo, Gemini is the favorite. For a photo where you want to chat back and forth and give detailed instructions, ChatGPT is comfortable and conversational. Both are free to try, so if one result disappoints you, paste the same photo and prompt into the other app and compare.
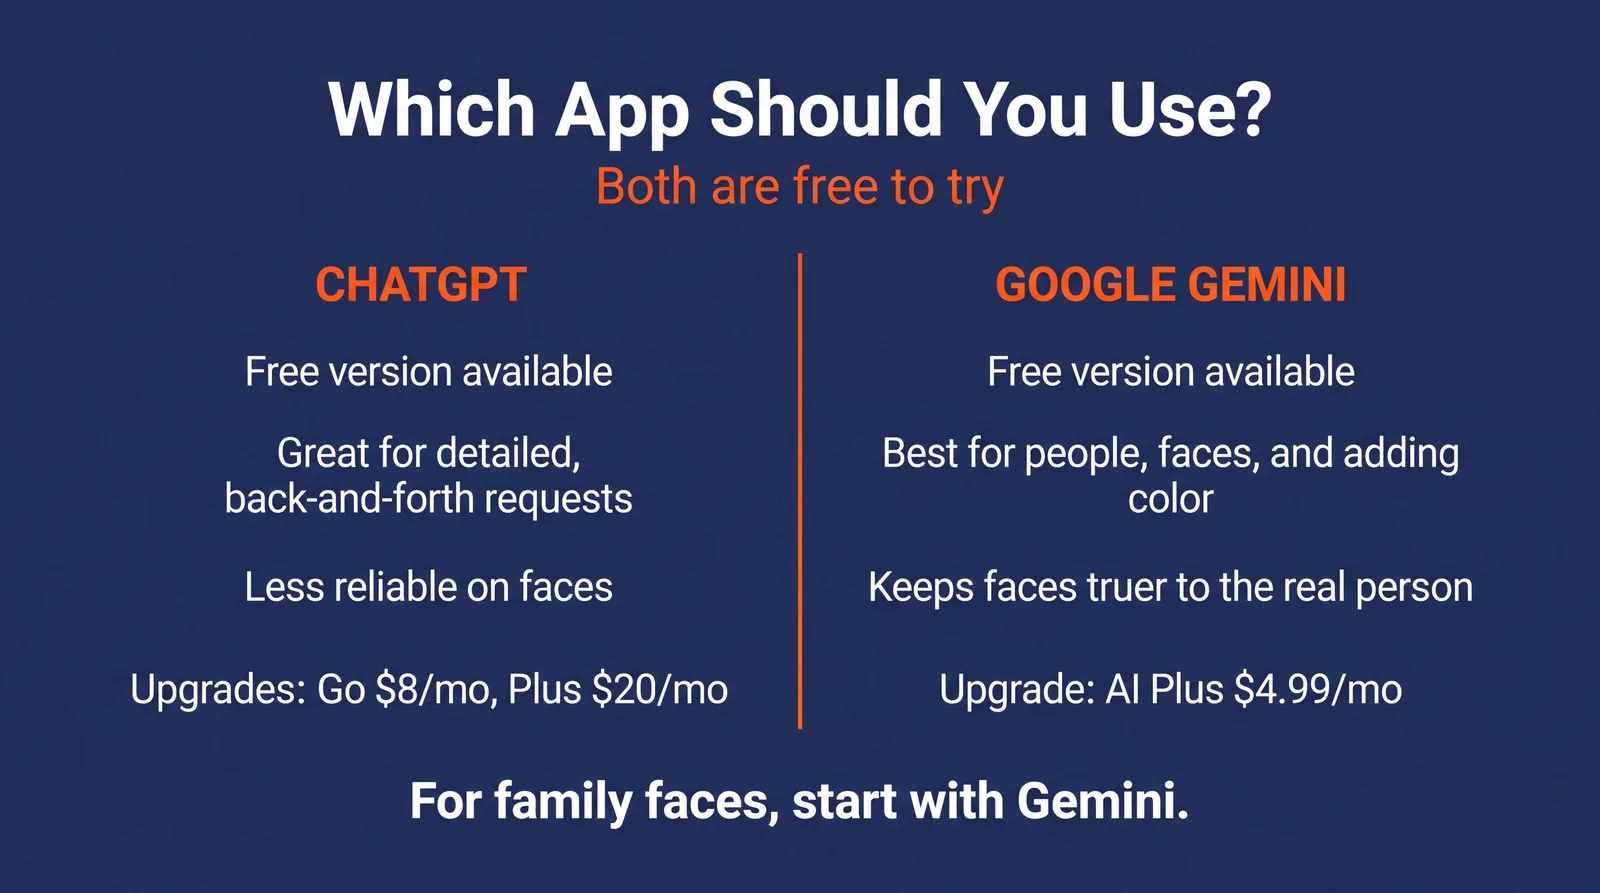
| ChatGPT | Google Gemini | |
|---|---|---|
| Free version | Yes (a few edits per day) | Yes (a few edits per day) |
| Best for | Detailed, back-and-forth requests | People, faces, and colorizing |
| Keeps faces true | Less reliable on faces | More reliable on faces |
| Cheap upgrade | Go $8/mo, Plus $20/mo | AI Plus $4.99/mo |
| Where to go | chatgpt.com or the ChatGPT app | gemini.google.com or the Gemini app |
Common Mistakes and Easy Fixes
A few small things trip up beginners, and each has a one-line fix. If the result looks blurry or low quality, your starting photo was probably blurry or had glare, so retake it flat in better light. If a face looks like a different person, add the “keep the peopl